

This post contains affiliate links and/or codes, so if you purchase a product through such a link or with such a code, I may receive a small commission at no extra cost to you.

In the first part, we have discussed workspace customization and basic adjustments for batch processing. The second part was all about editing large amounts of images from an event. Today, we’ll see how to process our images to the final formats properly.
To “pack” your files well, I recommend you to follow these three steps:
- Make your images look clear and sharp for web
- Automate export workflow with smart recipes
- Enhance image viewing experience for your clients
Make your images look clear and sharp for web
First and foremost, you need to focus on adjusting your images to look great online. Because, hey, this is where your clients publish images in the first place. Some of your event photographs might be printed as well, but most of the images will stay online only.
BTW, here is a great webinar on how to optimize your exports for a variety of different purposes.
What size to set for web-previews?
There is no single right answer. For most social media services, 1200px long edge is fair enough. However, I think this is a bit outdated, and modern phone display requires way larger images.
I prefer to export images in 1400px (sometimes 1600px) long edge as a compromise between file size and retina display viewing experience.
What about image quality?
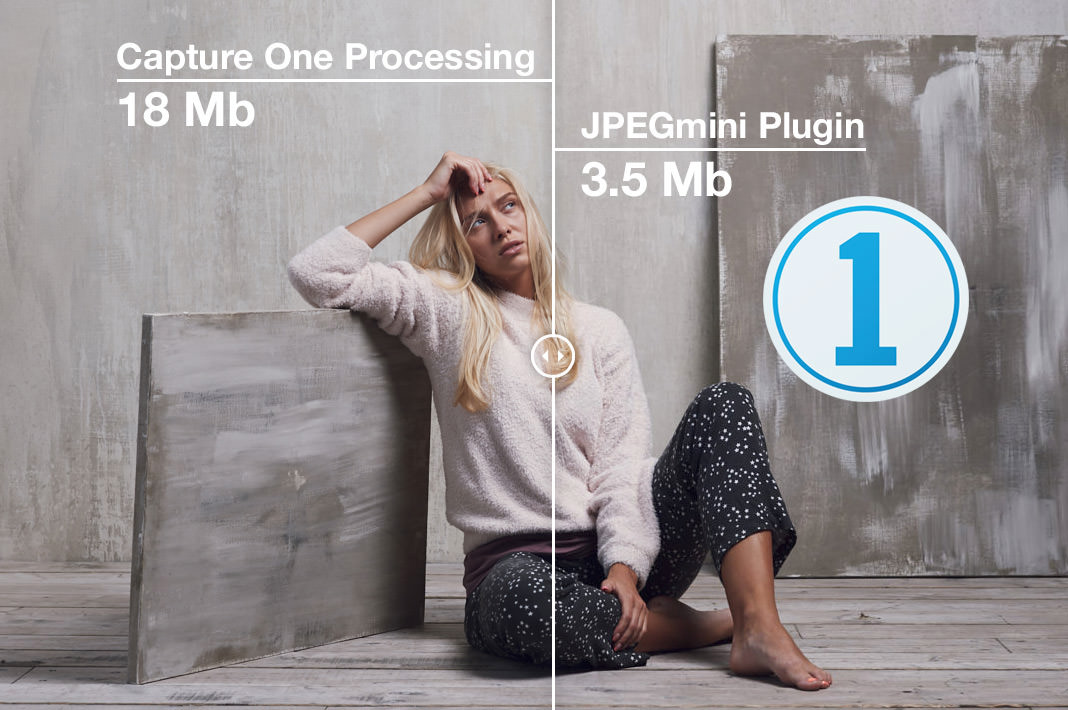
Here you can safely set 80%. You can even use 60-75% compression, but if you really need to reduce file size, check out my JPEGmini plugin review for Capture One.
What color profile to choose?
For the web, sRGB is the robust choice. It’s not the best color profile for sure, but it’s the universal profile. With sRGB, you can always be sure that your clients will not have any color-related issues.
Finally, what to do with sharpening?
It’s pretty pointless to adjust general sharpening for web-preview needs. Thus, I recommend using default adjustments for general sharpening and focus on setting correct Output Sharpening.
The idea of this tool is pretty simple:
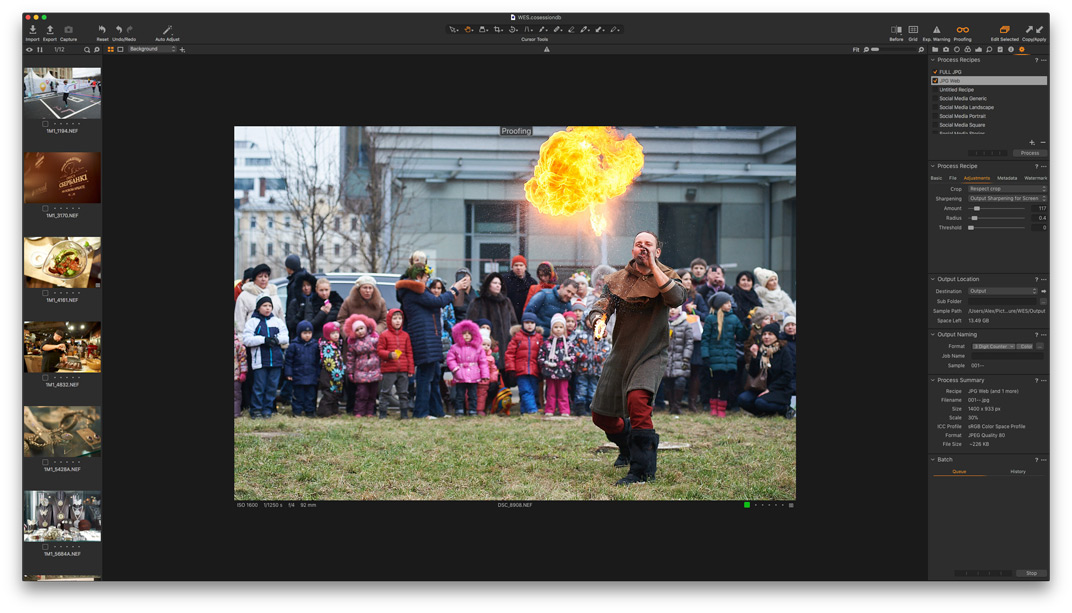
Output Sharpening applies additional sharpening adjustments to a particular processing recipe. For web, use Output Sharpening for Screen mode:

To evaluate required sharpening for your images, simply turn on Proofing mode:
Please, note that there are no (and can’t exist) any universal sharpening settings. Sharpening is highly dependent on your gear and image features. Thus, you need to figure out the correct values for your images.
As we started working with recipes, it’s time to automate your export workflow.
Automate export workflow with smart recipes
If you’re new to Capture One Pro, here is an excellent master class on using process recipes.
For event photography, I practice these principles:
1) Set up custom export formats. For events, I export images in three formats for my clients:
JPG WEB
- sRGB
- 80% quality
- 1400 or 1600 px long edge
- Output Sharpening for web
JPG Full-size
- sRGB
- 100% quality
- 4000 px long edge
- General sharpening
TIFF for prints
- sRGB as default, but it depends on an event
- Fixed 100% scale
- Uncompressed 8-bit TIF
- General sharpening
2) Give them names a human can memorize
I just hate all these IMG_0514 names. My clients always receive easily pronounceable names that contain valuable information on the event.
The naming template varies for different events, but it usually includes a digital counter of an image (001, 002, etc.), event name, and sometimes client name and event date.
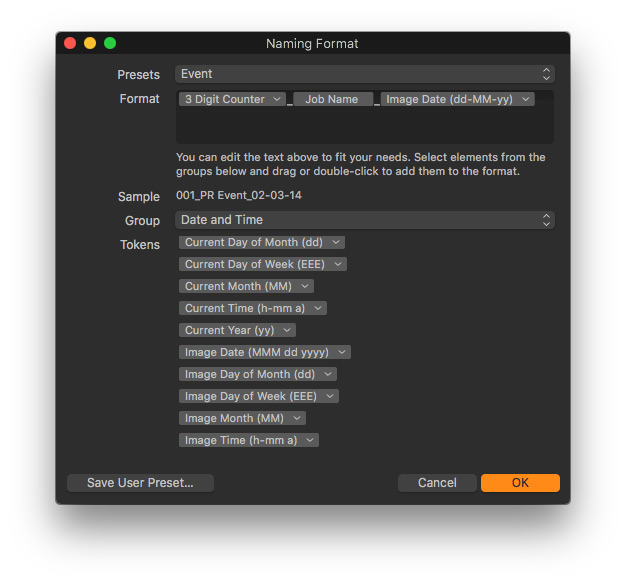
3) Automate export with tokens
Tokens are a fantastic tool to automate your export. Using tokens, you can set up a template that would automatically create all the export subfolders and correct file names for each shooting.
For instance, with Recipe name token, Capture One automatically creates subfolders according to recipe names and exports files in these folders, respectively.
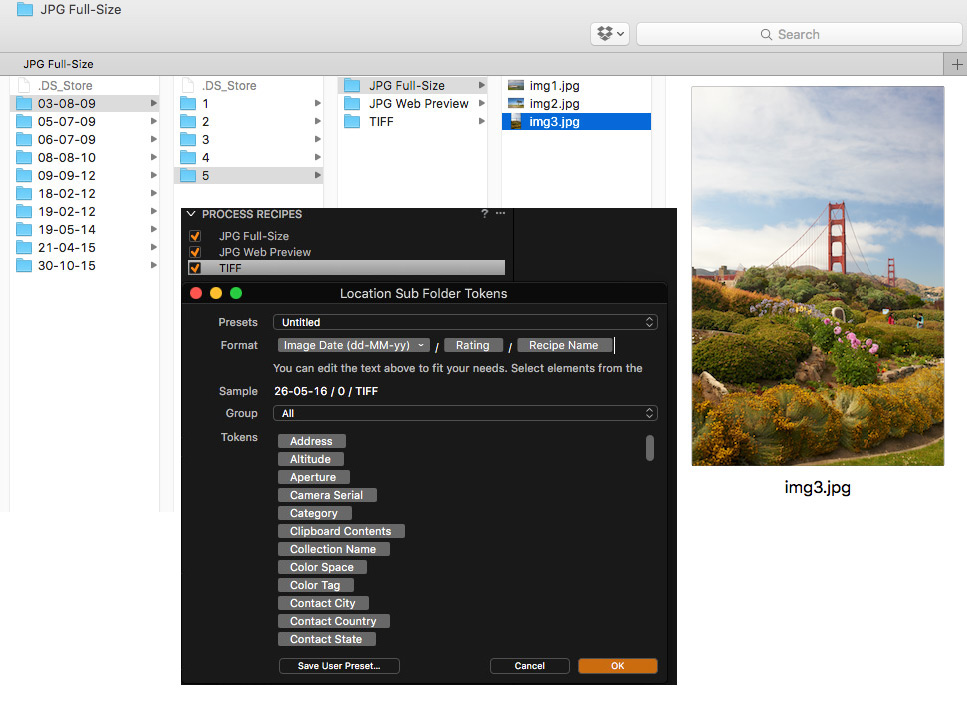
A token can use almost any information from the file’s metadata, including the variant position or collection name where the file is located.
To learn more about tokens, check out this tutorial.
So, we’re ready to export images; now, you need to provide your clients’ best viewing experience.
Enhance image viewing experience for your clients
There are plenty of solutions on how to demonstrate images to your clients. Most cloud storage services support gallery-view for your images, so you can just share a folder on Dropbox with your clients.
However, Capture One has two great plugins that can deliver the best viewing experience for your clients:
Format
Format.com is a smart platform for running your online portfolio.
For example, on Format, you can create password protected galleries for your clients, where they can review images and download them.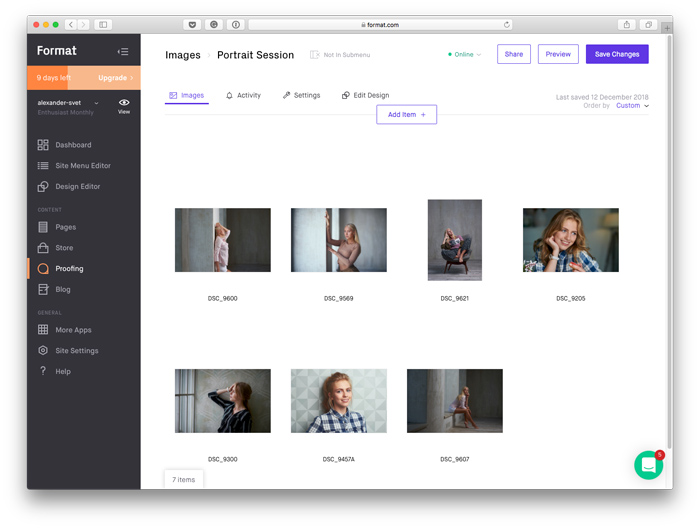
Everything is customizable; say you decided to allow your clients to download only small watermarked previews from the gallery.
The best thing is that you can create new galleries and upload images right from Capture One with the plugin.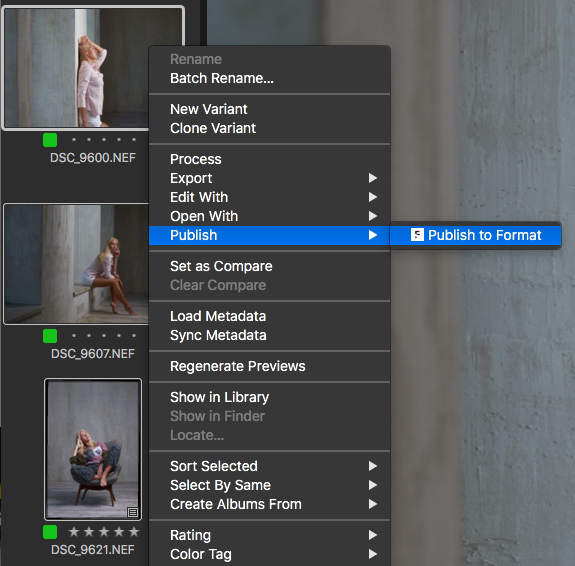
Check out my Format plugin review to see how it works in practice.
Prodibi
Prodibi is a service to share and showcase your full-size images online or embed them into your website.

With Prodibi, you can update your website or WordPress directly from Capture One. Plus, you can share images with your clients and get ratings back to your catalog or session.

Here you’ll find my review of the Prodibi plugin.
So! This was my Capture One Event Photography Special!
If you enjoyed it, please share it! Each part of the guide is already available as a post on my blog:
- Part I. Fast and Efficient Event Photography Workflow in Capture One
- Part II. Batch Editing in Capture One Best Practices
- Part III. Capture One Export Settings
Capture One Hidden Features eBook

Capture One Hidden Features is a collection of more than 200 pro hints to improve your Capture One workflow, structured into an easy-to-read book.
You can download four chapters from the Capture One Hidden Features ebook free of charge:
- 3. Must-Have Shortcuts
- 14. Hidden Features of Layers
- 27. The Power of Mask Inversion
- 38. Automation with Macros
Simply subscribe to the AlexOnRAW newsletter by entering your email in the form below. After subscribing to the newsletter, you’ll immediately receive the four chapters from the book. Also, you’ll regularly get a friendly newsletter with free Capture One tutorials, image editing tips and tricks, and news from Capture One community.