


In the first part, we’ve customized our workspace and shortcuts for batch editing. Also, we made sure that all the basic adjustments are applied before the processing. Now, it’s time to start editing images.
To make batch editing quick and effective, you need to follow these three principles:
- Work with groups of images
- Speed up all individual adjustments
- Practice quality control
Let’s start with group editing since that’s an essential part of the batch workflow.
Working with Groups of Images
Batch editing is all about copying and pasting adjustments.
You need to do as little of corrections as possible and copy/paste all the other.
Of course, you have to crop each image separately, as well as to fix some individual exposure/color issues. Still, most of the events have groups of photos taken in similar conditions. Thus, you can edit only one image from a group and copy/paste adjustments to other images from this group. After that, simply check each image in the group quickly and apply individual adjustments if needed. Then proceed to the next group.
How many images should be in a group?
It solely depends on shooting conditions. Groups of images for outdoor events can easily include 10-20 shots. Indoor events tend to be more varied in lighting. Thus your groups of images will be rather small: 5-10 photos taken in similar situations. If you’ve been lucky enough to shoot an event on a mildly cloudy day in a single outdoor location, your groups of images can consist of 30 pictures or even more.
What if my event contains images from mixed conditions?
That happens. Sometimes you can take images of several different conditions in a single room. In this case, I recommend you to color tag some “sample” shots of each condition to be able to return to them to copy adjustments quickly.

How to edit the first “sample” image in the group?
As you remember, we have set all the basic adjustments before processing. So we don’t need to worry about general corrections; they should be fine. Instead, focus on what has to be fixed on a particular image and copy/apply these adjustments to similar RAWs.
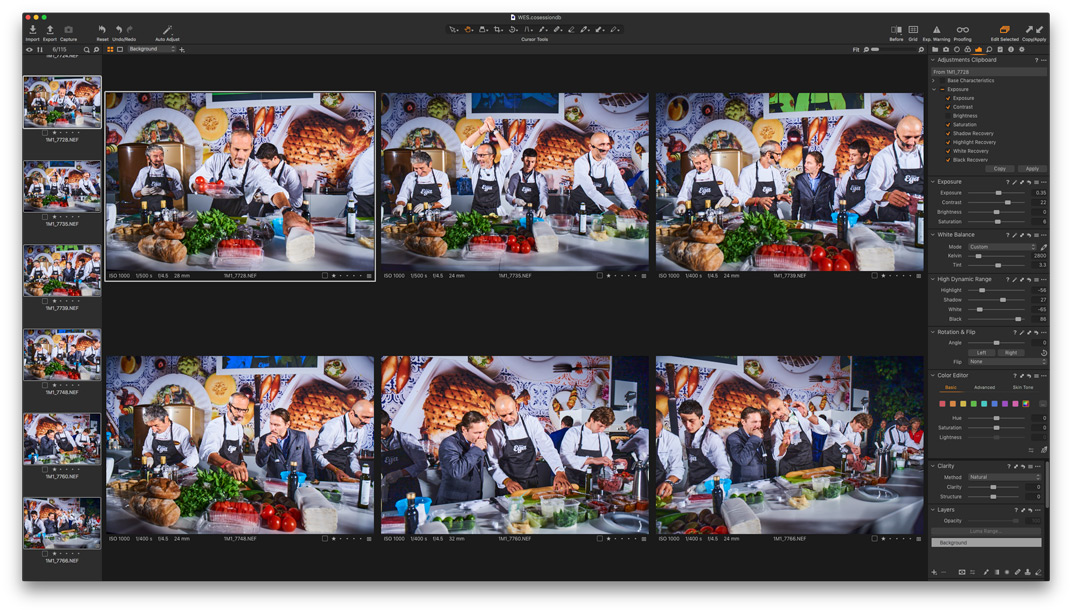
For instance, you see a series of images with incorrect white balance, noticeable color cast, and dark shadows. Fix WB, remove a color cast with Color Editor, brighten black areas with HDR, and copy/paste these adjustments to all images in this group.
Sounds great, but what to do when a crop from sample images is applied to all images in the series?
Fortunately, you can easily turn off auto-copying of the crop in the Adjustments Clipboard settings. Click “…”, go to Autoselect and choose Adjusted except Composition:

What about layers? What if I had made layer correction on a sample image?
Well, there are two ways to avoid copying layers:
1) Adjust all except for layers, copy these corrections, and add some layer corrections. Basically, you need to think in copyable/non-copyable categories of editing. All that can be copied should be adjusted before copying. All non-copyable adjustments should be applied after that.
2) Turn off autoselect of adjustments in the clipboard and select everything manually, except for layers and composition. Thus, Capture One will always copy/apply everything, excluding layers and composition adjustments.
I prefer the first method because sometimes you actually need to copy layers too.
So, we’ve figured out that batch editing is all about copying adjustments in groups of similar images. Still, you can’t get rid of individual adjustments.
How to speed up all the individual corrections you need to apply?
How to Speed Up Individual Adjustments
Let’s see which adjustments you’ll typically apply and how to do it faster.
Crop
It’s the most used individual correction, and here I can give only one advice: use shortcuts.
I prefer to toggle crop on/off using shortcuts C and H (Pan tool), respectively. You can use C and Enter keys, but C and H keys fit my workflow better since my left hand is always positioned on the keyboard.
All tools with sliders
There are three ways to speed up adjusting Exposure, WB, HDR, Clarity, and any other tool with sliders:
1) You can hover your cursor over any slider and move it using a mouse wheel or touchpad. Note that in Capture One 20, the mouse wheel and touchpad are now scrolling interface by default. To adjust sliders, you need to hold down Alt key or switch Alt-scrolling to interface in Capture One settings:

2) Most of the sliders can be adjusted with shortcuts. The increment of impact is predefined for shortcuts, and it doesn’t fit my editing style. However, I know photographers who mastered effective work with adjustment shortcuts.
3) Finally, you can use controllers to have quick control over sliders. Previously, Capture One had support for only high-end retouch panels by Tangent. Fortunately, things have changed during the last three years, and now there are way more controllers to choose from. Here I have described all the available controllers for Capture One.

Color Correction
Basically, there are three tools for color correction: White Balance, Color Balance, and Color Editor. WB and Color Balance adjustments usually fit group-editing-concept and can be easily copied. Thus, most of the individual corrections are done with Color Editor.
The problem is that selecting colors manually and adjusting their values don’t really fit high-speed editing. Fortunately, Capture One 20 introduced the Direct Color Editor. It allows you to quickly pick any color on an image and adjust it just by moving your cursor.
Direct Color editing might feel weird at first, but this is a perfect tool for batch editing. For most of the event photos, you don’t need to perform some sophisticated color correction. All you need is to remove, say, magenta color cast on a particular image. For such a task, Direct Color Editor fits just awesomely.
Layers
Oh, that’s a tough one. Layers work so fantastically in Capture One that you want to use them a lot. Still, any local correction reduces your editing speed. To get advantages of batch editing layers, you need to control all local corrections with shortcuts only.
Here is the thing: most of your images will require only one layer adjustment. Capture One creates the first layer automatically when you start drawing the mask (shortcut B) or gradient (L and T shortcuts). The same applies to the Heal brush (shortcut Q). If you need to add some retouching, Capture One creates the first heal layer right as you start drawing it. Thus, any local adjustments can be applied pretty quickly.
However, sometimes you need to switch back the background layer to add some general correction. You can speed up this action as well by setting a shortcut for it:

So, we have edited all the images. What’s next?
Quality Control
Our vision is highly adaptive. Jumping from image to image, you can easily adapt to a wrong White Balance or contrast. You can miss some critical things to retouch or composition mistakes to fix.
To avoid this, always practice quality control after editing. My rule of thumb is to perform two quality controls after the editing with short pauses between them.
Usually, it works like this:
- After the editing, I’m taking a short break to have some tea.
- Then I go back to my computer to scroll through images quickly. During this first quality control, I focus on color and exposure issues.
- After that, I’m taking another break to give eyes some rest.
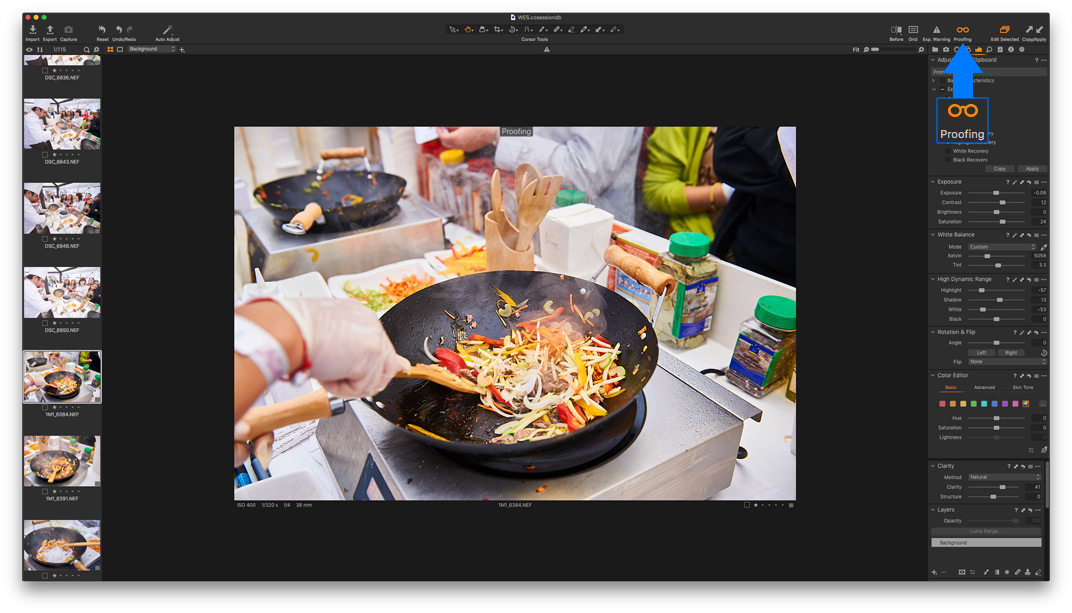
- For the second quality control, I turn on the Proofing mode with web-preview settings. Viewing images in a different size allows to spot missed issues easier, especially some compositional problems.
Even if you’re an experienced photographer, don’t underestimate the importance of quality control. If you’re new to batch editing, that should be one of the most crucial processing steps.
Now you know almost all the key features of batch editing! There is only one topic to cover – export.
Read Part III. Capture One Export Settings
Capture One Hidden Features eBook

Capture One Hidden Features is a collection of more than 200 pro hints to improve your Capture One workflow, structured into an easy-to-read book.
You can download four chapters from the Capture One Hidden Features ebook free of charge:
- 3. Must-Have Shortcuts
- 14. Hidden Features of Layers
- 27. The Power of Mask Inversion
- 38. Automation with Macros
Simply subscribe to the AlexOnRAW newsletter by entering your email in the form below. After subscribing to the newsletter, you’ll immediately receive the four chapters from the book. Also, you’ll regularly get a friendly newsletter with free Capture One tutorials, image editing tips and tricks, and news from Capture One community.