


Capture One 20 is finally here and it’s one of the most balanced releases of Capture One ever. Despite the provocative naming, Capture One 20 is an evolutionary-style upgrade with a mass of long-awaited features:
- New HDR tool with White and Black sliders
- Improved Noise Reduction
- Reworked Crop tool
- Improved copy/apply of Layers
Nevertheless, Capture One 20 experiments with novel approaches to image editing as well. For instance, you can now adjust color simply by moving cursor over image.
For new users, Capture One 20 delivers a new scrollable interface and improved image culling to make switching to Capture One even easier. Plus, in Capture One 20 developers enhanced processing for DNG files from your phones, drones, and non-supported cameras!
Download Capture One 20 (as always, it has a 30-day free trial), and let’s find out how all the new features work!
Capture One 20 Video Overview
New Scrollable Interface
First things first: Capture One 20 has now a scrollable interface!
Part of Capture One users have been asking for tool scrolling for years. However, some photographers were always against any changes in Capture One UI.
In Capture One 20, developers somehow managed to please both sides!
So, here is how it works now. You have two sections in each tool tab:
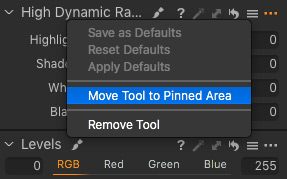
1) Pinned Area

There is no scroll bar in the Pinned area. All the tools located there work just as they did before.
2) Scrollable Area

You can place any tools here and quickly scroll through this section using a scroll wheel.
Tools can be easily moved between areas by drag-n-dropping or by clicking “…” icon and choosing “Move Tool to Pinned/Scrollable Area”.
Thus you can have any tool tab setup you want:
- You can place all the tools in the Pinned Area and have a classical Capture One interface.
- Similarly, you can move all the tools in the Scrollable Area and have a Lightroom-style interface.

However, I would suggest having the best of both worlds. For instance, you can place all the primary tools in the Pinned Area and have secondary tools in the Scrollable Area. In my case, I have set color channel curves in a scrollable section below the pinned RGB Curve.

By default, the scroll wheel is now used for tool tab scrolling, and thus you can’t adjust sliders with it anymore.
There are two solutions to this:
- You can use Alt-scroll to adjust sliders.
- Or you can set Alt-scrolling for tool tab in Capture One preferences and have a classical setup.

I think the new scrollable tool tabs fit perfectly into Capture One’s approach to the customizable interface.
Also, you can now quickly switch the viewer background color by right-clicking the background itself or by using shortcuts.
So, it’s time to discuss new editing features!
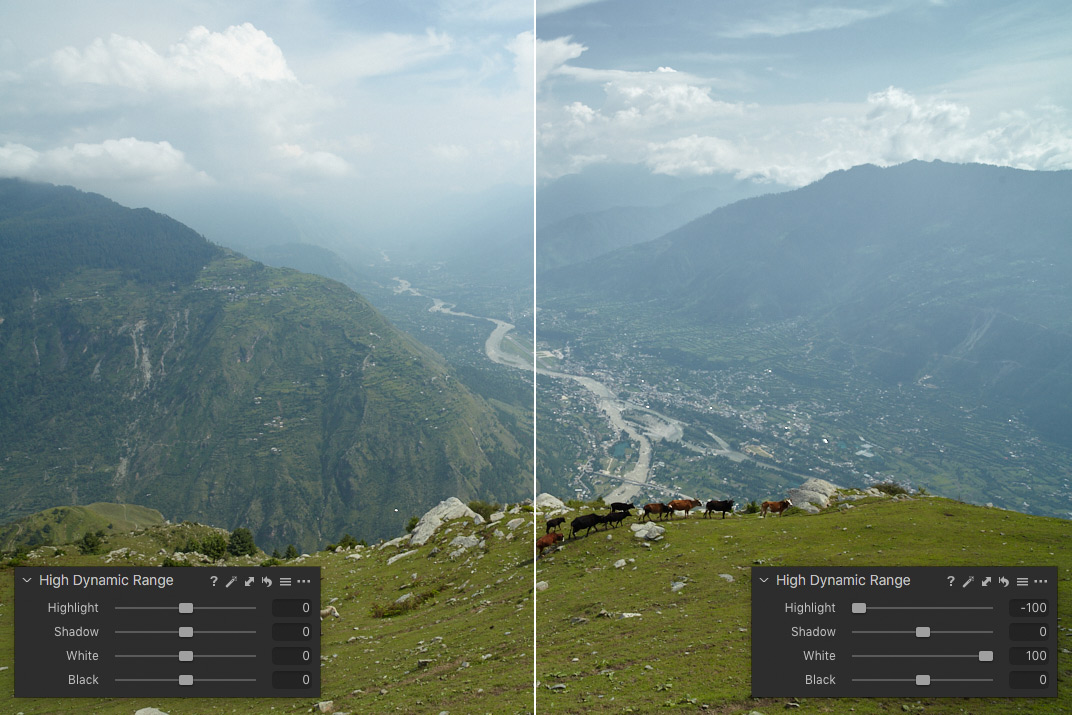
New High Dynamic Range

HDR tool in Capture One 20 has been entirely rebuilt.
Firstly, all sliders now have positive and negative values. Thus, you can easily make highlights brighter and shadows darker. It gives you additional control over image contrast.

Secondly, in Capture One 20 you’ll find new White and Black sliders to adjust the darkest shadows and brightest highlights precisely.
For example, you can easily recover the darkest parts of your image without affecting regular dark areas:
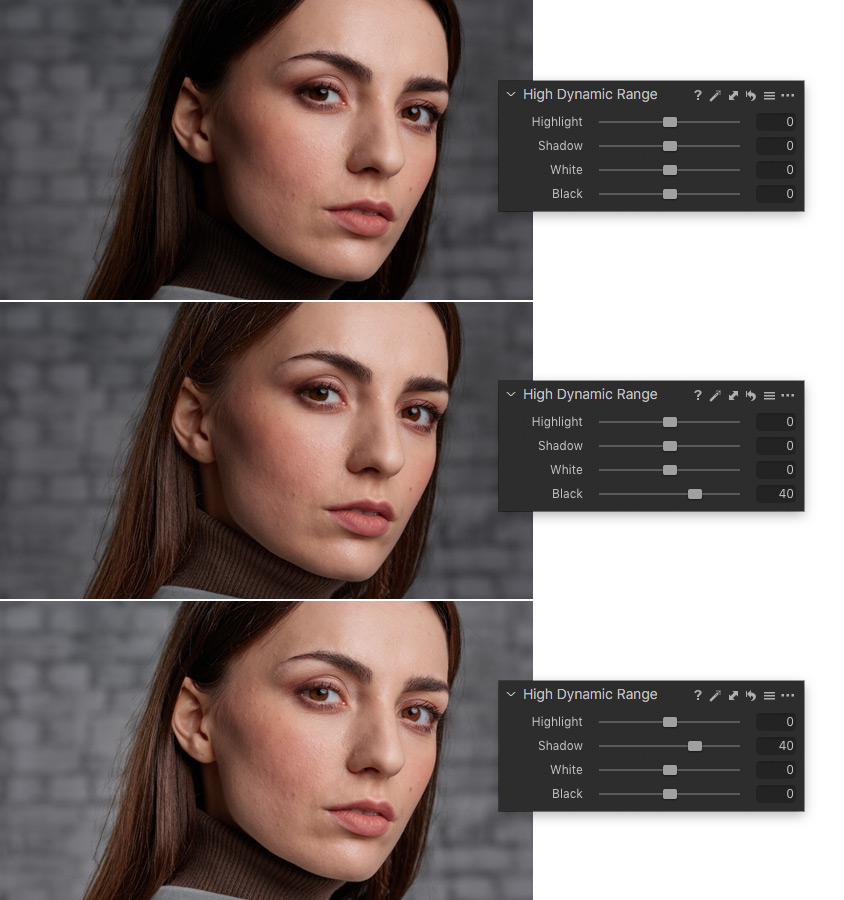
It works the same way for the brightest highlights.
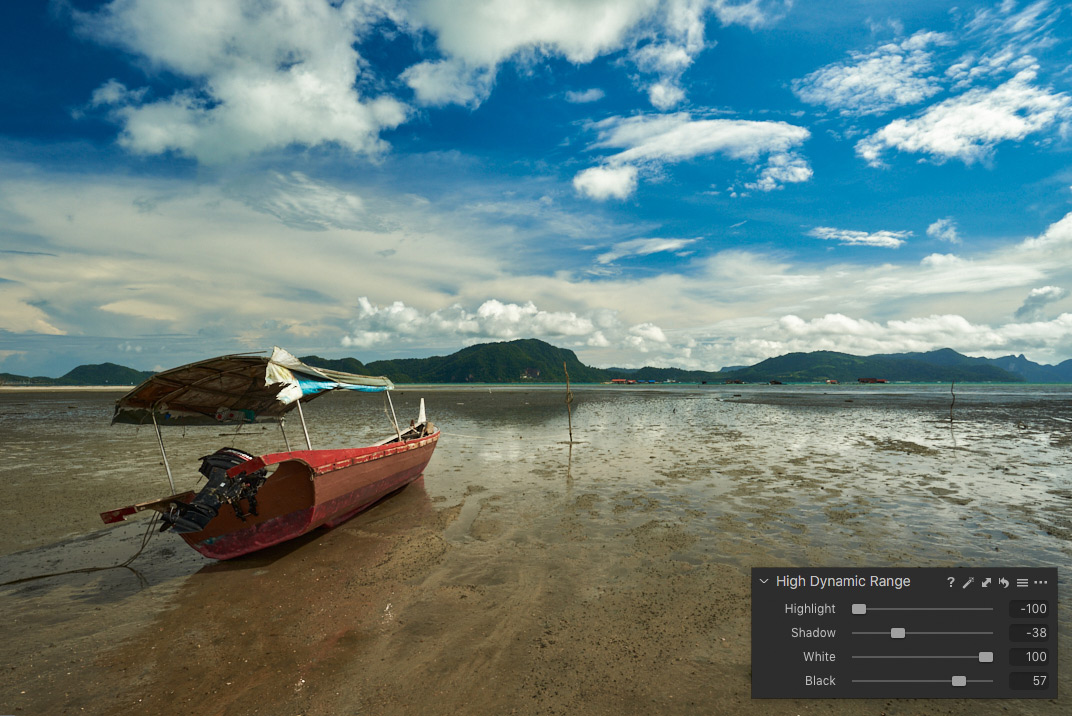
At first, you might think that new HDR sliders work similarly to Lightroom sliders, but they are quite different.
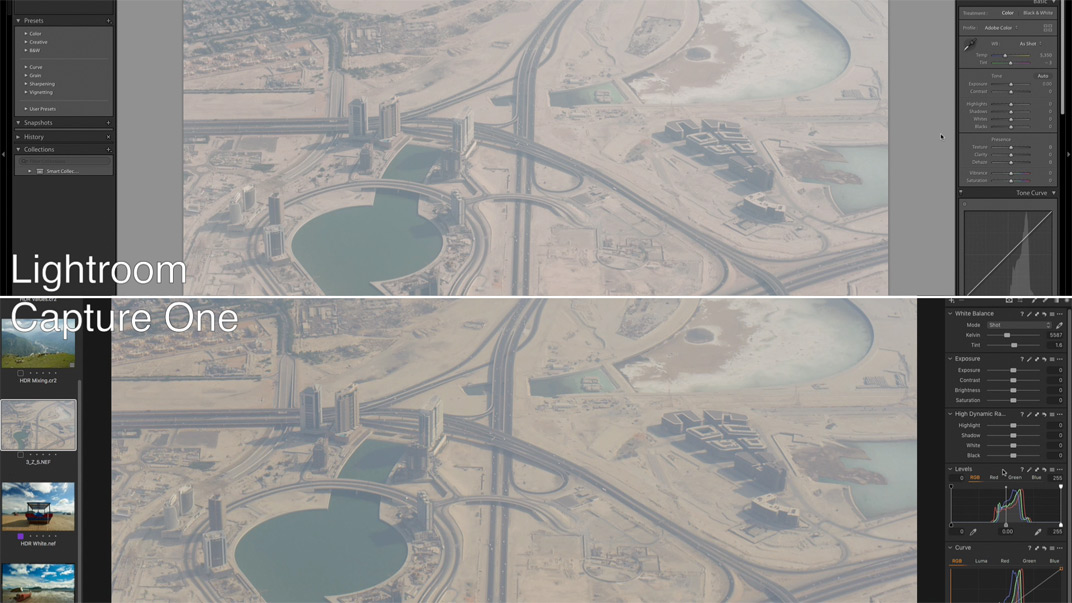
Whites and Blacks sliders in LR basically adjust white and black points on your image. Capture One has a separate and much more powerful tool for this – Levels.

Here is a simple example of how Whites/Blacks in LR work comparing to White/Black in Capture One.

As you can see, White and Black sliders in Capture One are not repeating Levels. If you have no dark or bright information on an image, you need to work with Levels first.
Another interesting feature: the new HDR sliders work excellently while being mixed. For instance, you can darken highlights and brighten white areas to make an image look deeper.
Likewise, you can dim shadows, but recover black parts and get more details out of them.

HDR tool in Capture One 20 clearly deserves a separate article!
Subscribe to my newsletter to be the first to know when it’s going to be released!
Plus, you’ll get my free guide to Capture One and a set of free styles for Capture One
PDF “Mastering Capture One”

17 Free Styles by 1Styles.pro

It’s absolutely free and we promise not to send emails more often than once a week!
If you’re already subscribed to AlexOnRAW Newsletter, this subscription will not duplicate emails!
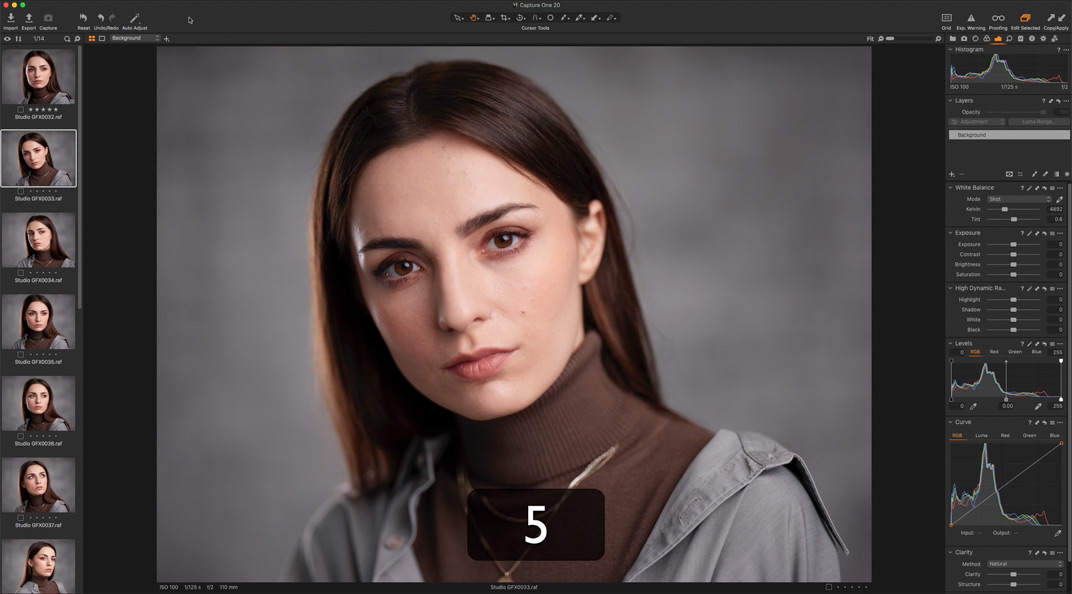
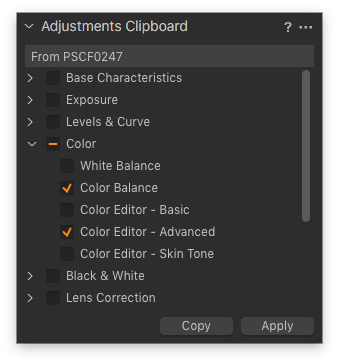
New Basic Color Editor
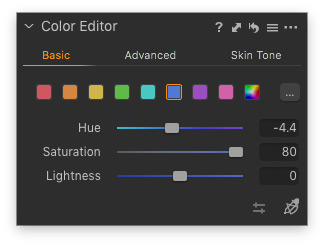
Another significant change in Capture One 20 is the new Basic Color Editor.
Basic Color Editor always felt a bit redundant in Capture One workflow. It had a lack of color control and no support for layers.
In Capture One 20 developers entirely rethought how basic color correction should work.
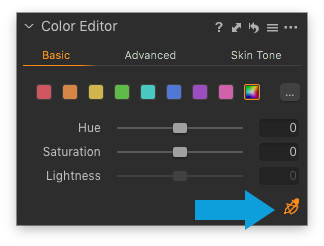
The new Basic Color Editor has no color wheel and thus takes much less space in a tool tab. Instead of the color wheel, Basic mode now contains eight prepared color segments with standard sliders: Hue, Saturation, and Lightness.
Plus, you can easily customize color ranges by clicking here:

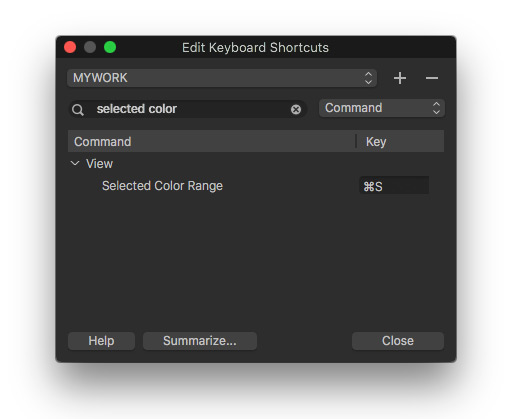
If you miss View Selected Color Range tool, don’t forget that you can set it to a shortcut:
Also, Basic Color Editor now fully supports layers!

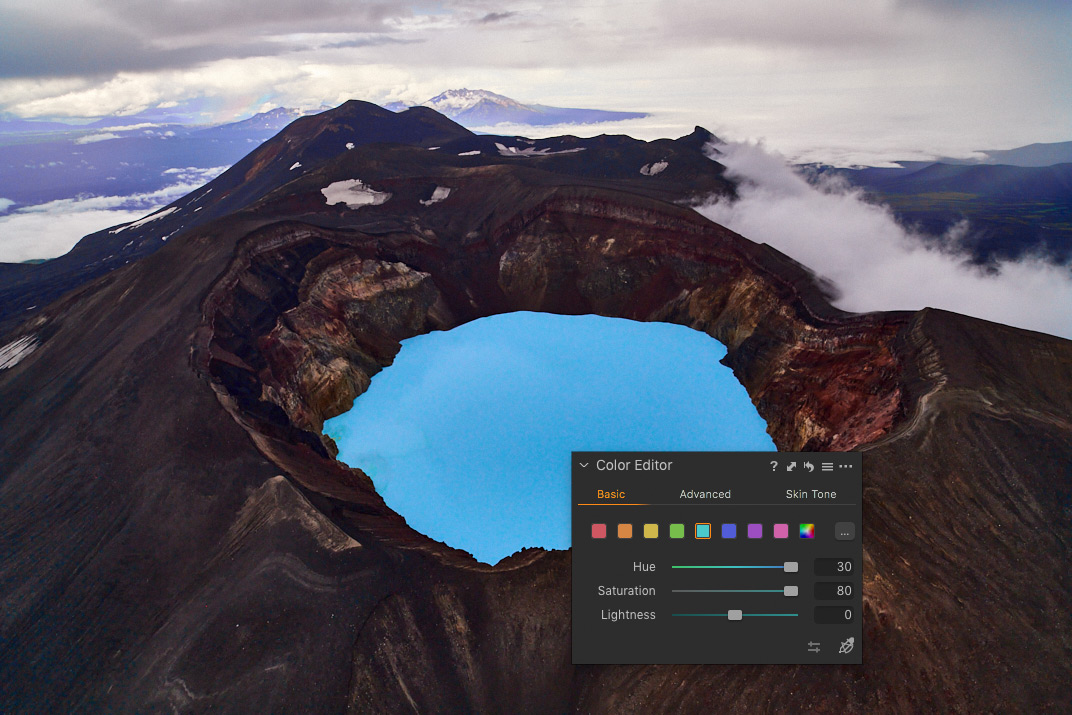
Direct Color Editor
Apart from visual changes, Basic Color Editor now offers an entirely new way of color correction – Direct Color Editor.
Direct Color Editor is a new cursor tool that gives you full control over color editing.
You can select Direct Color Editor in Basic Color Editor window, in Toolbar menu, or simply by using a shortcut D.
When Direct Color Editor is active, click any color on an image, hold down the left mouse button and move your cursor:
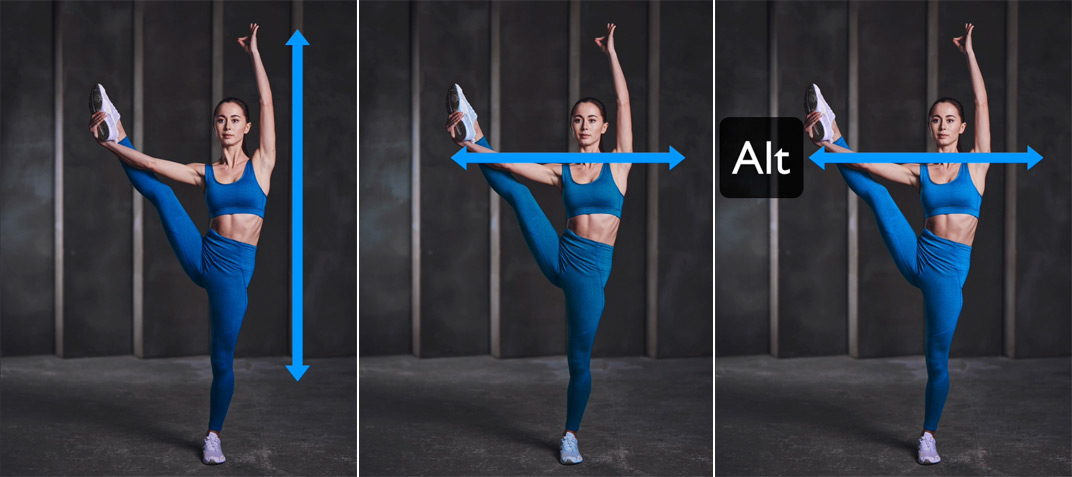
- Vertical movements adjust Saturation of selected color
- Horizontal movements change Hue
- Alt + Horizontal movements adjust Lightness
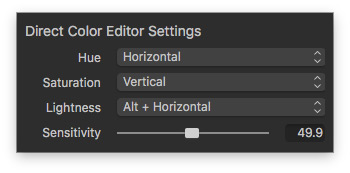
In Direct Color Editor settings (right-click with an active tool), you can adjust sensitivity and customize controls.
At first, such direct control over color feels offbeat, like you’re working blindfolded. It’s only a matter of confidence.
Give it some time, and you’ll notice that you’re making more and more corrections with Direct Color Editor. This simplicity and quickness suit basic color editing just naturally.
So, try it in your workflow and we’re moving to the next feature of Capture One 20 – new Crop tool.
New Crop Tool
Crop tool gained a significant redesign in Capture One 20.
Let’s see how it looks and works now:
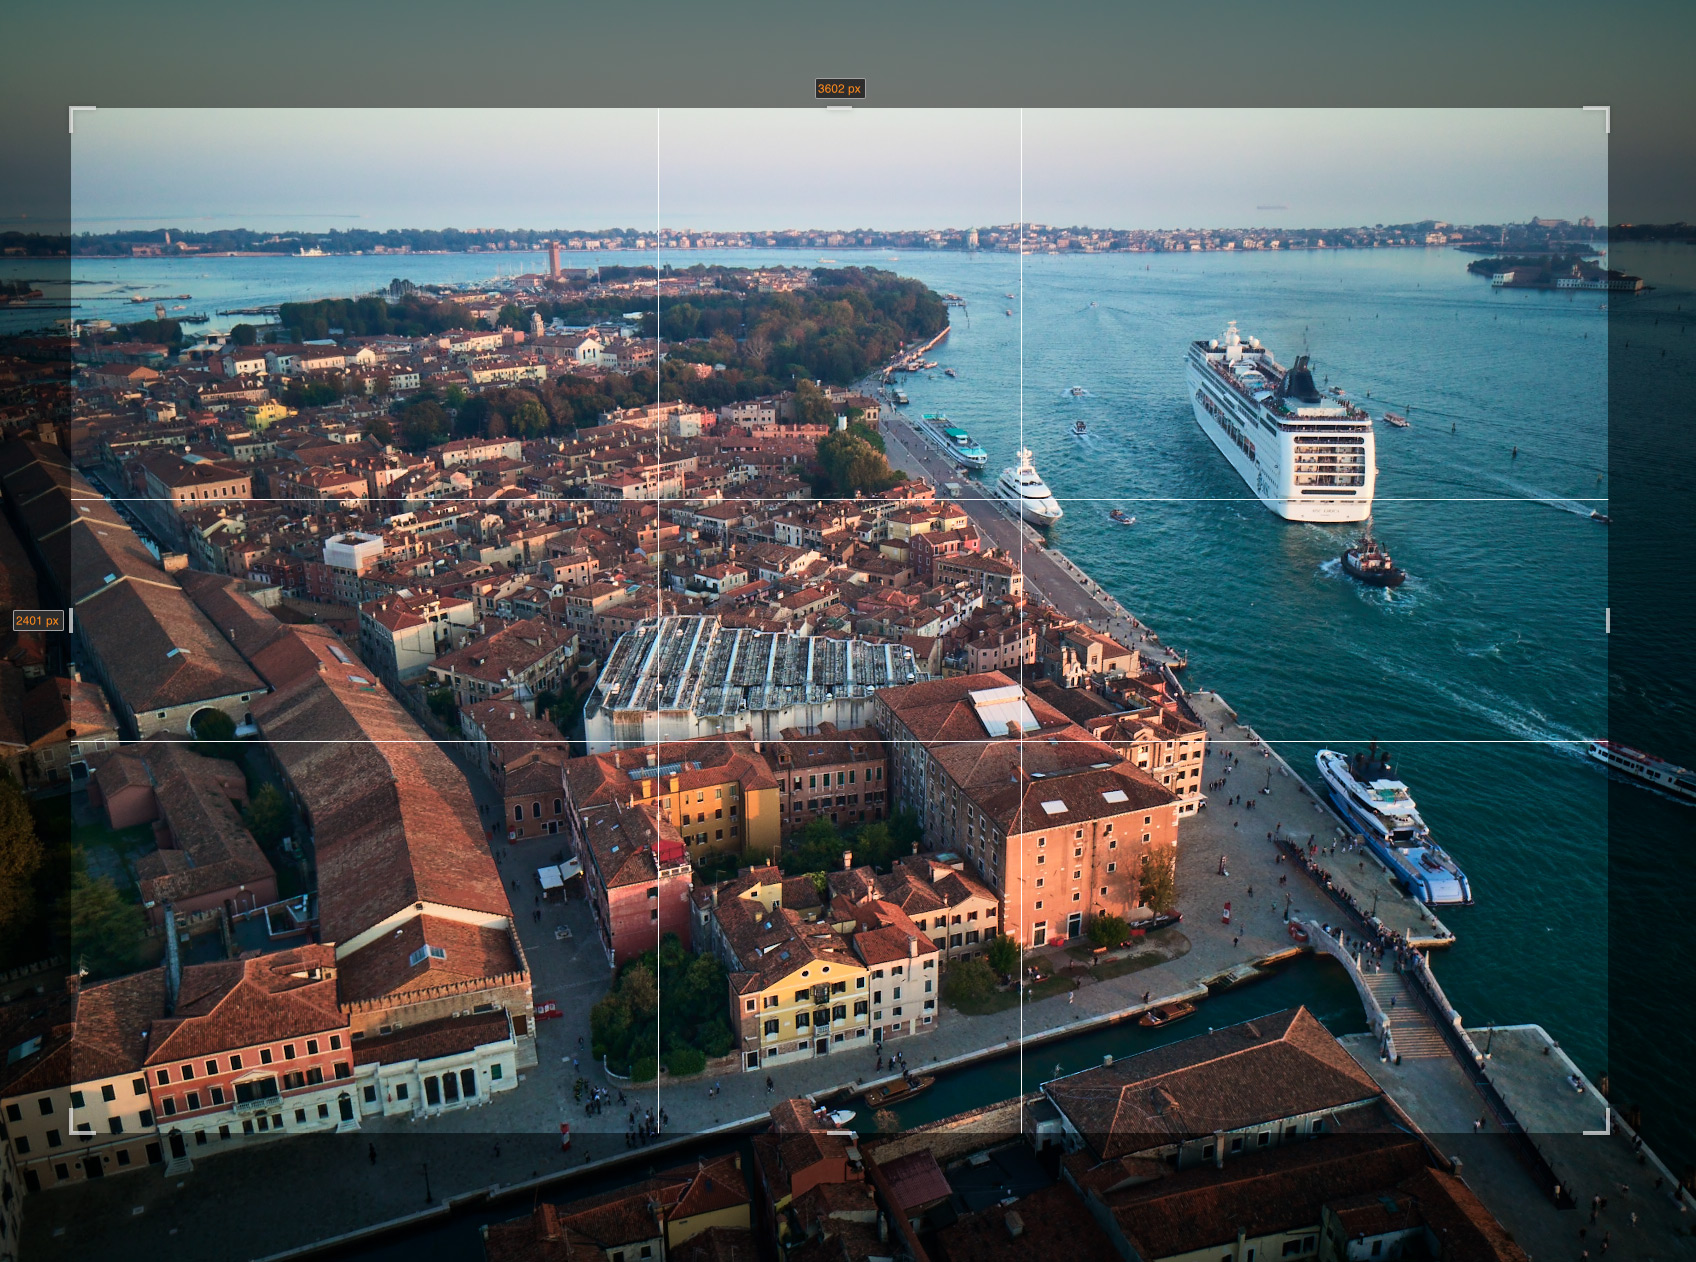
- Crop area has got more noticeable, bold handles. Now it’s much easier to grab and resize the crop.
- Also, you can now hold down the Alt key while cropping to crop around the center.
- When you’re cropping with an unconstrained aspect ratio, hold down the Shift key to lock the current aspect ratio.
- Freehand rotation can now be activated by moving the cursor outside the corner of the crop or by using CMD/CTRL keys.
- Plus, you can now use Enter key to switch to the Pan Cursor Tool quickly. It allows you to see an image in its regular view, without crop tool borders.
Ok, what about better Noise Reduction, which I have mentioned at the beginning of the video?
Important!
Don’t forget to upgrade your file engine to see the new Capture One 20 processing on your images!

Improved Noise Reduction
When I have just tried Capture One 20, I’ve been a bit skeptical regarding the new noise reduction. At first glance, it works pretty similarly to Capture One 12 algorithms.
To change your mind, you need to look at how Capture One 20 deals with color rendering in shadows and highlights. Capture One 20 preserves many more details now!

Moreover, according to developers, Noise Reduction works intelligently in Capture One 20. The default noise reduction adjustments are now based on your ISO. Thus, you can get a correct result without manual tweaking of noise reduction.
Now it’s time to discuss a pretty minor update, but it has been anticipated by so many of my followers that I just can’t put it at the end of my list!
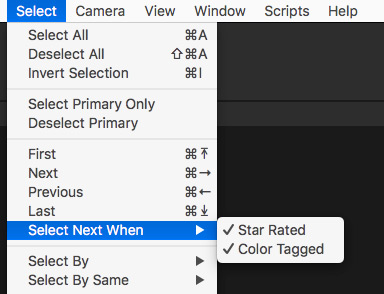
Better Image Culling
Capture One 20 brings a simple, but enormously useful tool for image culling – Select Next When.
It allows you to switch to the next image automatically once you set a rating or a color tag onto your image.
To enable auto-switching go to Select > Select Next When:
Ok, moving on to the next big update – improved DNG support.
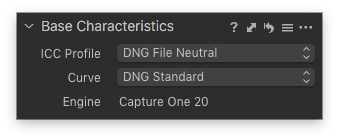
Improved DNG support
Capture One 20 now offers better color profiling for DNG files from drones, smartphones, and cameras that use DNG format.
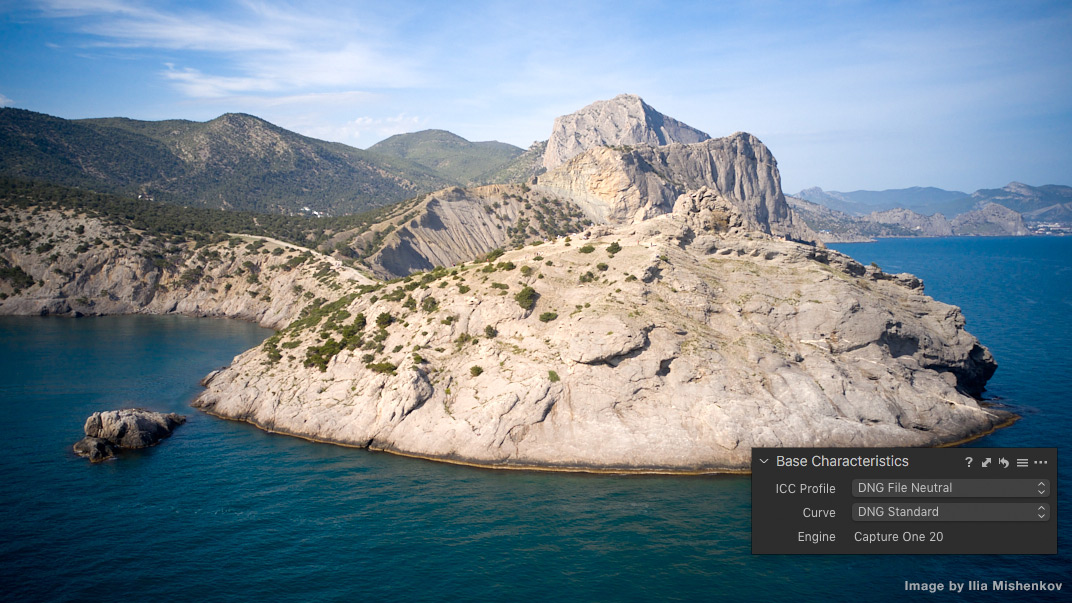
In Capture One 20 you’ll find a new base curve DGN Standart:
If you haven’t experienced any issues with color of your DNG files previously, you’ll see only the slightest changes in Capture One 20. For instance, DNG from iPhone X and the first DJI Mavic look pretty similar in Capture One 12 and Capture One 20.
However, if you weren’t satisfied with color of your DNG in Capture One 12, you might find color rendering significantly better with the new DNG Standart curve.

I’ve tested images from DJI MAVIC 2 PRO L1D-20C and the new curve delivers way more natural colors.


Now to another update from Capture One user’s wishlist: improved copying of Layers.
Improved copying of Layers
There are three major improvements to the copying of layers in Capture One 20:
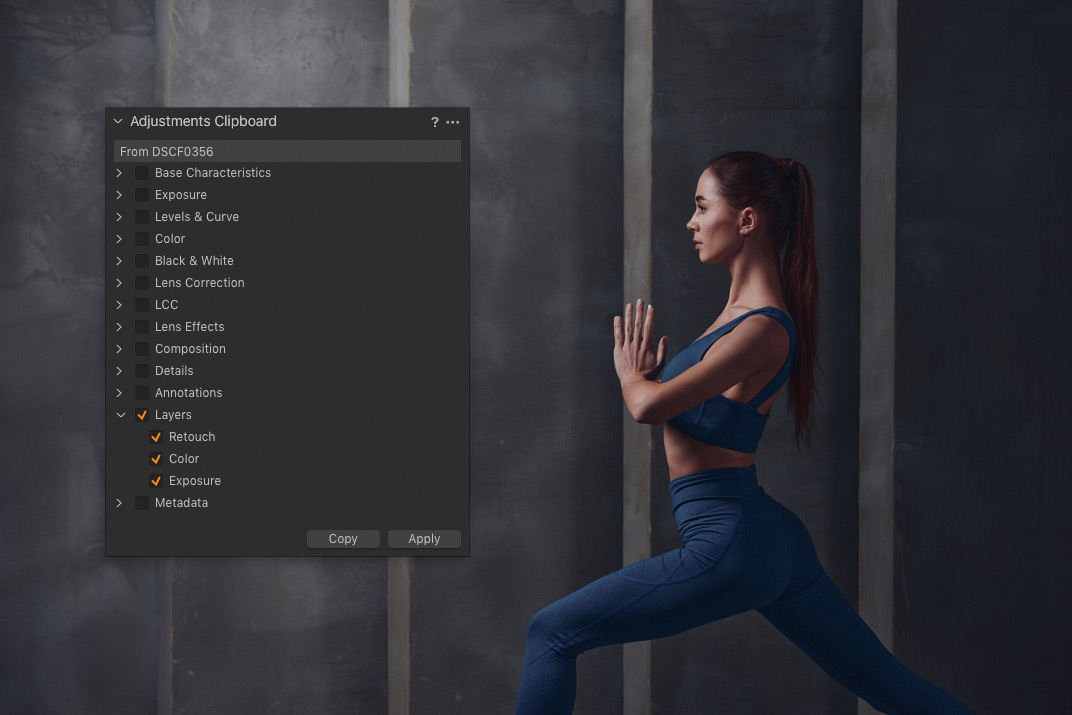
First of all, you can now select which layers to copy. Say, you have different layers for color editing, exposure correcting, and image retouching. In Capture One 20 you can easily copy color and exposure layers without copying of retouch layer.
Secondly, if you already have some layers on an image, new layers will be added on top of the existing layers.

The third improvement enhances coping for images from different cameras
Previously, you might have had issues of coping layers from a file taken with one camera to an image from another camera. In Capture One 20, developers have fixed this problem, and now you can easily copy layers to images with different dimensions.
The Free Way to Support AlexOnRAW
If you have found my Capture One 20 review useful, there is a simple way to support my work. And it will cost you nothing!
Just use this code at Capture One checkout: ALEXONRAW

Other Improvements
License keys for all running modes
Any version of Capture One (including Trial and Express versions) now requires activation with a license key. You can find your license key on CaptureOne.com.
Adjustment Clipboard Improvements
Adjustment Clipboard tool now automatically collapses groups without adjustments (if “Auto-select adjusted” mode is on). Thus it’s now easier to navigate in Adjustment Clipboard.
Toolbar text and icons

Icons in the Toolbar in Capture One 20 have descriptions under them. You can turn this text off by right-clicking the Toolbar.
Masking cursor tools arrangement

Masking tools (brush, eraser, linear and radial gradients) are now available right in Layers tool for quick access.
Browser thumbnail resolution

Browser thumbnail resolution has been increased by 50%.
White Balance Picker
WB picker now provides much higher consistency and works better with noisy images.
Changes to default shortcuts
Some new shortcuts were added or changed in Capture One 20:
Proof Margin: X
Direct Color Editor: D
Hide Viewer: G
Linear Gradient: L
Zoom to 100%: . (period)
Zoom to fit: , (comma)
Toggle Focus Mask: Q
Full Screen: F (On Windows F11 works as a secondary shortcut)
New camera support
• Olympus E-M5 III
• Canon EOS M6 II
• Canon EOS 90D
• Leica V-LUX 5
• Pentax K-1 II
• Ricoh GR III
• Panasonic Lumix DC-S1H
• Nikon Z 50
• Generic GoPro RAW support