

"The toolkit has allowed me to become much more efficient."
"The AlexOnRaw presets for Capture One are a pure joy to use, and the amount of work Alex has put in has really surprised me."
"Toolkit let me quickly run through editing ideas I would never have considered."
Styles & Tools
Ultimate Capture One Toolkit
Make your Capture One workflow faster & easier than ever
The Toolkit contains 40 Ready Looks, 20 Curve Adjustments, Color Shift styles, Visual Accent styles, Color Toning styles, Skin Tone styles, 20 Tech style brushes,Dynamic Symmetry grids, Session & Catalog Templates, Social Media and Cinema Aspect Ratios, Social Media Export Recipes, Custom Workspaces, HSL preset for Color Editor, B&W in Layers styles, Color Cuve Styles, and 50 Style Brushes.
Do you want to quickly see how your image will look with vibrant, calm, or balanced adjustments? The Ultimate Capture One Toolkit offers 40 Ready Looks to find the right adjustments for your image in no time.
Do you want to have a tool to shift objects’ color quickly?
Using Color Shift styles, you can change any object’s color in just a few clicks.
Are you looking for a contrast that will fit your image best?
Among 40 Ready Looks, you’ll discover complex adjustments that add Accurate Contrast, Balanced Cool/Warm Contrast, Vibrant High Contrast, Cyan Bronze Contrast, and many others.
What Do I Get with the Toolkit?
40 Ready Looks
In the Ultimate Capture One Toolkit, you’ll find 40 Ready Looks to find the correct adjustments for your image quickly. There are three types of Ready Looks in the kit:
Balanced (BL) Styles
Balanced styles are perfect for images where you need to balance highlights and shadows, add some contrast, and have accurate color grading.
- 15 Color Styles
- Style Brushes Included
- All Styles Support Layers


See Balanced styles in action:
Vibrant (VT) Styles
Vibrant styles are designed for dynamic and color-rich shots, maximizing their RAW potential.
- 10 Color Styles
- Style Brushes Included
- All Styles Support Layers


See Vibrant styles in action:
Calm (CL) Styles
Calm styles work perfectly for adding an atmosphere of stillness and serenity.
- 15 Color Styles
- Style Brushes Included
- All Styles Support Layers
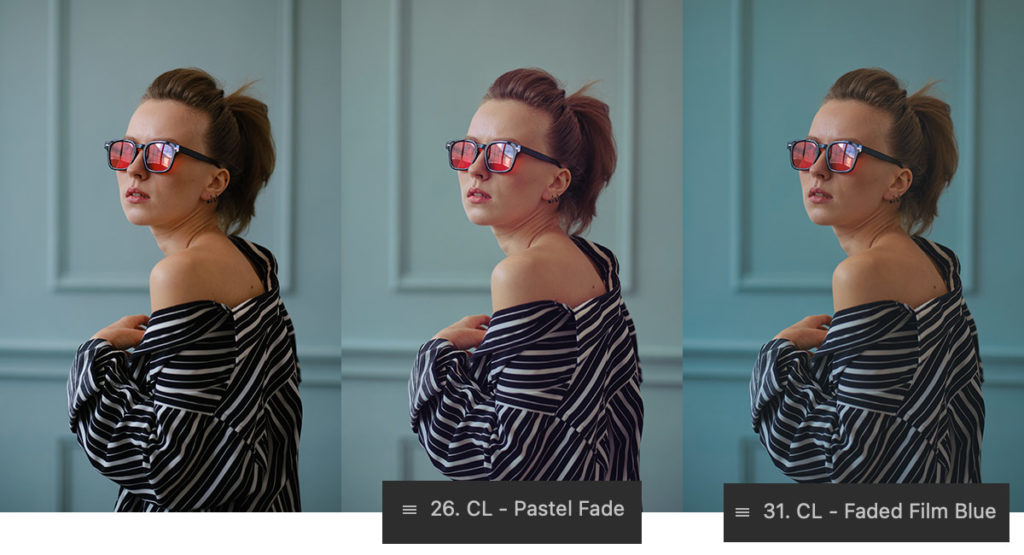
See Calm styles in action:
Color Shift Styles
Color Shift styles allow you to change the color of any object on an image completely. Simply mask an object and apply a Color Shift style to the selected layer:
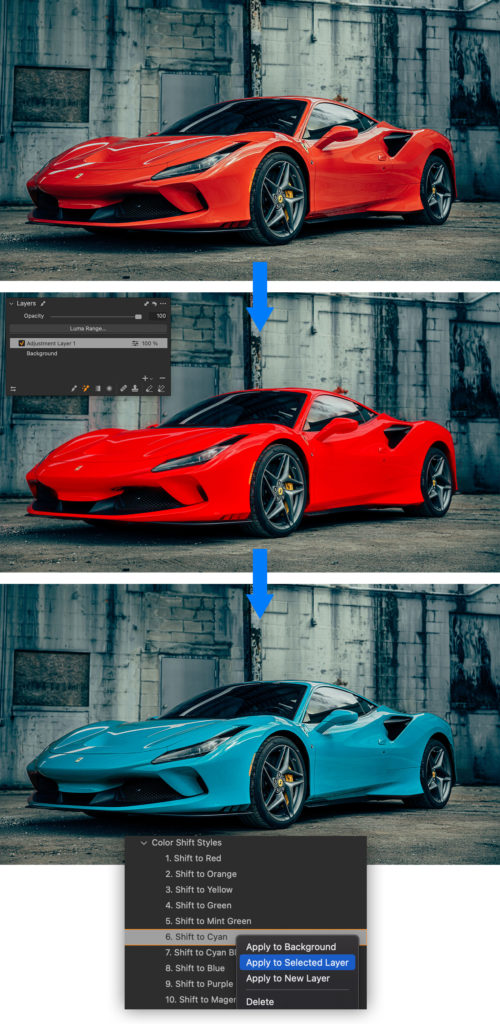
See how it works in action:
Please note that this tool is designed to shift existing colors and hues, not to create them. That means Color Shift styles can’t change color on objects without hue, such as the white background.
Also, the resulting color highly depends on the object’s lightness and saturation. If you’re not entirely satisfied with the result, feel free to experiment with the Saturation and Lightness sliders of the Skin Tone tool.
Capture One Photographers About the Toolkit
But Wait… There’s More!
Visual Accent Styles
Visual Accent Styles set allows you to focus the viewer’s attention on particular areas, such as skin tone, warm or cool colors, and image details.
The set includes 10 styles and 10 style brushes. All Visual Accent Styles support layers.
- 10 Color Styles
- Style Brushes Included
- All Styles Support Layers

How to Apply Visual Accent Styles?
As with any styles, it makes sense to adjust Exposure and White Balance before applying a style. Also, I’ve prepared additional recommendations for the new styles:
- 1. The Accent on Environment style enhances all colors on an image except skin tone hues. Try to apply it in layers or as a style brush for the most accurate impact on your image.
- 2. The Accent on Skin Tone style slightly dims non-skin-tone colors, focusing the viewer’s attention on the people in the shot.
- 3. The Paint it Cyan style is designed for images with noticeable warm and cool areas, adding a pale cyan look. The best practice is to apply this style to a layer and adjust the opacity to modify the style impact.
- 4. The Accent on Tonal Contrast style applies a hand-crafted mix of adjustments, amplifying the tonal contrast on your image. The best practice is to adjust HDR and Saturation after using the style.
- 5. The Accent on Emotions style is designed to enhance emotion-driven images. The best practice is to apply this style to a layer and adjust the opacity to modify the style impact.
- 6. The Accent on Warm Colors style makes the warm colors pop, which can benefit images of various genres. I highly recommend you to apply this style on a layer, working with portraits and other sensitive plots.
- 7. The Enhance Foggy Shot style is designed for hazy images. Keep in mind that it’s barely suitable for portraits or high-contrast landscapes.
- 8. The Accent on Depth style contains a hand-crafted mix of adjustments, adding depth and dimensionality to your image.
- 9. The Accent on Cool Colors style accurately dims warm colors and enhances cool colors, focusing the viewer’s attention on them. This style is designed for travel and street photography shots rather than portraits.
- 10. The Accent on Details style makes details stand out in your image. I recommend to apply it in layers or as a style brush for the most accurate impact.
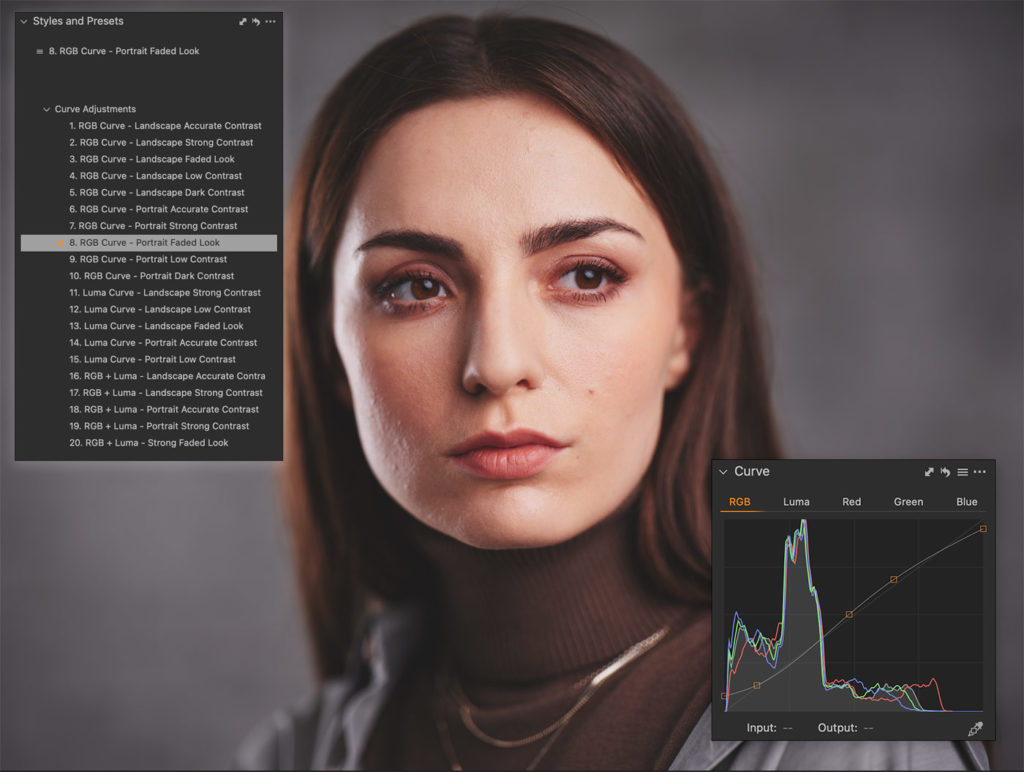
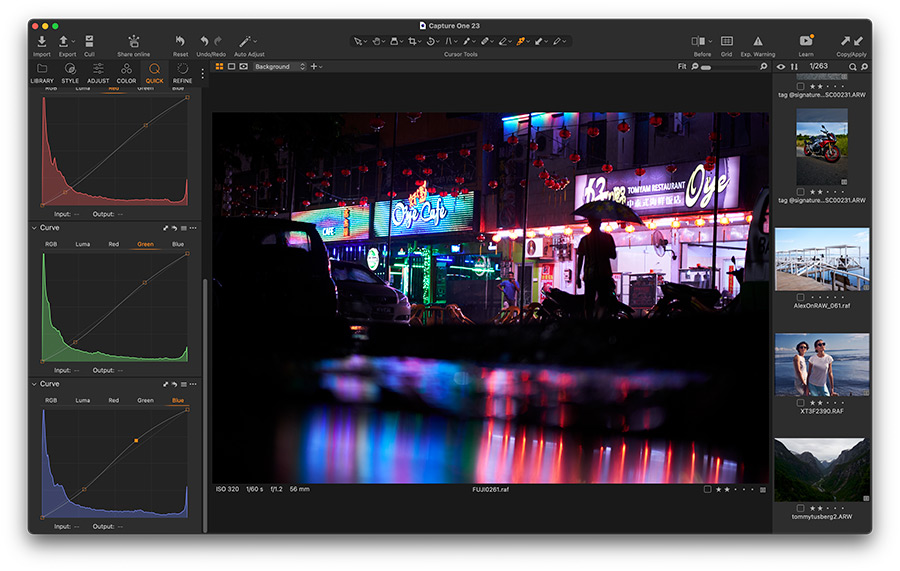
Curve Adjustments
In the Toolkit, you’ll find 20 styles with various Curve adjustments. Using these styles, you can quickly find a contrast that fits your image best.
To mix these styles with other styles, turn on the Stack Styles feature.
- 20 Styles with Curve Adjustments
- All Styles Support Layers
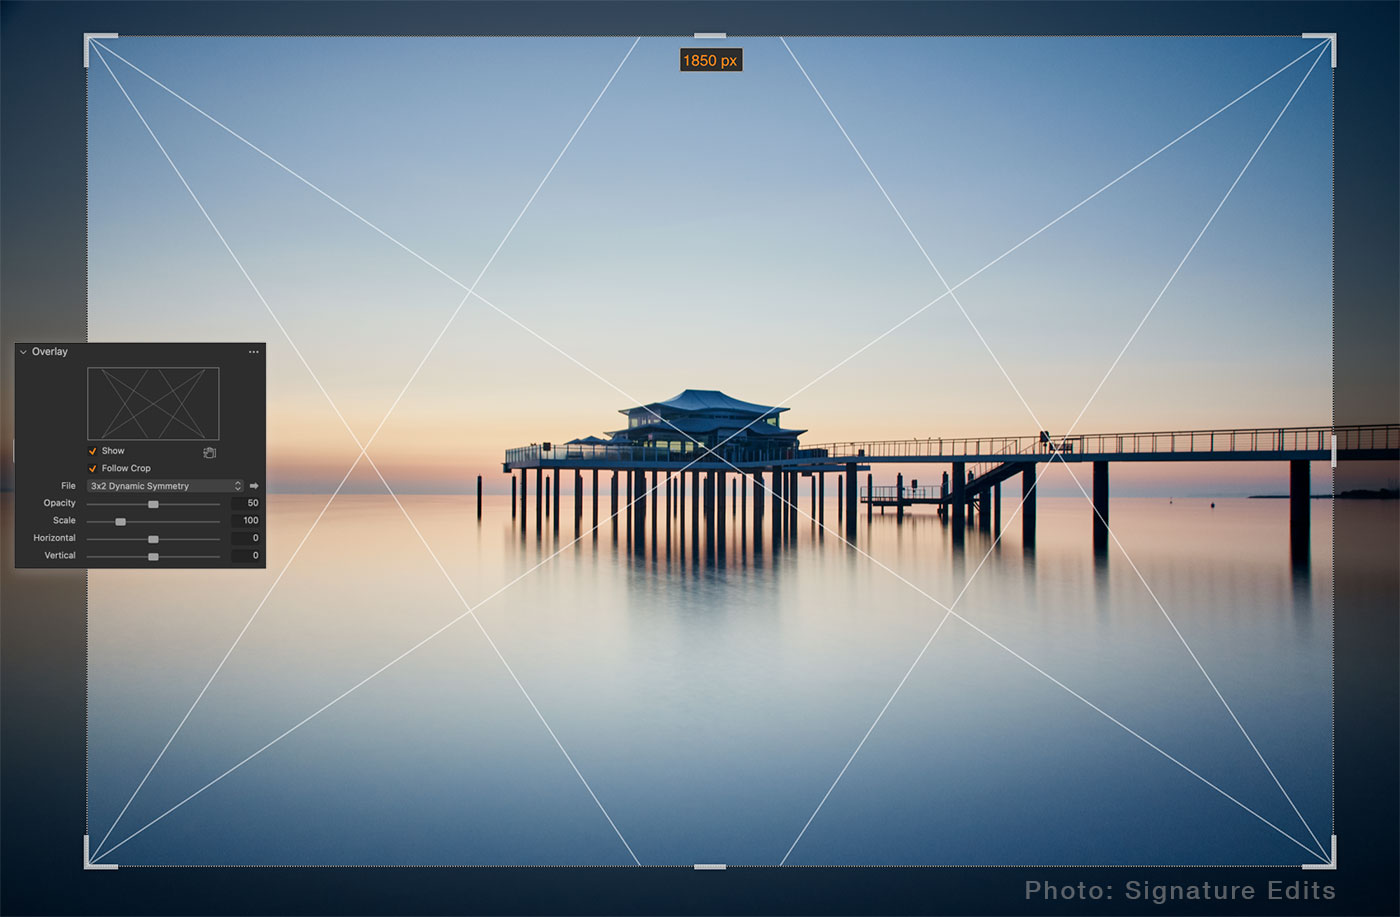
Dynamic Symmetry Grids
Dynamic Symmetry grids offer an easy way to evaluate your composition and arrange it according to the key elements of your shot. Simply add it to your Overlay tool to quickly access the new grids.
Social Media Aspect Ratios
In the kit, you’ll find seven custom aspect ratios that cover popular social media and cinema looks.

Session and Catalog Templates
Boost your workflow with our 10 Session and Catalog templates.
What is a Template?
Templates contain saved structures of Capture One sessions and catalogs. Thus, you can create a new session or catalog with pre-defined albums and folders.
Templates don’t affect your workspace or image adjustments.
Here is how it works
Let’s create a new session using the Studio 3 Looks template:

This template automatically creates four folders in the session’s Capture folder and adds them to the Session Favorites:

The Lighting-Setup folder is set as the default Capture Folder. Simply right-click on the Look-1/2/3 folders to set it as the Capture Folder.
Also, every session template creates five smart albums:

- – All Images
- – Selected (5 stars or Green color tag)
- – Decide Later (2-4 stars or any color tag different from Green and Red)
- – Rejected (1 star or Red color tag)
- – Not Rated
All session templates follow the same logic, but the folders’ naming and amount differ.
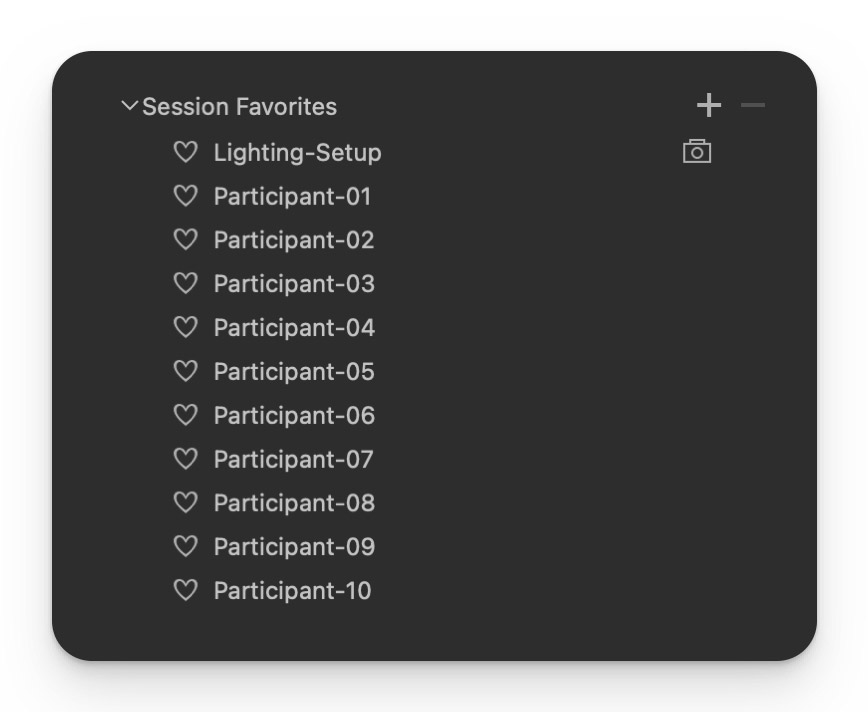
For instance, the Portrait 10 Participants template creates folders for 10 participants of a photo session:
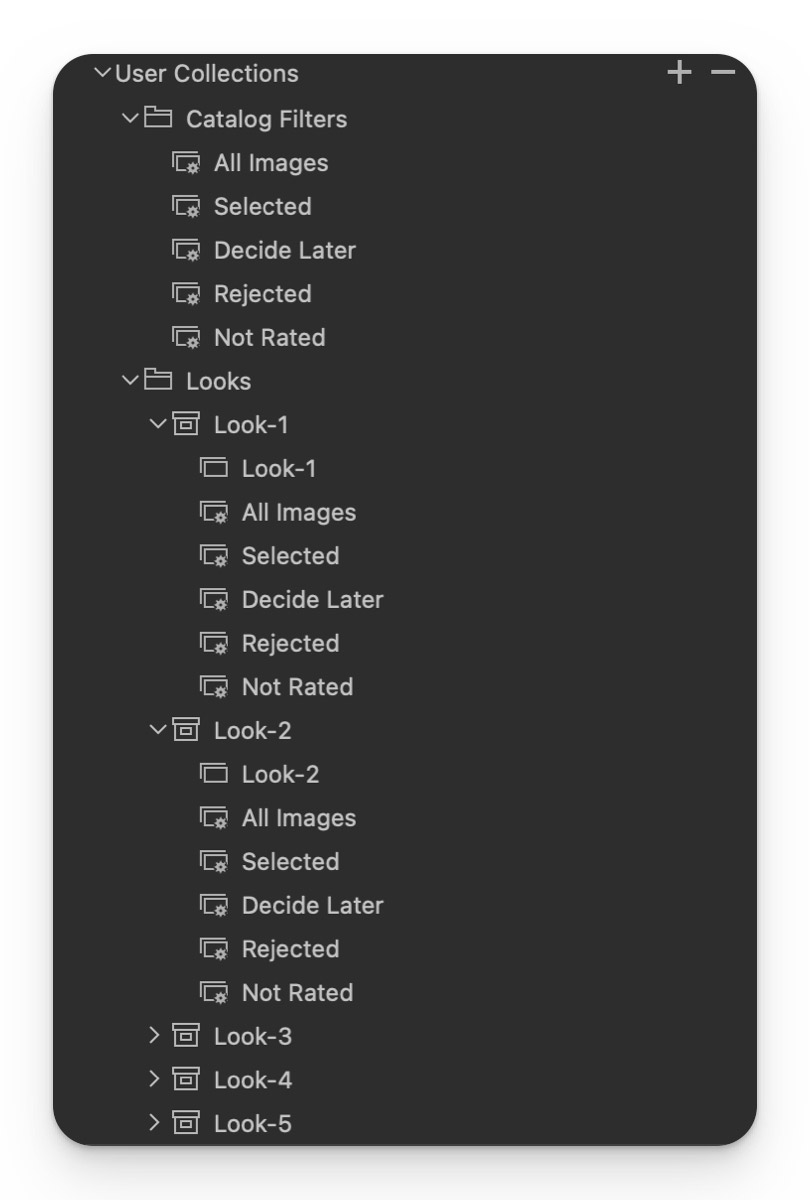
Catalog Templates
Catalog templates are based on projects and smart albums.
For instance, the Studio 5 Looks template creates five projects for every look with separate sets of smart albums:
Social Media Export Recipes
21 export recipes designed for various social media formats.
Export recipes and crop settings are inextricably linked in Capture One:
Export recipe determines the export file size, and cropping defines an area that is going to be presented in the exported file.
Thus, your file had to have a proper aspect ratio and export settings to fit Instagram or Facebook requirements.
Simply crop an image, and select export recipes with your current aspect ratio in the naming:

For instance, you need to prepare a landscape shot for posting on Instagram, Facebook, and LinkedIn.
First, select the SM Landscape preset and crop your image to fit the required aspect ratio.
Secondly, select export recipes that have SM Landscape in the name.
Finally, export images and Capture One will sort all files in custom subfolders.
All images will have file sizes and sharpness that fit the guidelines of social media platforms.
Please note that image sharpness is a pretty subjective matter, and you’re free to adjust the Output Sharpness of the recipes to match your preferences.
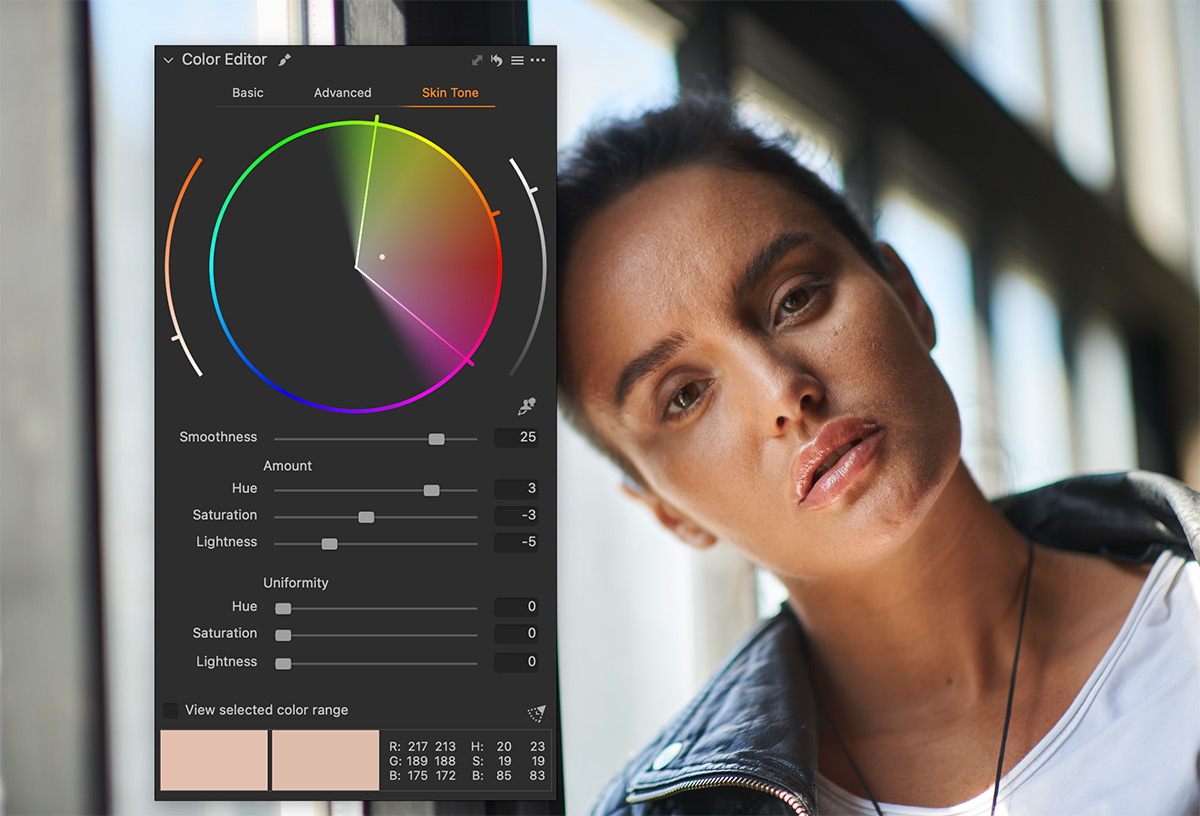
30 Skin Tone Styles
30 Skin Tone styles, designed to speed up skin tone correction.
– Default Even Out Styles
– Skin Hue Styles
– Skin Saturation and Lightness Styles
Custom Workspaces
Five custom workspaces for Capture One:
– Speed Edit Workspace
– Batch Editing Workspace
– Color Grading Workspace
– Studio Workspace
– Travel Workspace
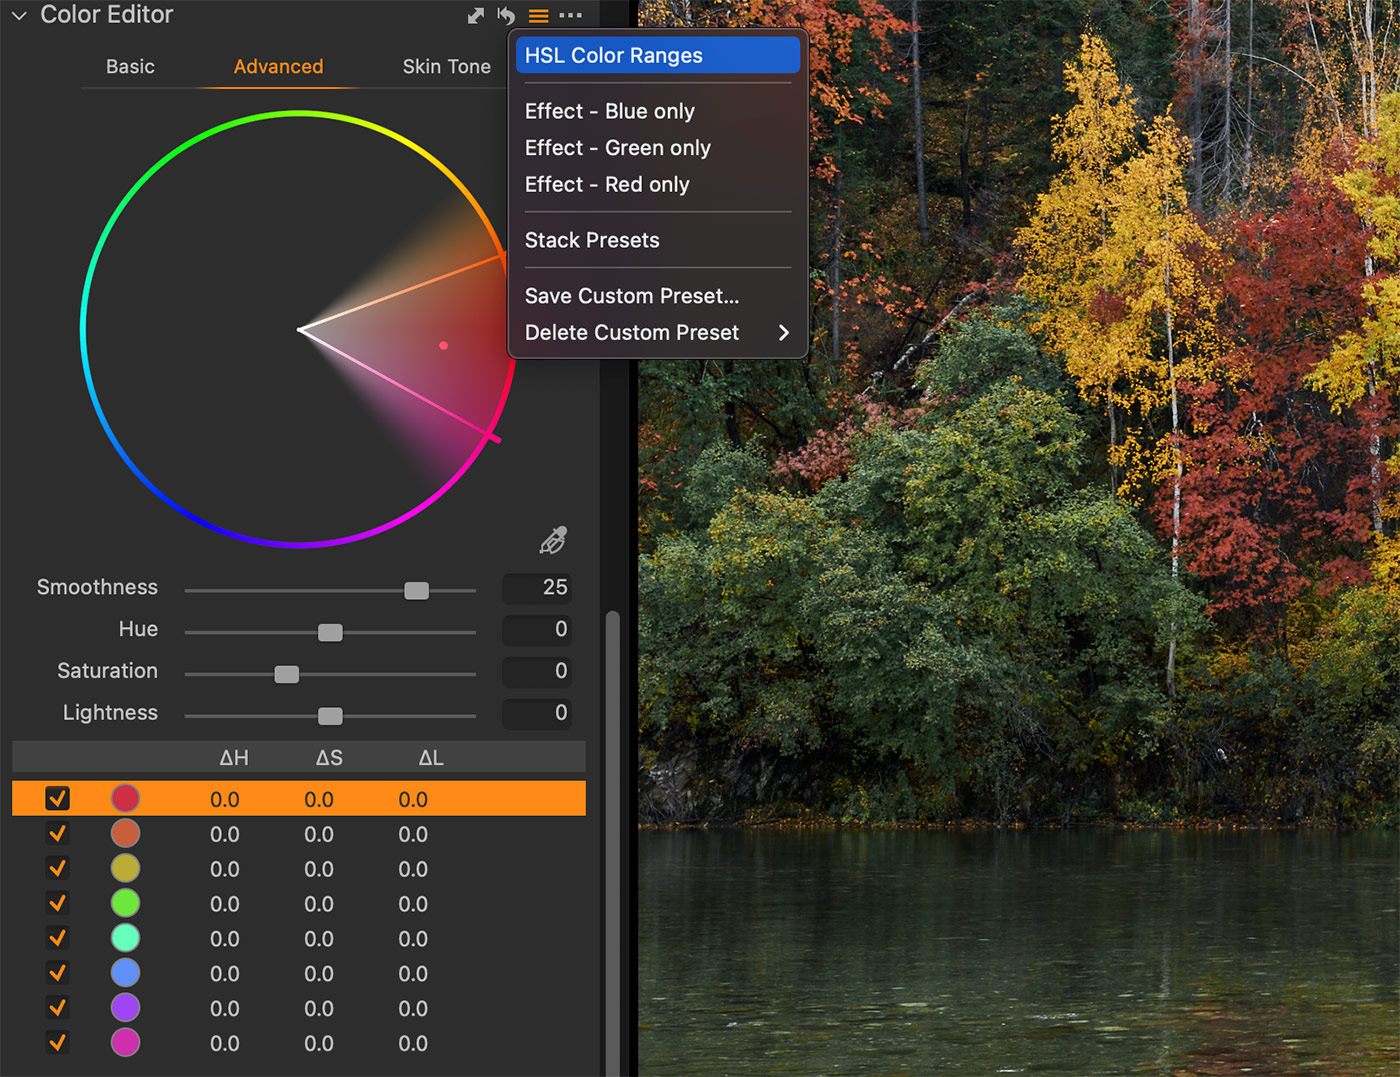
HSL Color Ranges Preset
This preset imitates the color ranges of Lightroom’s HSL panel.
Using it, you can convert your LR HSL presets to Capture One. Also, it’s convenient to use this preset when applying color correction techniques from LR tutorials.
The preset is also available as a style.
80 Style Brushes
All the Ready Looks, Visual Accent Styles, and Color Shift styles are also available as style brushes, so you can easily apply adjustments locally.
✅Capture One for iPad Compatability
All Ready Looks and Visual Accent Styles are fully compatible with Capture One for iPad, bringing professional tools to your iPad app.
✅Capture One Pro Compatability
The Ultimate Capture One Toolkit is fully compatible with the new Capture One Pro.
Access Hundreds of Pro Styles for Capture One


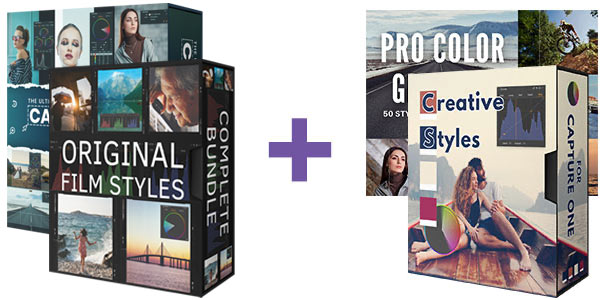
Toolkit + Film Styles
575 Styles Bundle
Ultimate Capture One Toolkit+
Original Film Styles Complete Bundle
-
175 Pro Styles
-
Dynamic Symmetry Grids
-
Social Media Export Recipes
-
Custom Workspaces
-
Catalog & Session Templates
-
HSL Color Ranges Preset
-
500+ Layered Versions
-
336 Style Brushes
-
Free Tutorial:
How to Get the Most Out of Capture One Styles -
Free Tutorial:
Working with Color Schemes in Capture One
AlexOnRAW Complete
Styles Collection
Ultimate Capture One Toolkit+ Original Film Styles Complete Bundle
+ Pro Color Grading Styles
+ Creative Styles
-
175 Pro Styles
-
Dynamic Symmetry Grids
-
Social Media Export Recipes
-
Custom Workspaces
-
Catalog & Session Templates
-
HSL Color Ranges Preset
-
700+ Layered Versions
-
436 Style Brushes
-
Free Tutorial:
How to Get the Most Out of Capture One Styles -
Free Tutorial:
Working with Color Schemes in Capture One
Free Tutorials with the Styles Bundles
How to get the Most Out of Your Capture One Styles
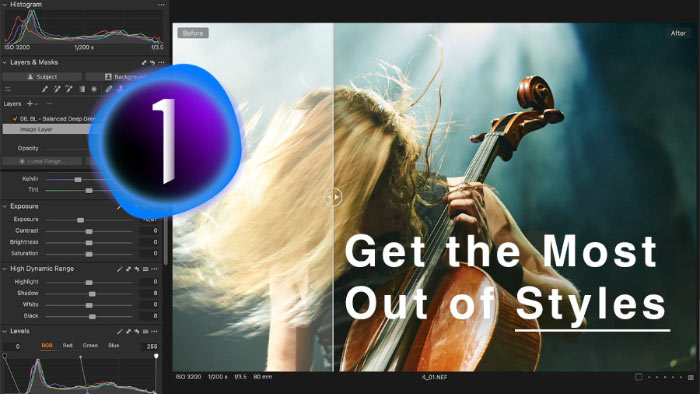
- You’ll learn a three-step workflow to get the maximum out of your Capture One Styles.
- Then, we’ll discover hidden features of styles in Capture One and discuss the benefits of layered styles.
- Finally, you’ll see how to speed up batch editing with AI masks and styles.
Working with Color Schemes in Capture One
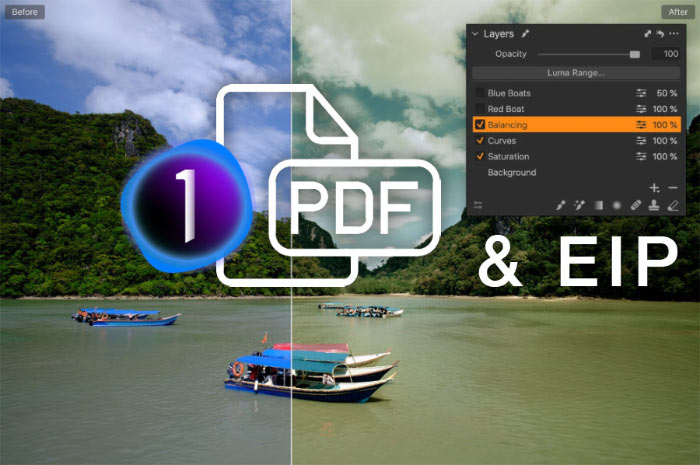
You’ll learn how to apply complementary, analogous, triadic, and other color schemes using Capture One tools. The tutorial includes EIP files containing RAWs with adjustments to the images from the PDF. So that you can experiment with the RAWs from the tutorial and see the applied adjustments in all their detail.


Download 5 Sample Ready Looks

You can download five sample styles from the Ultimate Capture One Toolkit free of charge!
Simply subscribe to the AlexOnRAW newsletter by entering your email in the form below. After subscribing to the newsletter, you'll immediately receive the five styles from the set. Also, you'll regularly get a friendly newsletter with free Capture One tutorials, image editing tips and tricks, and news from Capture One community.
If you are already subscribed to the AlexOnRAW newsletter, feel free to subscribe again. The new subscription will not duplicate your current one.
FAQ
What Version of Capture One Is Required for Ultimate Toolkit?
Ultimate Capture One Toolkit requires Capture One Pro / Sony / Nikon / Fujifilm version 21 14.1 or newer.
The styles are not compatible with Capture One Express.
How Do I Install Styles?
For Capture One 22 15.3 and newer:
Simply double-click the Install All.costylepack file. The styles and style brushes will automatically appear in Capture One.
For Capture One 22 15.2 and older:
Simply double-click the Install Styles.costylepack file and the styles will automatically appear in Capture One. Also, you can install them manually by copying the styles into the Capture One system folder. Here is how to access the Capture One system folder:
MacOS
In Finder, select Go -> Go to Folder and paste ~/Library/Application Support/Capture One
Locate the Styles folder there and copy the styles into it. Restart Capture One.
Windows
Click Win + R and paste this text (with your HDD name and username): C:\Users\[User_Name]\AppData\Local\CaptureOne\
Locate the Styles folder there and copy the styles into it. Restart Capture One.
How Do I Install Style Brushes?
For Capture One 22 15.3 and newer:
Simply double-click the Install All.costylepack file. The styles and style brushes will automatically appear in Capture One.
For Capture One 22 15.2 and older:
To install style brushes, you need to copy them into the Capture One system folder. Here is how to access the Capture One system folder:
MacOS
In Finder, select Go -> Go to Folder and paste ~/Library/Application Support/Capture One
Locate the Style Brushes folder there and copy the style brushes into it. Restart Capture One.
Windows
Click Win + R and paste this text (with your HDD name and username): C:\Users\[User_Name]\AppData\Local\CaptureOne\
Locate the Style Brushes folder there and copy the style brushes into it. Restart Capture One.
How Do I Install Aspect Ratios?
MacOS
In Finder, select Go -> Go to Folder and paste ~/Library/Application Support/Capture One
Locate the Aspect Ratios folder there and copy the User Aspect Ratios.xml into it. Restart Capture One.
IMPORTANT!
The new aspect ratios will replace your custom aspect ratios. Please, backup your custom aspect ratios before copying this file.
Windows
Click Win + R and paste this text (with your HDD name and username):
C:\Users\[User_Name]\AppData\Local\CaptureOne\
Locate the Presets60 folder there, open it, and locate the CropRatios folder. Copy the aspect ratios into it. Restart Capture One.
How Do I Install Dynamic Symmetry Grids?
To install the guides, simply click on the Choose File section in the Overlay tool and select each file one by one. After that, they will be quickly accessible in your Overlay tool.
I recommend you to turn on the Follow Crop option to use Dynamic Symmetry grids when cropping. You can also set a shortcut for the Overlay tool to quickly turn the Dynamic Symmetry grid on/off.
How Do I Install Export Recipes
To install the export recipes, you need to access the same Capture One system folder as for installing Custom Aspect Ratios.
MacOS
In Finder, select Go -> Go to Folder and paste ~/Library/Application Support/ Capture One
Windows
Click Win + R and paste this text (with your HDD name and username): C:\Users\[User_Name]\AppData\Local\CaptureOne\
In this folder, you need to find the Recipes143 folder and copy the recipes there.
Restart Capture One, and the recipes will appear in your app.
If you have Capture One 21 14.1 or older, you'll need
the Recipes120 folder.
The naming of these folders may be confusing, but it merely represents the engine version used in these recipes. Capture One 22 and 23 are using export recipes created with Capture One engine version 14.3.