The first major update of Capture One 20 (13.1) is finally here!
Previously, developers unveiled some details of this release; now we have a full update features list:
- New Before/After Tool
- Reworked Heal and Clone tools
- Capture One for Nikon
- New Nikon Color Profiles
- Enhanced Lightroom importer
Plus, Capture One 20 now has a new logo and has added some other minor improvements.
Download Capture One 20 and let’s see how all the new features work in practice.
Video Overview
The New Before/After Tool
The new Capture One 20 update brings the real Before/After tool, and it works just like it should.

You can now quickly compare your edit to the original image just by clicking a shortcut Y.

The new tool has two modes, and you can toggle them using Y+Shift shortcut.
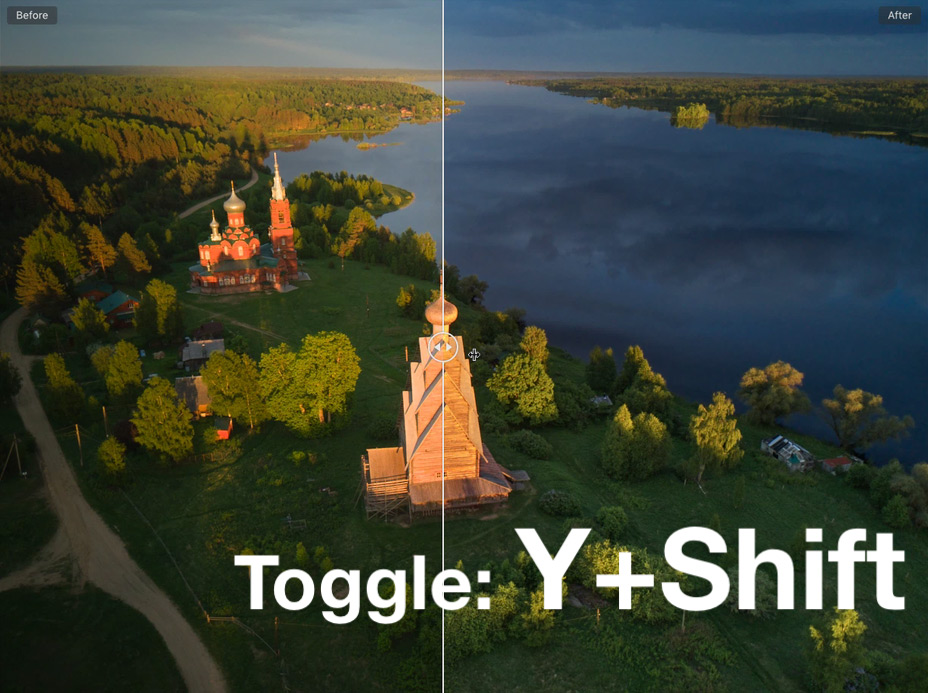
Full View Mode
The first mode, Full View, fits perfectly the need to switch between edited and original images quickly.

Note that the original image, here, always includes composition adjustments, so as to make it easier to compare before/after shots.
If you add some new adjustments, Capture One auto-switches you to the edited variant.
Split View Slider
In the second mode, you see Before/After images on the same screen, divided by a moveable slider. The original image is located on the left and the adjusted variant on the right side.
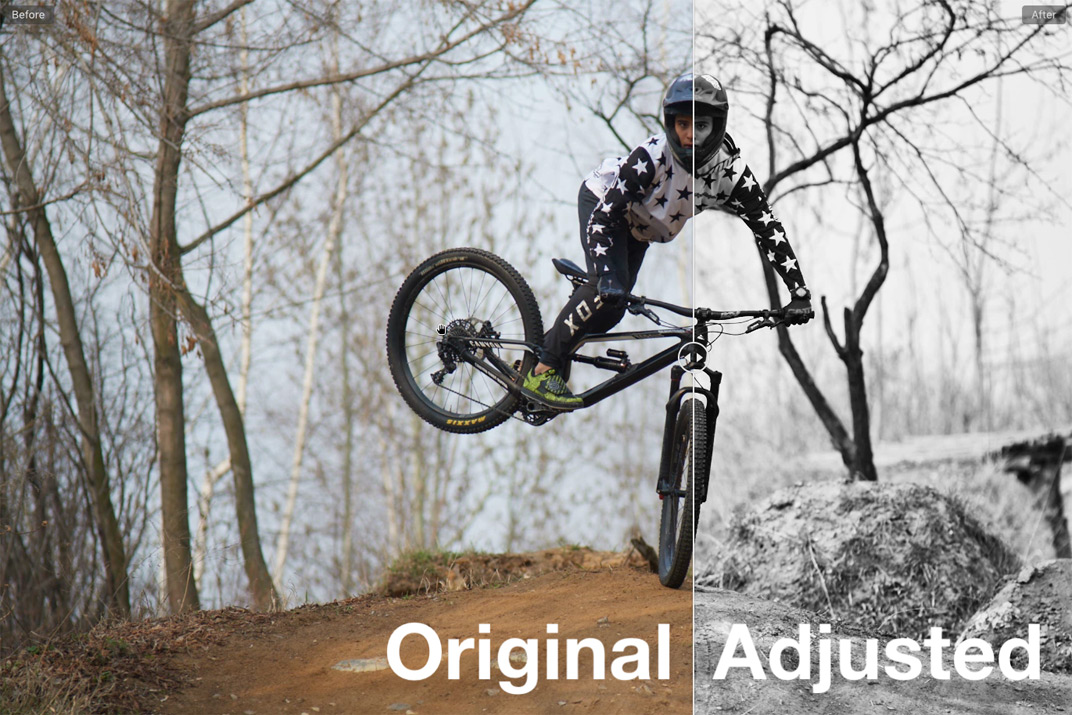
Split View works excellently when you need to compare some particular parts of your edit. You can continue editing in the Split View mode; additional adjustments would still appear on the After variant.
Also, it’s really convenient to compare styles and presets now:

Both modes work well with multiple selected images:
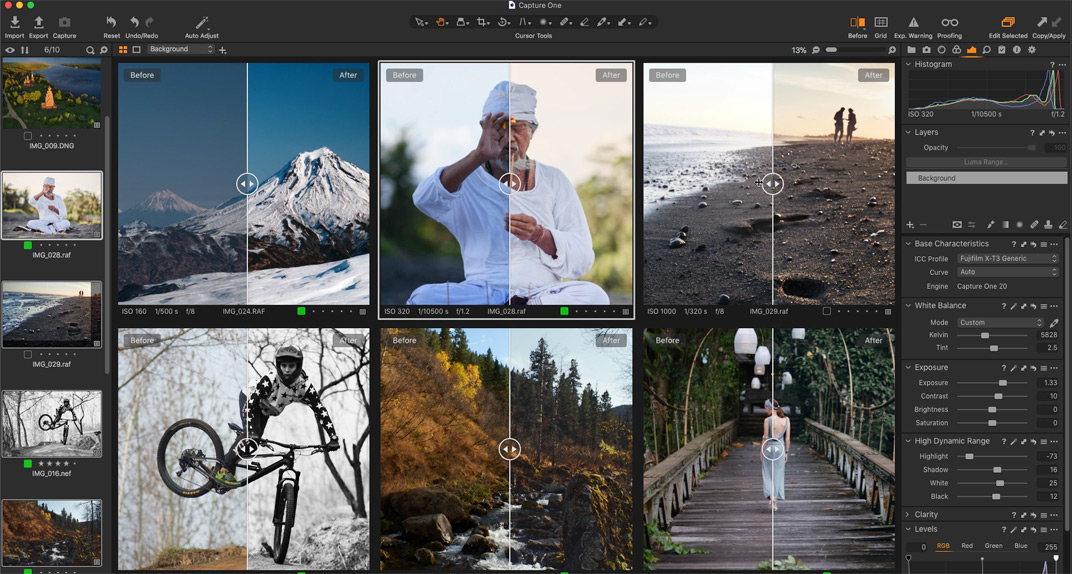
The old Alt+Reset feature has been removed in the new Capture One, which makes total sense.
Ok, long-awaited Before/After tool looks great, now, what about updated retouch features?
Reworked Heal and Clone tools
Capture One developers did excellent work on enhancing Heal and Clone tools for this upgrade.
Heal tool now finds source points automatically, and the tool works way more intelligently than before.
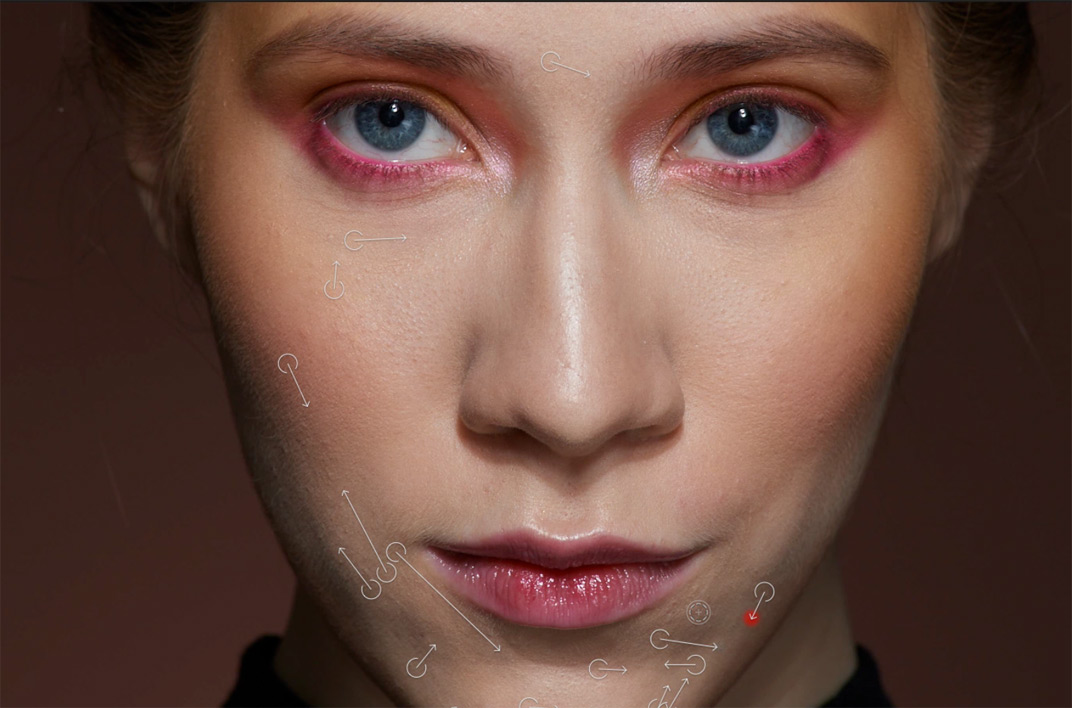
What is even more important, now you can have unlimited heals on one layer. That’s a real game-changer for retouch workflow.
Previously, users have been limited to 16 layers and 100 spot removals. Now, you can do all the editing in Capture One, including complex retouching.
In the new Capture One, you have all control over the retouch areas.
If you need to set a source point manually, you can do this just as before. Hold down the Alt key to set a source point before masking or select an existing arrow to change its position.

Also, when an arrow is selected, the new masking will relate to this source point.

To delete selected area, simply press Backspace; The erasing of the mask removes the arrow as well.
BTW, you can easily hide arrows just by moving the cursor away from the viewer or by unchecking Display Arrow mark in the Heal Brush Settings.
Clone and Heal layers now have their own brushes with all the regular settings. For instance, the Flow setting allows you to increase retouching impact with each cursor movement. It works perfectly for portraits when you need to retouch skin carefully.
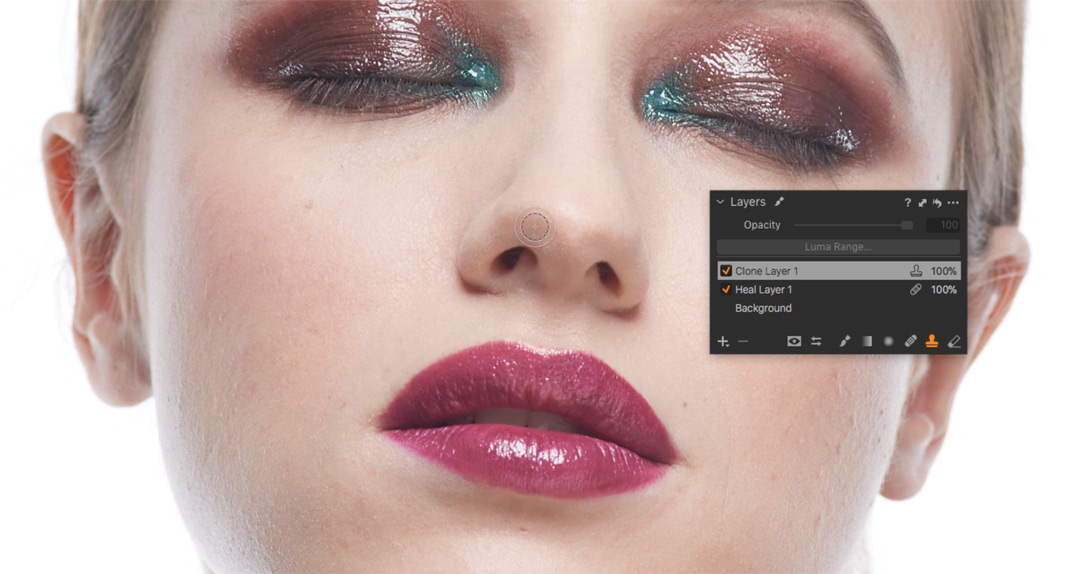
Plus, you can change the Heal or Clone layer opacity to tone down retouch on an image.
However, updated tools have inherited a critical restriction: Capture One still uses the original image as a source for retouching. Thus, you can’t retouch an area and build new retouch based on this correction.
Also, you can’t perform healing and cloning on Offline files, which is pretty understandable.
Apart from the new Before/After tool and enhanced retouching, this update also brings a bunch of new color profiles for Nikon cameras.
Capture One for Nikon

A nice surprise is awaiting Nikon photographers in the new update.
Capture One now offers a special version of the software for Nikon camera owners.
Capture One for Nikon has two versions: Express and Pro.
Nikon Express is a completely free version of Capture One with a basic set of image editing tools.
Nikon Pro offers all the professional features of Capture One and comes with a special, lower price tag.
New Nikon Color Profiles
Capture One developers have replicated Nikon Picture Control color profiles in Capture One. Thus, you can now get the same color for your RAW files as you have shooting JPG.
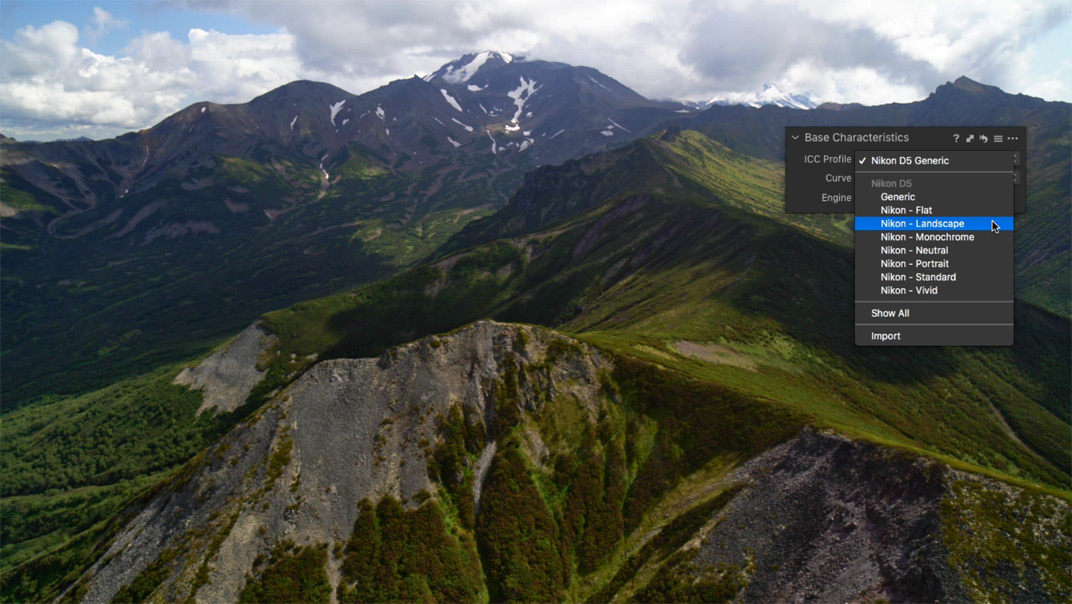
The difference between color profiles is quite noticeable, and for some images, I’ll surely prefer the new Nikon profiles.
At the moment, the new profiles are available for these camera models: D6, D5, D850, D810/D810A, D800, D780, D750, D610, Z7, Z6, D500, D7500, D5600, D5500, D3500, D3400, D3300, Z50.
Also, in the update, you’ll find some improvements to Lightroom catalogs import.
Enhanced Lightroom importer
Firstly, the import process is more transparent now; you can see what will happen after the import.

Secondly, you can now import Smart Previews (or Offline images in terms of Capture One). Once the original files become available, Capture One syncs them automatically.
Other Improvements
New Logo

Capture One developers haven’t changed the logo when jumping from 12 to 20 versions. Now they suddenly introduced it in Capture One 13.1 (technically it’s 13.1, not 20.1).
However, the new logo looks pretty nice! After having it for several years, I’m missing an old white one a bit; it’s always tough to get used to a new design.
Capture One (for Sony) and Capture One Fujifilm have new logos as well:


New onboarding flow
For new users, developers have added a new onboarding screen to get familiar with Capture One features. Here you can customize your interface lightly and even get sample images for your very first editing.
Note that you’ll not see this screen, if you already have a previous version of Capture One installed.
Workspace changes
In the update, the default workspace has been modified a bit; now, some of the tools are collapsed. Also, developers have merged three “Simplified” workspaces into one, and the Black & White editing
workspace had been removed.
New cameras and lenses
Apart from new features, the update brings some new camera and lens profiles.
New Cameras Support
• Canon 250D
• Canon PowerShot G5X Mark II
• Canon PowerShot G7X Mark III
• Nikon P950
• Leica M10 Monochrom
• Olympus OM-D E-M1 Mark III
• Zeiss ZX1
New Lens Profiles
• Phase One XT -Rodenstock HR Digaron-W 50mm f/4
• Tamron 28-75mm F2.8 Di III RXD
• Fujifilm Fujinon XF16-55mmF2.8 R LM WR
• Ricoh GR III (GR Lens 18.3mm f2.8)
• Canon PowerShot G5 X Mark II
• Sony FE 20mm F1.8 G


