

In my newsletter, I’ve offered you a puzzle to challenge your Capture One skills.
I’ve desaturated this image without using any standard tools:

- None of Saturation sliders have been used.
- B&W tool hasn’t been used.
- All color profiles and curves are standard.
- Overlay tool hasn’t been used as well.
- This is not a cheat or something. It’s a real image editing trick.
So, the right answer is… color inversion!

You can desaturate an image by inverting all colors in a layer and setting layer opacity to 50%. This is not a Capture One exclusive trick; desaturation via color inversion works in Photoshop and other image editors.
Here is how to apply it in Capture One:
1. Create a new filled layer
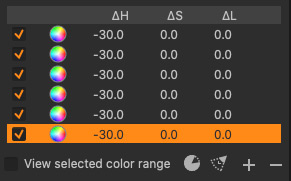
2. Go to Advanced Color Editor and create six “full color wheel” ranges by clicking “+” in Color Editor.
3. Set the Hue value for each range to -30 (+30 works as well, but all six ranges should be the same).
4. Set Opacity to 50%, and you’re done!
However, while experimenting with this trick, I’ve discovered a curious feature of Capture One processing engine. It doesn’t always fully desaturate the image.
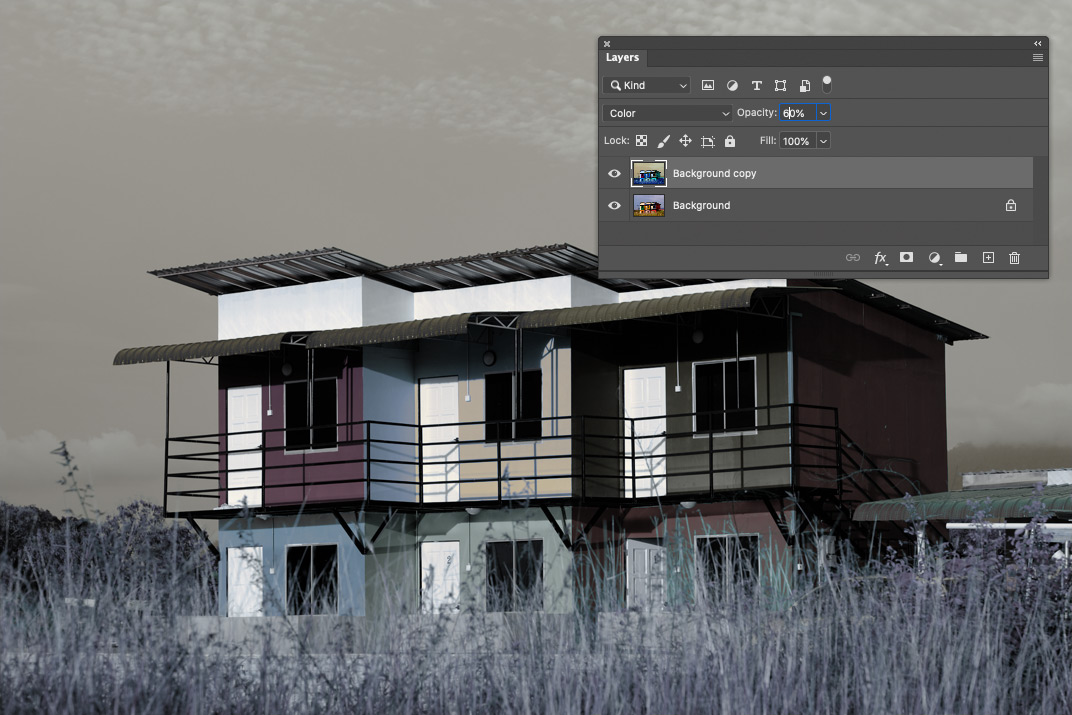
Let’s take this photo and desaturate it in Photoshop using color inversion.

As you can see, it becomes fully desaturated. Now, let’s perform this trick in Capture One:
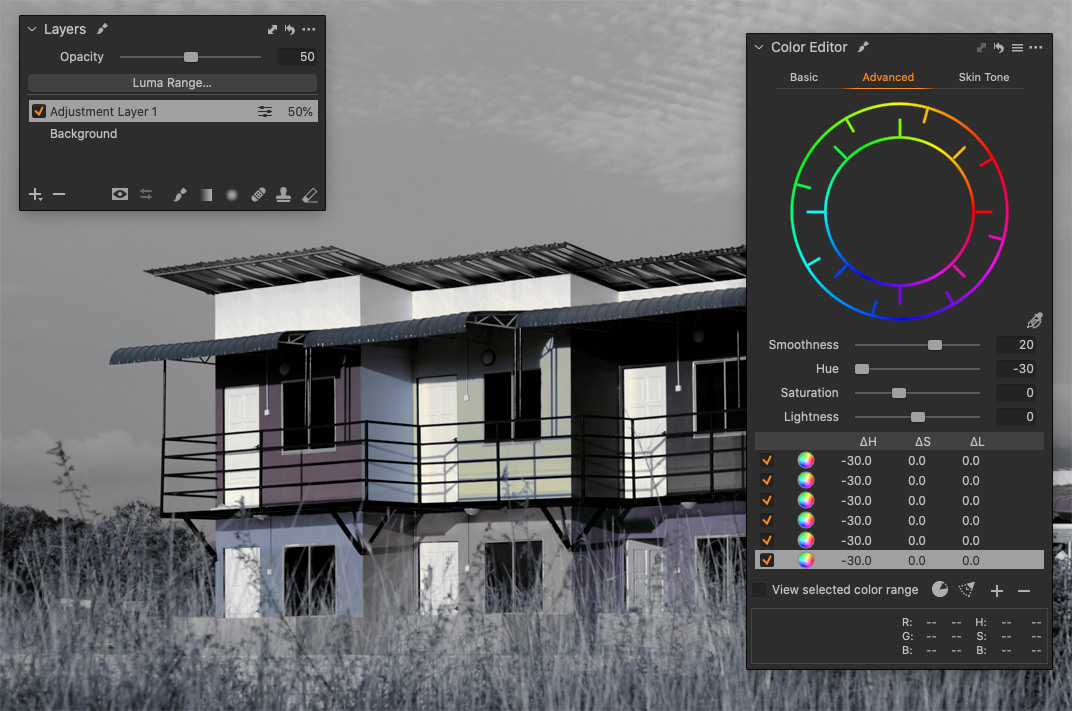
The image is still slightly colored. Why?
There is no mistake in Color Editor; you can easily test it. Simply add six more ranges, and you’ll get the original color back.
It seems that the reason is layer blending algorithms in Capture One. You can get quite similar results in Photoshop by setting Opacity to 60% and blend mode to Color.
How to use this effect in editing?
As I’ve experimented with this feature, I’ve found two practical applications for it.
First, you can desaturate images a bit differently, giving an image a unique look. Try it on your images; you’ll see that the result is sometimes quite distinct from regular desaturation.
To make the color shift more noticeable, adjust the layer’s Opacity or turn off one or two color ranges in Color Editor.

Secondly, this effect works unexpectedly well with portraits. You can use it with other tools to get a more accurate color correction.
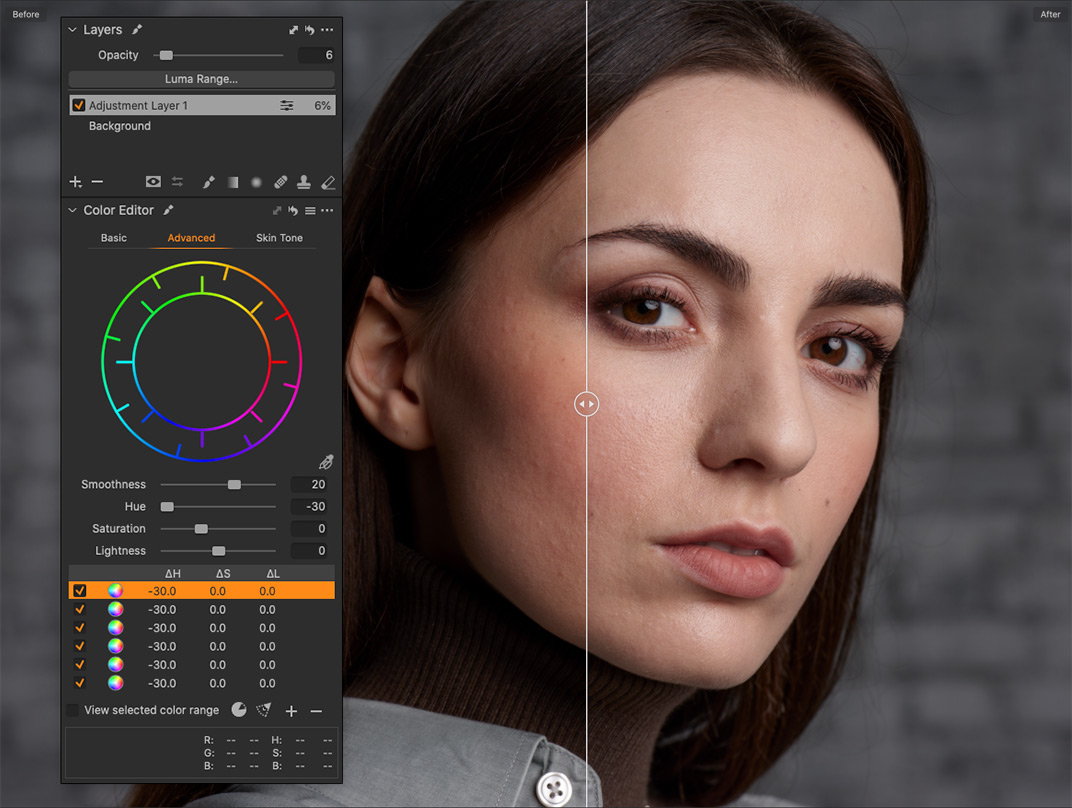
I’ve published a post for all my patrons on how to use this feature in portrait editing.
Become my patron, and you will gain access to this tutorial and patron-exclusive posts with Dynamic Symmetry PNGs, skin tone retouching videos, and more exclusive Capture One content in the future!
Plus, my patrons can download a ready-to-use desaturation preset.
Capture One Hidden Features eBook

Capture One Hidden Features is a collection of more than 200 pro hints to improve your Capture One workflow, structured into an easy-to-read book.
You can download four chapters from the Capture One Hidden Features ebook free of charge:
- 3. Must-Have Shortcuts
- 14. Hidden Features of Layers
- 27. The Power of Mask Inversion
- 38. Automation with Macros
Simply subscribe to the AlexOnRAW newsletter by entering your email in the form below. After subscribing to the newsletter, you’ll immediately receive the four chapters from the book. Also, you’ll regularly get a friendly newsletter with free Capture One tutorials, image editing tips and tricks, and news from Capture One community.