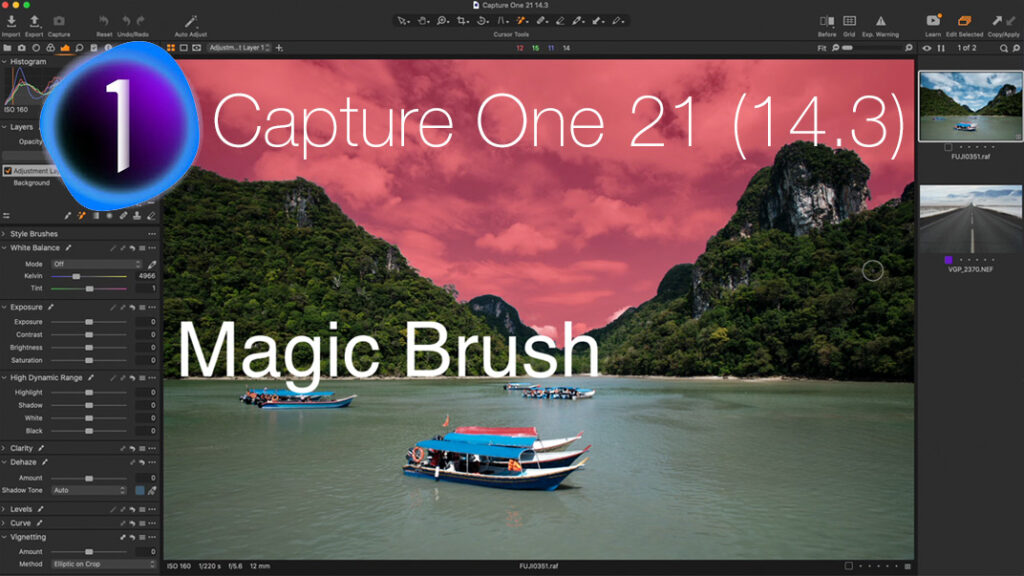
Capture One has just released Capture One 21 (14.3) update, and you’ll just love it! Seriously, it’s one of the most exciting free updates of Capture One ever.
We have got an entirely new tool – Magic Brush, that allows you to create a complex mask from color in a single brush stroke. Just like old color range masks, but on steroids, it’s much faster and smarter. Moreover, Magic Brush works with colorless areas as well, making it a real game-changer in RAW editing.
Next, Capture One developers have fully redesigned the export workflow, making it way more user-friendly. There is now a single export window with a large viewer. Don’t worry; recipes and settings are all in there!
On top of that, developers have finally added several long-awaited improvements. You can now view images inside subfolders, overwrite existing files on export, and synchronize new subfolders into your Catalog.
Sounds too good to be a free update? Download Capture One 21 14.3, and let’s try out all the new features!
Magic Brush in Capture One 21 14.3 Video Overview
Before we continue, I’ve got some fantastic news for you:
You can get 10% OFF on Capture One 21 new license or upgrade with this code: ALEXONRAW
Simply enter it at the checkout in Capture One store, and you’ll immediately get a 10% discount.
Magic Brush
Magic Brush is a new brush that allows you to create a mask from color remarkably quickly.

All you need to do is make a brush stroke over any color, and Magic Brush will create a complex mask of similar colors.
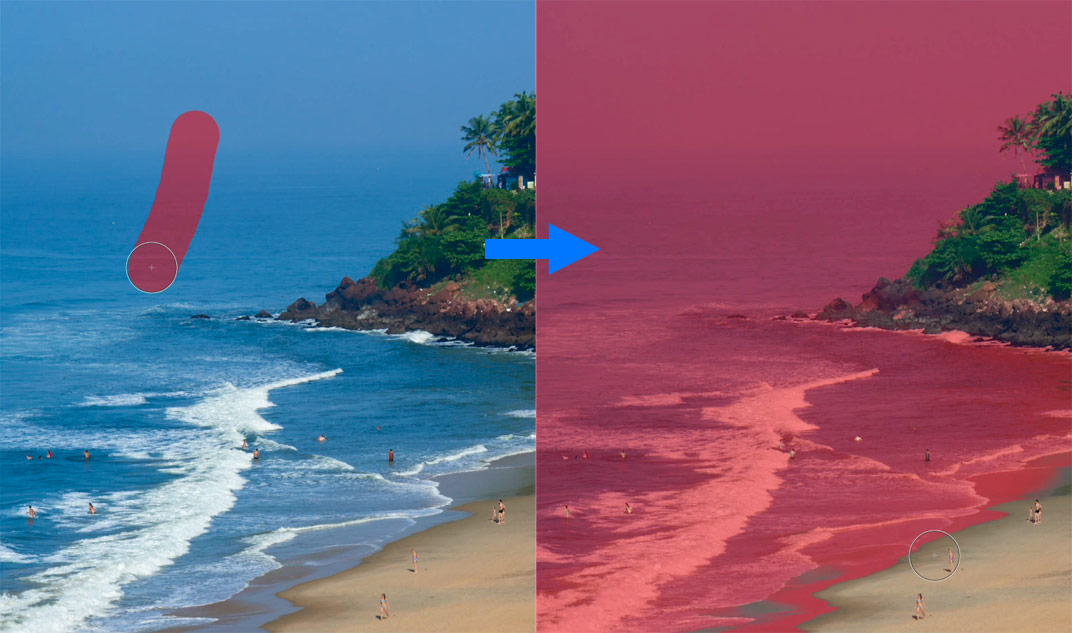
Likewise, additional brush strokes expand the mask.
Also, you can mask similar colors on an entire image at once by selecting “Sample Entire Photo”:
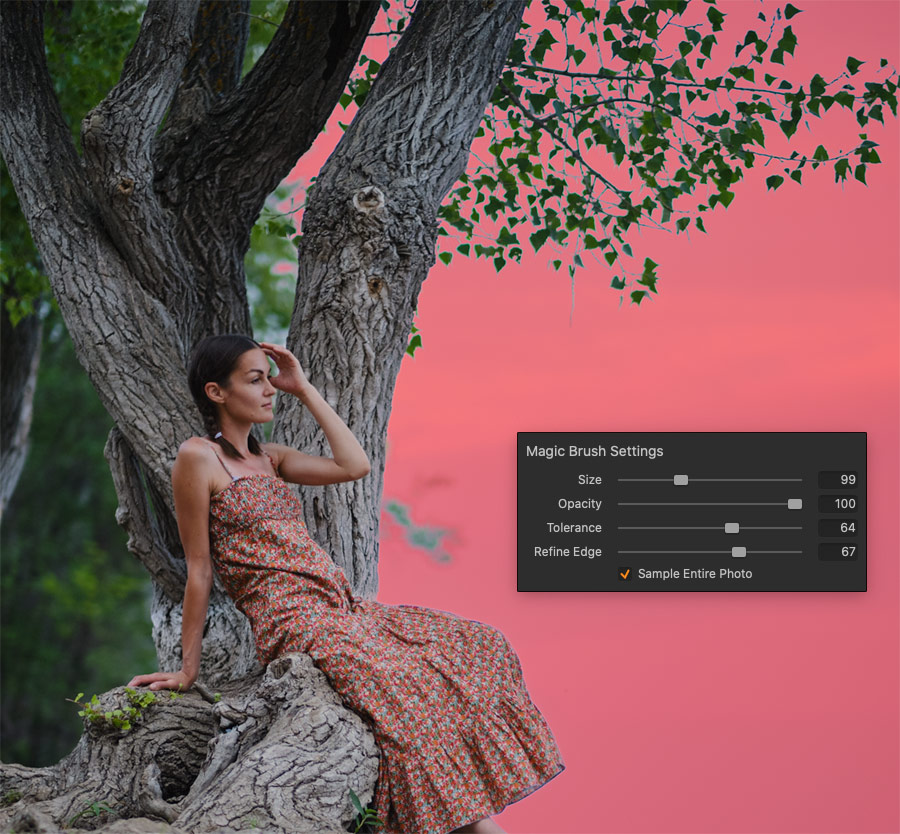
Basically, you can now create a complex mask from any color in a matter of seconds! Need to enhance some area on an image quickly? Make a single brushstroke, and you’re ready for adjustment:

Now, there is even more of a wow-feature: you can mask colorless areas with Magic Brush!
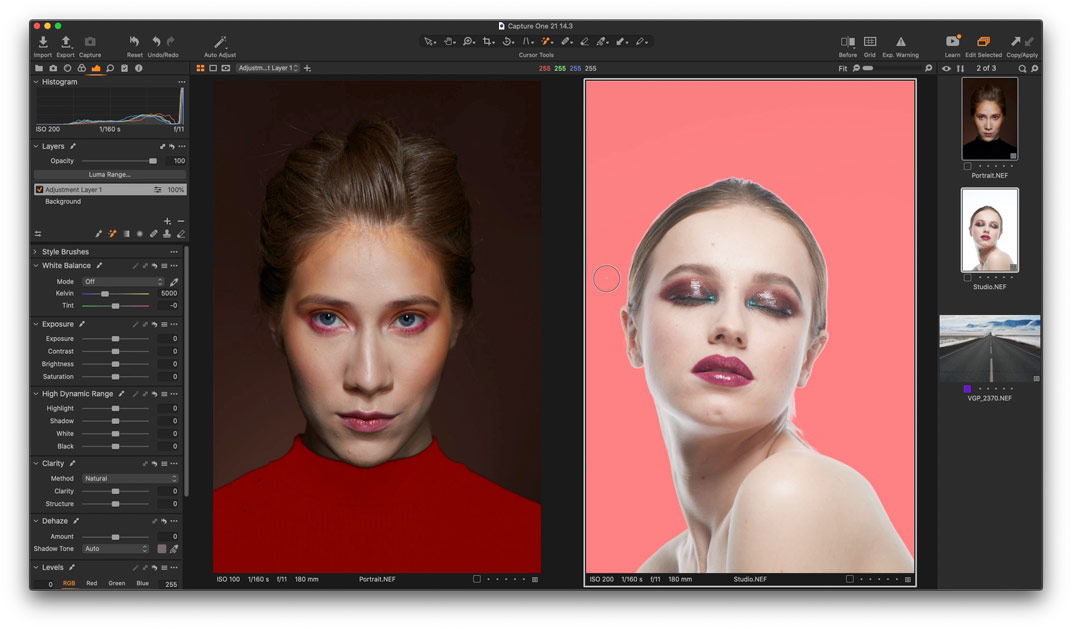
Thus, you can easily create a mask of shadows or highlights.
Let’s take this landscape. Previously, you would need to draw a mask manually or use Luma Range to mask the background. With the new update, we can create such a mask in a single brushstroke, like this:
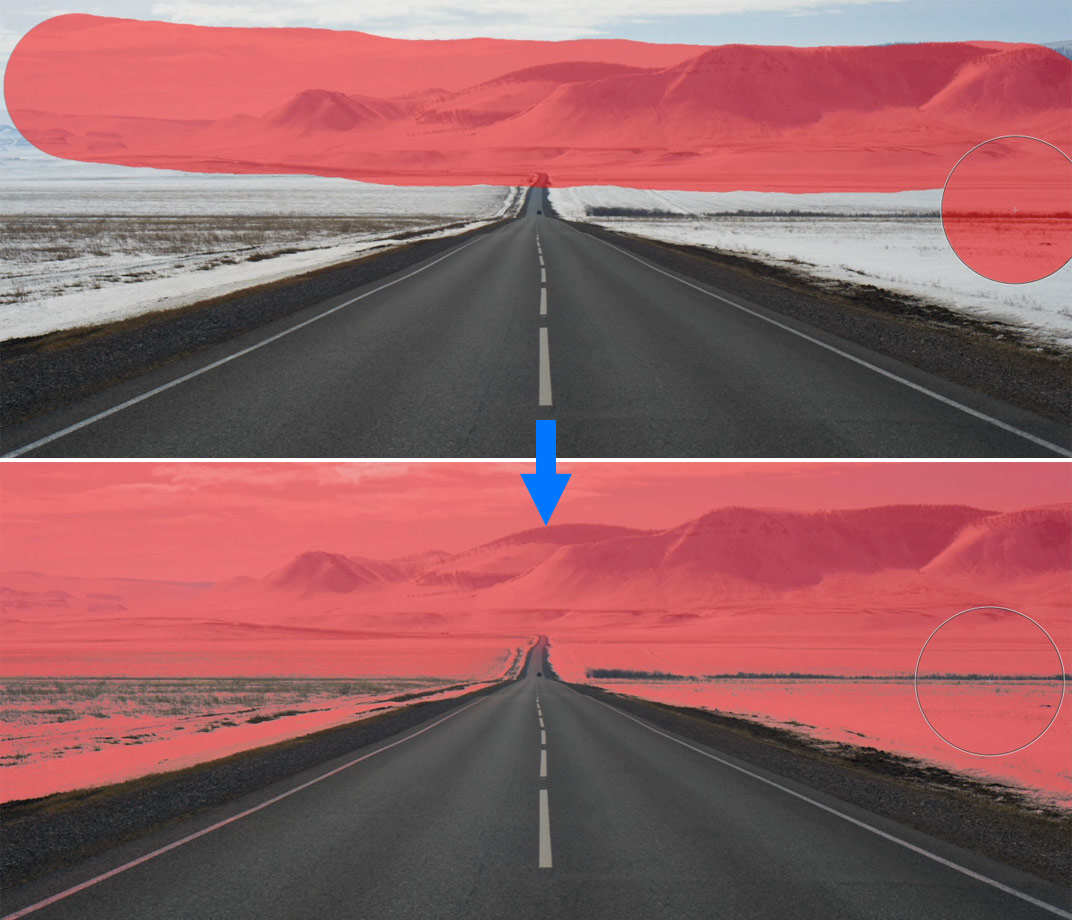
We can now dehaze this area, add a bit of contrast and HDR.
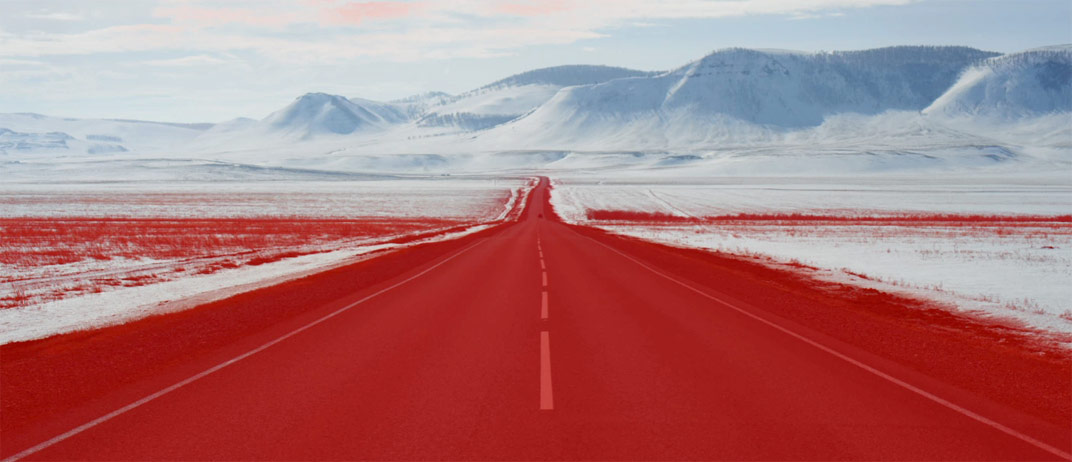
Keep in mind that Magic Brush creates a standard mask so that you can easily erase, refine and invert it:
BTW, the new Magic Brush has the same default shortcut as the regular brush, but you can quickly switch between them using Shift + B keys. Either that or you can set up a custom shortcut for it.
Apart from Size and Opacity, Magic Brush has two additional settings:

Tolerance defines the range of colors that will be included in a mask. Low Tolerance will restrict your mask to very similar colors only.

High Tolerance will create a mask that covers a broader range of colors.

From my experience, the universal value here is around 50-70. Usually, it allows you to get the required mask with fewer brush strokes.
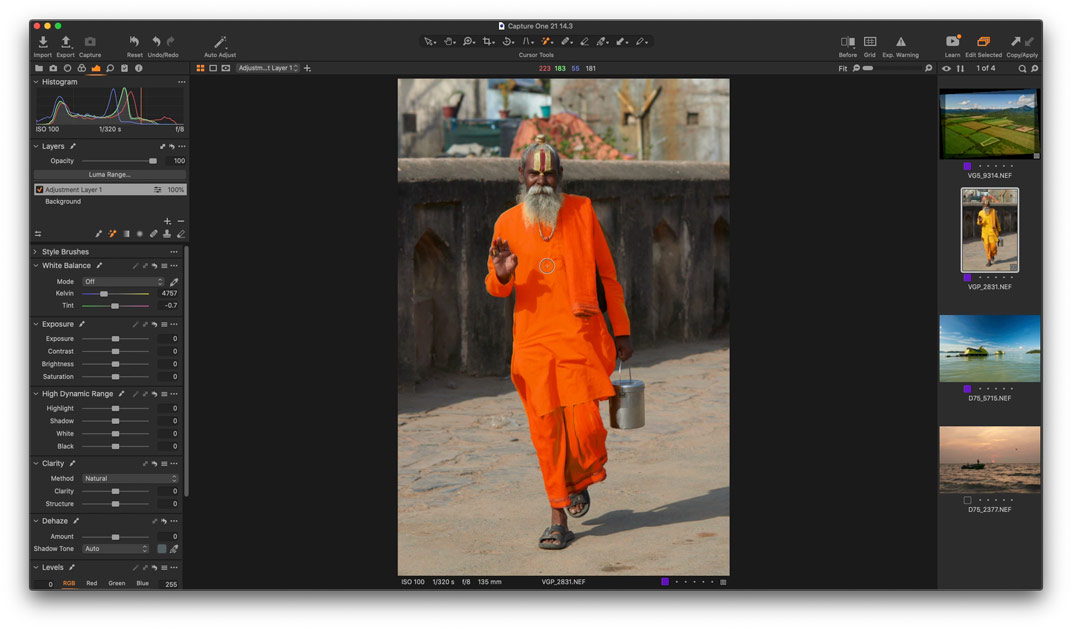
The Refine Edge slider works similarly to Refine Mask feature. A higher Refine Edge value will create a mask with softer edges, which, again, fit most images better.

I’ve tested Magic Brush for a while, and I am still kind of shocked how easily and quickly we can draw masks now.
In fact, you don’t draw masks anymore – you select objects on your image in one or a couple of brushstrokes. Layers now save you time, not consume it.
Ok, next, let’s see the new export in Capture One 14.3
New Export
In the new update, developers have finally redesigned the export workflow to make it more user-friendly. There is no Output tool tab any more:

All process recipes and other settings are now located in a new Export Images window.
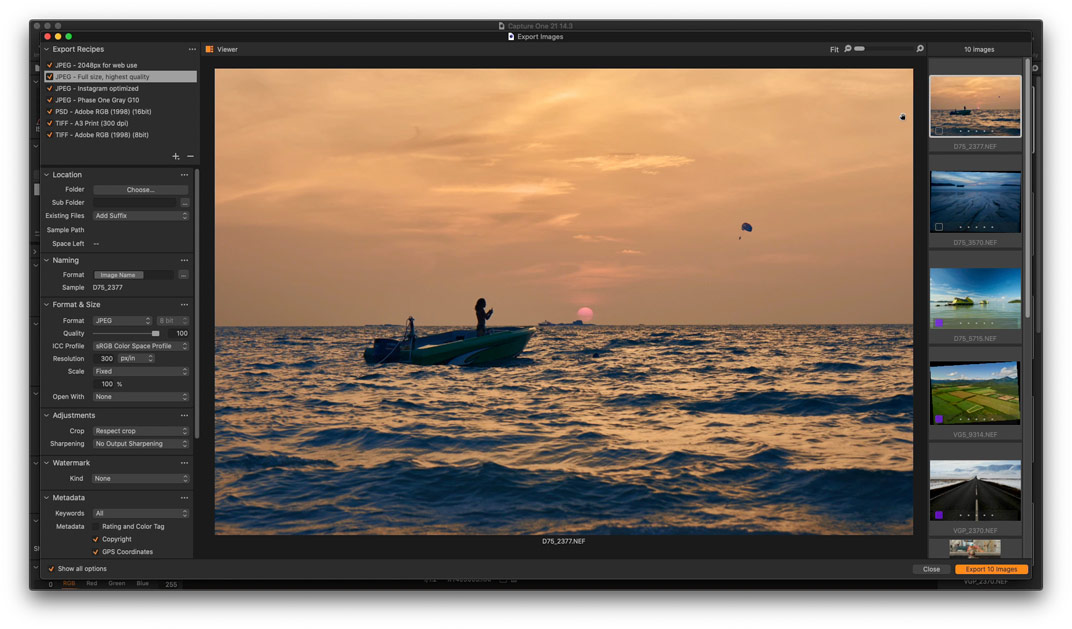
Here we see all the images chosen for export and a large Proofing Viewer representing selected recipe settings. Feel free to switch to the grid mode if it suits you better. Just as before, you can create custom recipes and export images in different formats simultaneously.
Still, there are several important changes.
Advanced export settings are now hidden under “Show all options” checkmark:
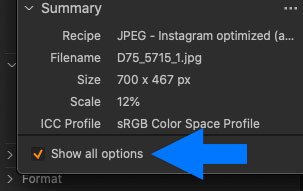
Next, all preferences are now specific for the selected recipe. Previously, Naming and Location were common for all recipes. In the new version, all export settings can be different for each individual recipe.
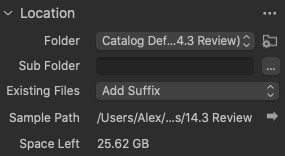
Location tool has three new options.
Firstly, every catalog and session now has a default output folder. You can change it by clicking on the folder icon here:
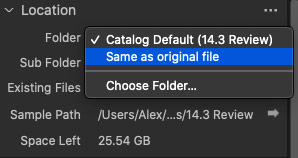
Secondly, you can export images into the same folder where original files are kept:
Thirdly, you can now decide what to do with existing files on export. You are free to choose between adding a suffix to file names (as it was before), overwriting duplicates, or skipping files that have been already exported.

Also, there is a way to access export settings quickly. Long press the Export icon, and you’ll access a menu with additional export options:
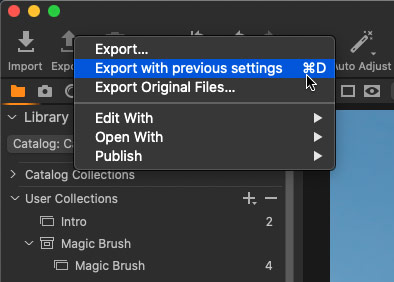
Here you can quickly export with previous settings, export original files, and publish images to Capture One plugins.
The new export workflow looks excellent, but what about in-app recipe proofing? It’s still here! Simply long press the Proofing icon to choose a recipe to proof with.
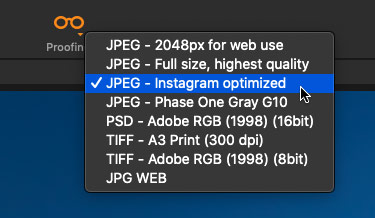
BTW, not all tools have survived redesign: The Batch Queue and Process History have been removed.
Apart from these new features, the new update adds several minor improvements.
Other improvements
View Images in Subfolders
Firstly, you can now view images in catalog subfolders!
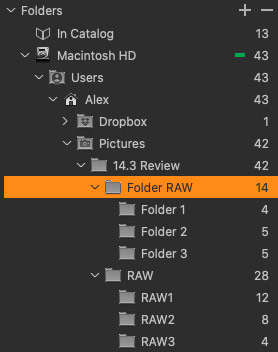
Previously, this was a real headache for former Lightroom users, who got used to browsing all images in subfolders collectively. The new update makes this feature available in Capture One as well. Still, you can always turn it off if you wish.
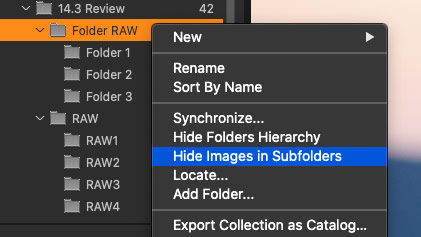
Synchronize new Subfolders
Next, you can now synchronize new subfolders into the catalog! Simply right-click on a folder, choose Synchronize, and select Include subfolders.

To synchronize images from known folders only, select Only include previously added subfolders:
Tethering improvements
Finally, you can now trigger an exposure from Capture One when tethering with Fujifilm cameras.
Also, several Leica cameras and lenses have now got support for Focus Nudge tool.
Focus Nudge supported Lenses:
- Leica Super-Elmar-S 24
- Leica Elmarit-S 30 CS
Focus Nudge supported Cameras:
- Leica S (Typ 007)
- Leica S3
New Camera Support
- Fujifilm X-T1 IR
- Fujifilm X-S10 tethering
- Panasonic Lumix G99/G95/G90
New Lens Support
- Fujifilm Fujinon XF16mm F2.8 R WR
- Fujifilm Fujinon XF18mm F1.4 R LM WR
- Fujifilm Fujinon XF27mm F2.8 R WR
- Fujifilm Fujinon XF50mm F1.0 R WR
- Fujifilm Fujinon XF10-24mm F4 R OIS WR
- Fujifilm Fujinon XF70-300mm F4-5.6 R LM OIS WR
- Fujifilm Fujinon GF30mm F3.5 R WR
- Fujifilm Fujinon GF80mm F1.7 R WR
- Sony FE 35mm F1.4 GM (SEL35F14GM)
- Sony FE 40mm F2.5 G (SEL40F25G)
- Sony FE 50mm F1.2 GM (SEL50F12GM)
- Sony FE 50mm F2.5 G (SEL50F25G)
- Sigma 15mm F2.8 EX DG (Canon EF)
- Sigma 16mm F1.4 DC DN (Sony E)
Capture One 21 Summary
Previously, in my Capture One 21 overview, I predicted that we’d see more new features in the upcoming free updates.
Capture One 14.1 introduced Style Brushes, the new Import Viewer, additional ProStandard profiles, the increased zoom, redesigned Keystone tool, and live-view feature for Leica cameras.
Capture One 14.2 came out with native support for the new M1 Apple silicon.
Now, Capture One 14.3 brought us Magic Brush, new Export, and other valuable improvements.
Here is a short summary of all the new features that have been added with Capture One 21 release:
- The new Dehaze tool
- Magic Brush
- Speed Edit
- Style Brushes
- Reworked import and export
- ProStandard camera profiles
- Show images in subfolders
- Synchronize new subfolders
- Overwrite existing files on export
- Apple M1 Native Support
- Leica tethering support
- HEIF support
- The Increased 1600% Zoom
If you have been a bit disappointed with the first version of Capture One 21, you can now see that the upgrade is 100% worth the money.
Capture One Hidden Features eBook
Capture One Hidden Features is a collection of more than 200 pro hints to improve your Capture One workflow, structured into an easy-to-read book.
You can download four chapters from the Capture One Hidden Features ebook free of charge:
- 3. Must-Have Shortcuts
- 14. Hidden Features of Layers
- 27. The Power of Mask Inversion
- 38. Automation with Macros
Simply subscribe to the AlexOnRAW newsletter by entering your email in the form below. After subscribing to the newsletter, you’ll immediately receive the four chapters from the book. Also, you’ll regularly get a friendly newsletter with free Capture One tutorials, image editing tips and tricks, and news from Capture One community.


