Do you have a quality control stage in your Capture One workflow?
That’s a crucial part of the image editing process. Quality control allows you to find and fix the mistakes you made during the editing.
The idea is rather simple:
No matter how experienced you are, your eyes get tired over longtime editing. Thus, sooner or later, you will make mistakes in image adjustments. The worst thing is that probably you would not even notice it. Because our vision quickly adapts to the current color on an image, you’re working with.
Here is a typical case when this issue occurs:
You’re working with images from some event. At the beginning of the editing, everything goes smooth, but as your eyes get tired, you’ll start making small mistakes in setting proper White Balance. Nothing critical at first glance. Just insignificant changes in White Balance from image to image. What is really dangerous here is that each next image is becoming even more corrupted, when compared to the previous photographs.

In the middle of editing, you can’t notice that – your vision has already adapted to these spoiled variants. Thus, pictures at the end of the editing might have a significantly different color from the first images.
The same thing is happening when you’re doing a batch editing of some travel photographs or developing images from an intensive portrait session.
I see this issue repeating again and again with each new group of students at my photography course.
How to avoid this?
You can’t avoid it. This issue is built-in in our nature. But you can double-check yourself by implementing quality control into your workflow.
Here are my rules of running a proper quality control:
1. First of all, to decrease the number of mistakes, don’t forget to take short breaks during editing.
I know, it’s tough to pause your processing when you’re in the “flow”. But your eyes are not in the flow no matter how you feel about it.
2. After you finish the editing, take a 30-40 minutes break. Then scroll through your images once again to control editing quality. And again. It’s essential to navigate images pretty quickly to prevent adaptation of your vision. This way you’ll notice issues you have missed previously. If you’re new to image editing, I recommend you to repeat scrolling 3 or 4 times.
3. My rule of thumb is to run the first quality control in the full-screen mode and the second quality control in preview-mode. Large and small image sizes allow you to notice composition issues and inappropriate details in your images.
Here are two ways how to turn on preview-mode in Capture One:
– Select some web-size recipe and turn on Recipe Proofing mode

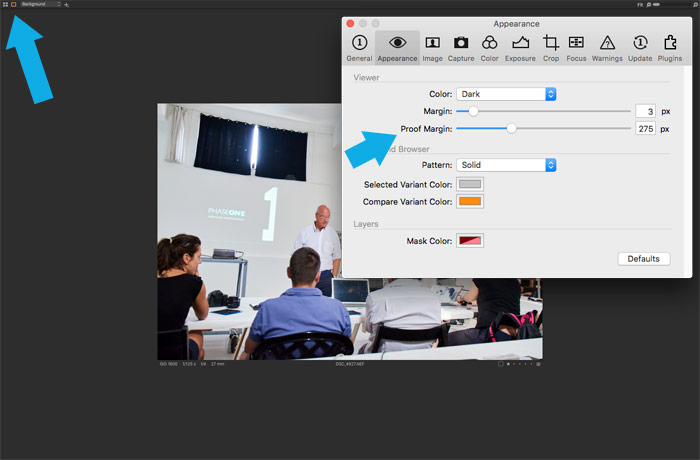
– Turn on Proof Margin mode (don’t forget to set the required margin in Capture One preferences).