

This week, we’re going to discuss some of the most underrated and overlooked tools in Capture One!
You’ll learn how to:
- Adjust the white balance of a portrait according to the skin tone
- Apply multiple auto adjustments
- Create a complex session/catalog structure with a single click
- Access new features using style shortcuts
- Completely change any color
But first, a friendly reminder that we’re having a summer sale at AlexOnRAW.com, where you can access hundreds of Capture One styles and courses at up to 75% off:

There are three Summer Bundles available:
- Courses Bundle contains over 14 hours of video lessons and 200+ Capture One tutorials.
- 800+ Styles Bundle includes over 800 Pro Styles approved by thousands of photographers worldwide.
- Complete Bundle contains all my courses and styles at an unbeatable 75% off!
Ok, now back to the most under-appreciated tools in Capture One!
The Normalize Tool
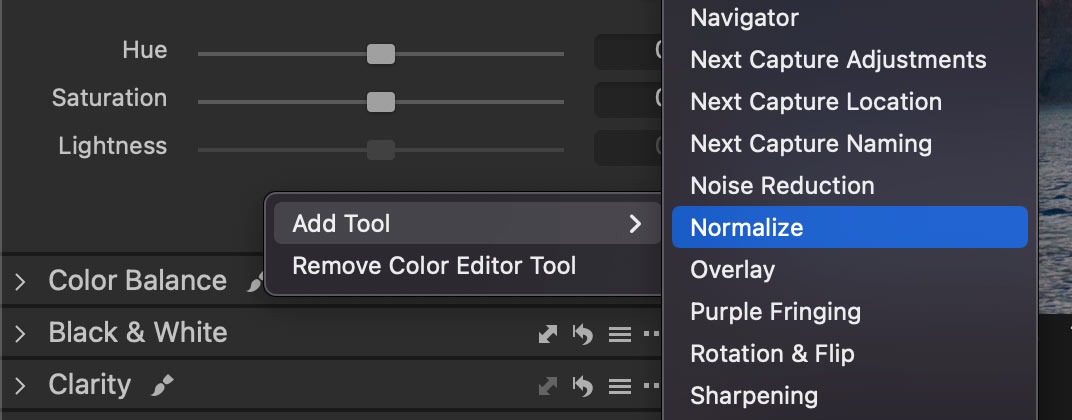
Speaking of the most overlooked tools, let’s start with the Normalize tool since it is literally hidden in the Capture One interface. To access it, you have to add it to a tool tab manually:
I think the main reason why Capture One developers abandoned the Normalize tool is that the new Smart Adjustments tool does pretty much the same thing, but in a more advanced way.
However, the Normalize tool has two unique features:
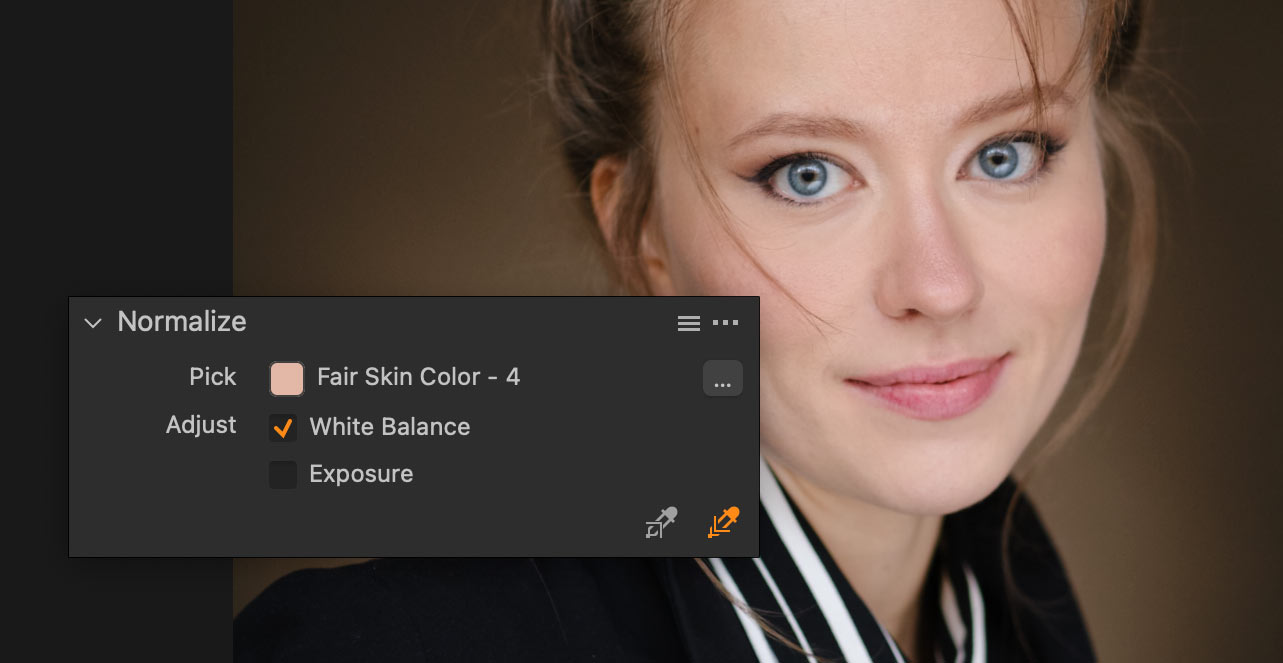
First, it allows you to set specific RGB values as a reference, which gives you more options for setting white balance. Here is a free lesson from my Capture One Expert Course where I show how to use Normalize presets to quickly adjust portrait WB:
In this video, you’ll also learn some of my favorite color correction techniques in Capture One!
BTW, the Capture One Expert Course is now $50 OFF, and with the course, you’ll also gain access to the closed Capture One Expert Community and ten bonus materials, such as Capture One styles and tools:
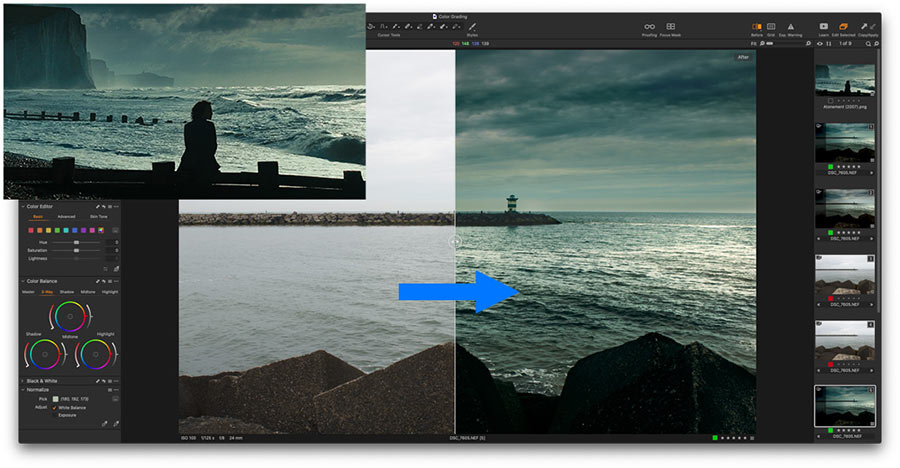
The second feature of the Normalize tool is that it allows you to pick a sample color with the eyedropper, making it easier to replicate a color grading from a reference image.
Here is my detailed tutorial on how to use this technique in practice:
Multiple Auto Adjustments
Some tools in Capture One have a magic wand icon that allows you to automatically adjust that tool. However, there is a way to perform all auto adjustments at once with a single click. Simply select the tools you want to adjust and trigger the auto adjustments by clicking Auto Adjust or using the shortcut CMD/CTRL + L.
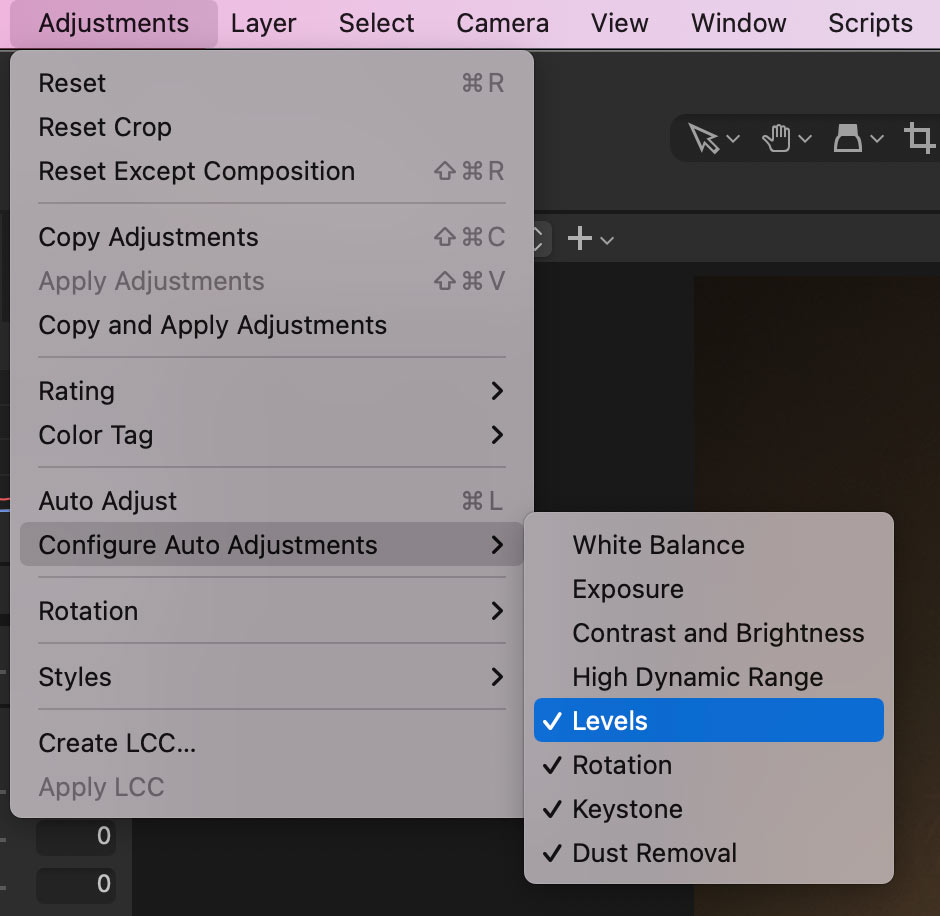
In the Expert Course, I also share my approach to auto-adjusting images in Capture One. The point is that some auto adjustments, such as White Balance, Exposure, or HDR, are completely useless in auto mode, and others, such as Levels and Dust Removal, are extremely helpful.
Create a complex session/catalog structure with a single click
Have you customized your Capture One workspace and shortcuts? I bet you did!
But what about Session and Catalog templates? If you regularly create new sessions or catalogs, templates can save you a massive amount of time!
Templates contain saved structures of Capture One sessions and catalogs. Thus, you can create a new session or catalog with pre-defined albums, folders, and projects.
Also, you can save the Next Capture Naming settings in a template.
Keep in mind that templates can’t affect your Capture One workspace or image adjustments.
In practice, templates are extremely useful when you regularly create sessions or catalogs with similar structures.
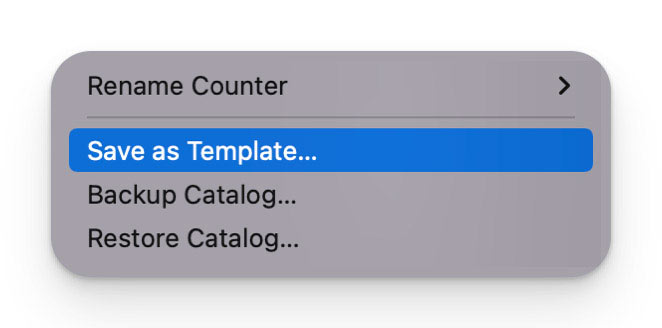
For instance, some photographers create a new session for every studio work. Usually, such a session has a standard set of folders and albums. This session structure can be easily saved in a template by clicking File->Save as Template.
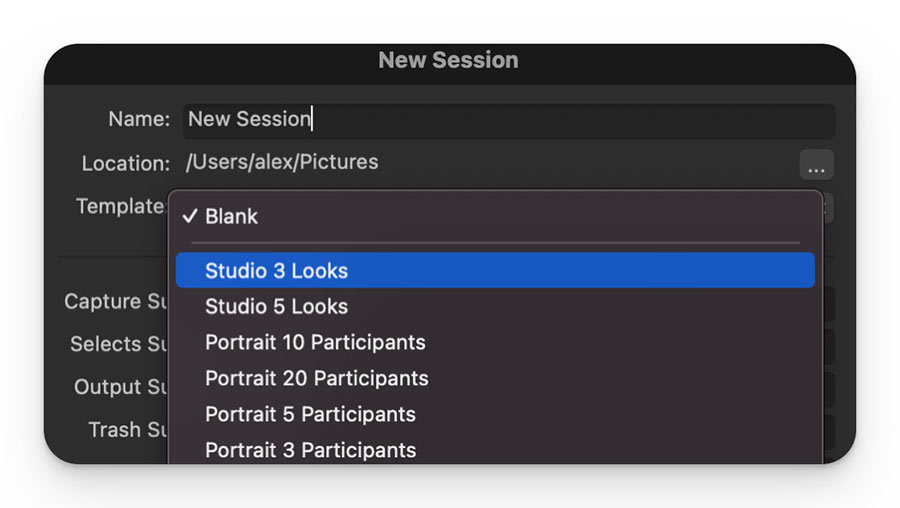
Now, you can select this template when creating a new session to get the same structure.
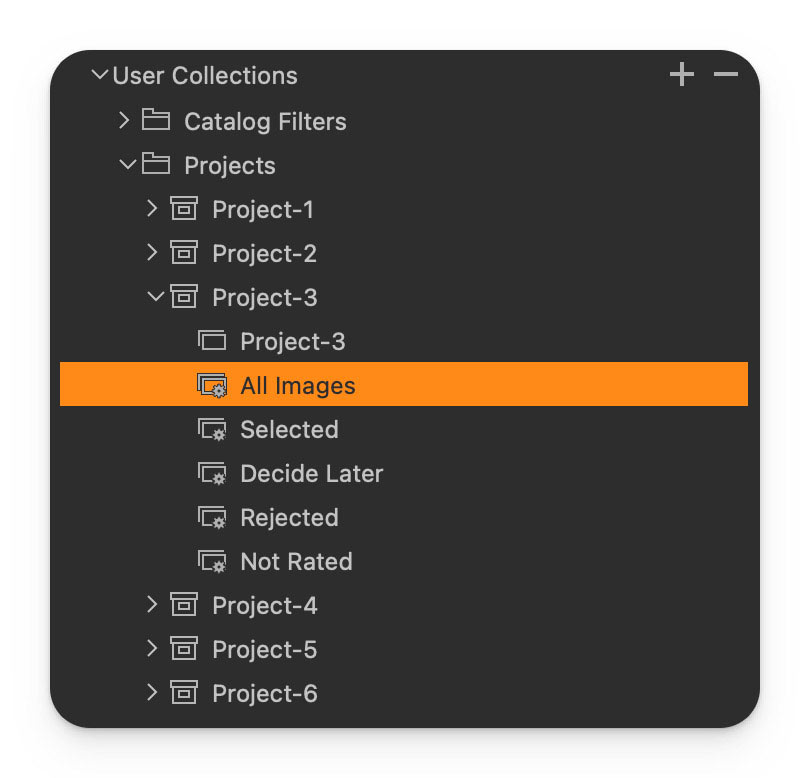
Catalog templates work the same way; however, catalog structure is built around virtual collections, such as projects and albums. That’s why you can’t use session templates for catalogs and vice versa.
Check out my free tutorial to learn how to duplicate albums and projects using templates. Also, we’ll discuss the best practices for template creation.
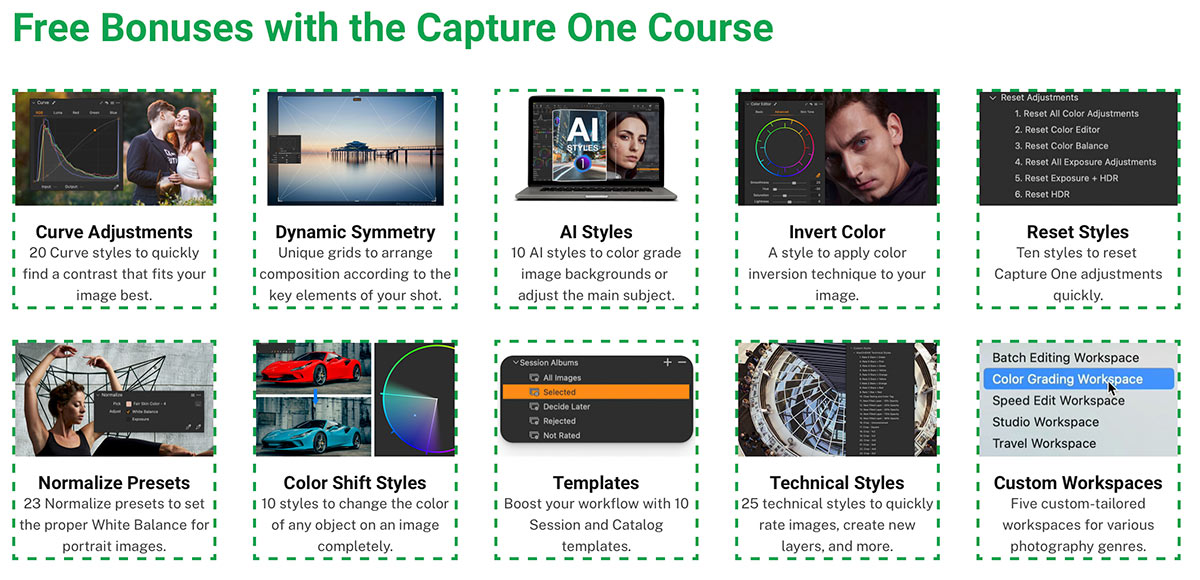
BTW, the Capture One Ultimate Toolkit includes 10 unique session and catalog templates designed to speed up your studio workflow or enhance your image library.
 It’s now 60% off, giving you access to a huge amount of unique Capture One tools, including:
- 40 Ready Looks
- 20 Curve Adjustments
- Color Shift styles
- Visual Accent styles
- Session and Catalog Templates
- Dynamic Symmetry grids
- Social Media and Cinema Aspect Ratios
- Social Media Export Recipes
- 50 Style Brushes
- Skin Tone presets
- 20 Tech style brushes
- Social Media Export Recipies
- Quick Color Edit styles
- Color Curve presets
- Color Toning styles
- Custom Workspaces
- HSL preset for Color Editor
- B&W in Layers styles
Access new features using style shortcuts
Recently, Capture One 23 16.2 has introduced style shortcuts to apply pre-made looks and adjustments quickly. However, this feature offers way more than just a few additional hotkeys. Style shortcuts allow you to access new features previously unavailable in Capture One.
For example, you can use style shortcuts to set ratings and color tags simultaneously.
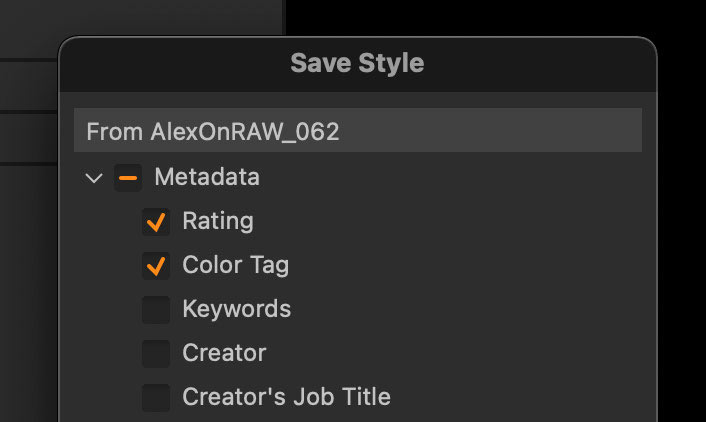
First, create a style that contains a rating and a color tag only:
Next, assign some handy shortcut to it; I prefer standard rating keys with a modifier:
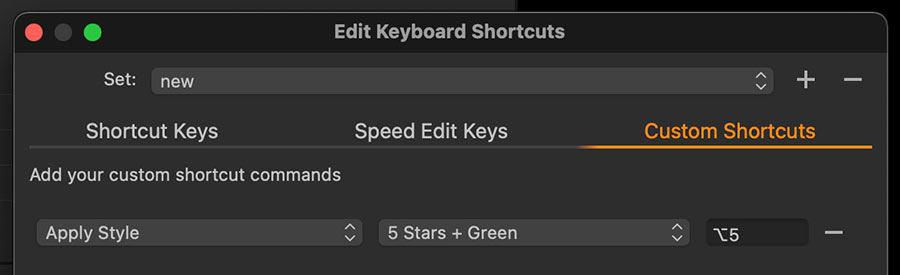
Done; you can now rate and tag images simultaneously!
Here, I’ve prepared for you four more ideas for custom shortcuts:
- Make Sky Vibrant
- Create New Layers with Custom Opacity
- Change Film Simulations with Hot Keys
- Quickly Apply Color Ranges
Completely change any color
One of the least-known features of Color Editor Skin Tone is that it can completely change any color.
Simply mask the object you would like to adjust. Next, select the whole color wheel in Skin Tone and set Hue Uniformity to 100.
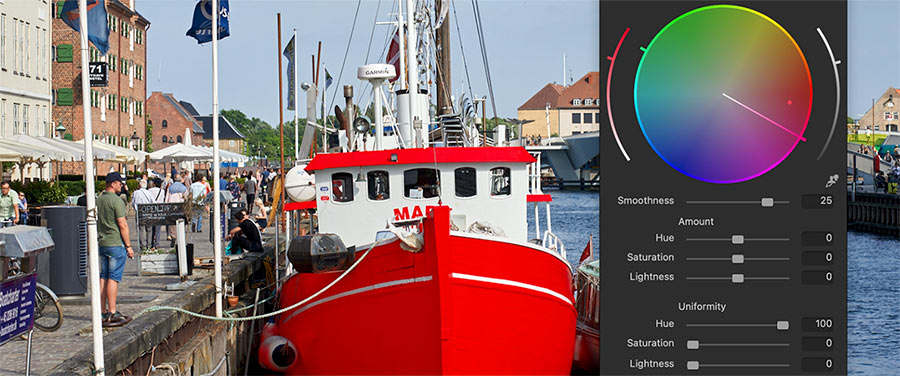
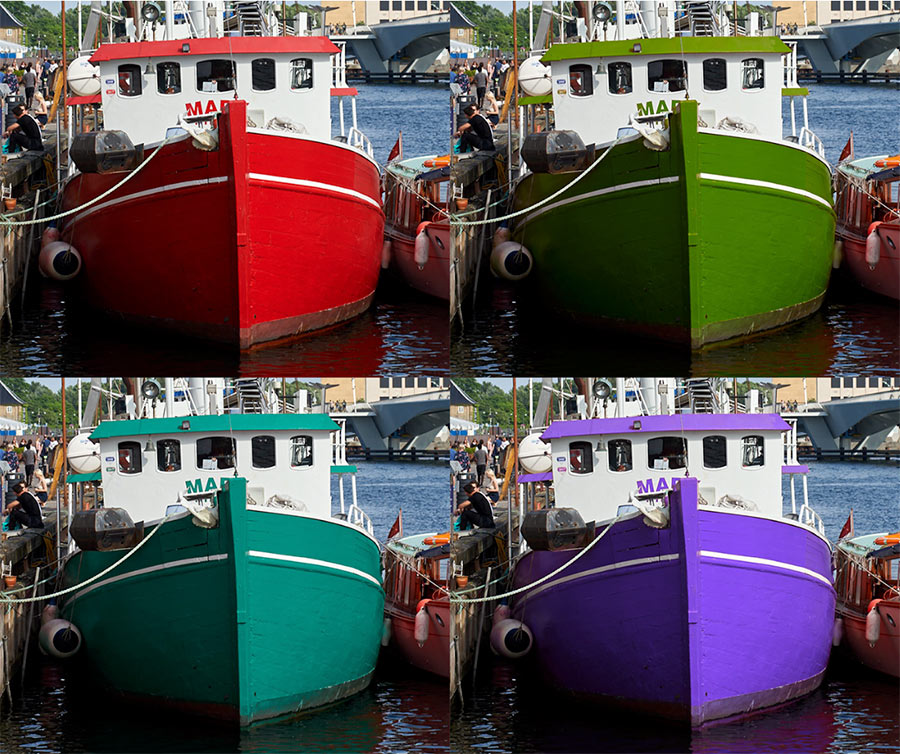
Now you can quickly modify color just by moving the small dot on the color wheel:
If you want more tricks like this, the Capture One Expert Course has hundreds of PRO tips to enhance your Capture One workflow.
Here is what Capture One photographers are saying about this course: