

Capture One 12 release brought us plugin support and I continue to test all the plugins available at the moment.
Previously I’ve shared my experience of working with Format.com plugin – an awesome smart platform for running your online portfolio.
This week I’ve tested JPEGmini plugin for Capture One.
JPEGmini uses patented image optimization technology to reduce your file size up to 80% without losing image quality. In my case, I was able to easily reduce the file size of an image from 18 Mb to 3.5 Mb without harming image quality.
You’ll find all the sample images below, but first of all, I think we should answer an obvious question – why save space?
Why Save Space?
That’s a good question, indeed. In the age of high-speed internet and 4K movie streaming, you should not worry about reducing the size of your images on the web. In theory.
In practice, I see three objective reasons for this:
1. Speed Up Website Loading
If you’re running a blog with a mass of illustrations (like AlexOnRAW), the image size is a big deal.
For example, my article “10 Reasons to Switch to Capture One Pro 12” weight about 12.5 Mb and that is not really friendly for mobile devices and slow internet connections.
The worst thing is that slow loading affects the overall user experience of your readers, so I would be happy to reduce the images size at least by 20-30% percent.
2. Improve SEO
For stand-alone blogs, search engine optimization is one of the most important things under-the-hood of useful content.
Smaller image sizes tend to improve your SEO, so image optimization is a thing worth implementing into your publishing workflow.
3. Reduce Expenses on Storage
If you’re running a photography business you are probably paying for storing images: on cloud storages, on web-galleries and other services which charge you for an amount of space you’re using.
Reducing image size would reduce the usage of the space and thus would save you some money.
Ok, now, let’s head to the JPEGmini plugin itself.
JPEGmini Plugin Installation
At the moment, JPEGmini plugin is in the beta and is available for Mac OS only. But developers assured me that Windows version will be ready in the coming weeks.
As you would download the plugin, there are two ways to install it into Capture One:
1. Double-click JPEGmini.coplugin file; Capture One will automatically install the plugin.
2. Drag-n-Drop plugin file into Capture One Plugins window.

Now you need to activate the plugin.
JPEGmini Plugin Activation
JPEGmini plugin has no trial version and you have to activate the license to use it. Capture One plugin, as well as Lightroom plugin, requires JPEGmini Pro Suite license for a price of $89.
But if you wish to test how JPEGmini works, you can download a trial version of JPEGmini standalone app, which allows you to reduce the file size of the first 200 images for free.
BTW, thanks to JPEGmini developers for providing me with a free key to test the plugin!
Ok, the plugin is activated, let’s try it in action!
JPEGmini in Capture One
There are two ways of how you can use the JPEGmini plugin in Capture One:
Publish
Right-click an image, select Publish and choose “Export with JPEGmini”.

It opens a basic export window where you can specify the file path and other standard image settings.
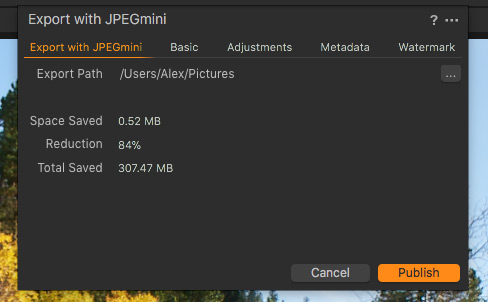
Clicking “Publish” exports the image with applied file size reduction.

Publishing works pretty well, but since I’m using process recipes workflow, I’m more interested in the second way of using JPEGmini.
Open With
I have a variety of processing recipes for different formats and tasks, so I need a seamless way of integrating JPEGmini into my workflow.
Fortunately, Open With option suits perfectly here. Let’s see how it works.
First of all, you need to set “Optimize with JPEGmini” in the Open With settings of selected recipe.
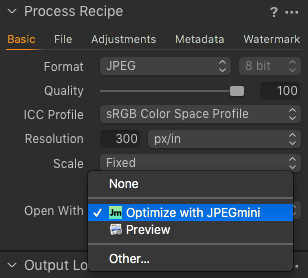
Now, images are processed with recipe’s settings and after the processing JPEGmini automatically reduces the file size.
If you worry about the speed of processing, JPEGmini doesn’t affect it seriously. In my case, processing with JPEGmini takes 10-20% more of time comparing to the regular processing.
What I really like in the JPEGmini plugin, is that it’s well integrated into Capture One. You just need to activate it once and select it the Open With settings – now you’ll always have a better file compression.
BTW, have you noticed something unusual here?
JPEGmini has no settings at all! Auto algorithms do all the work, there are no options for “less” or “more” reduction.
I found it to be just awesome! I’m okay with basic file size settings in Capture One, but I don’t want any other options to worry about, so JPEGmini fits excellently here.
Ok, what about the results of the reduction?
JPEGmini Tests
I think it’s worth to run tests on four different images sizes:
- Full-Size Image
- Hi-Res Image (4000 px long edge)
- Hi-Res Web Image (1920 px long edge)
- Low-Res Web Image (1072 px long edge)
Plus, it’s important to notice that the file size reduction rate is highly dependent on the specifics of the particular image.
For these tests, I will take three different images of various sizes and cameras.

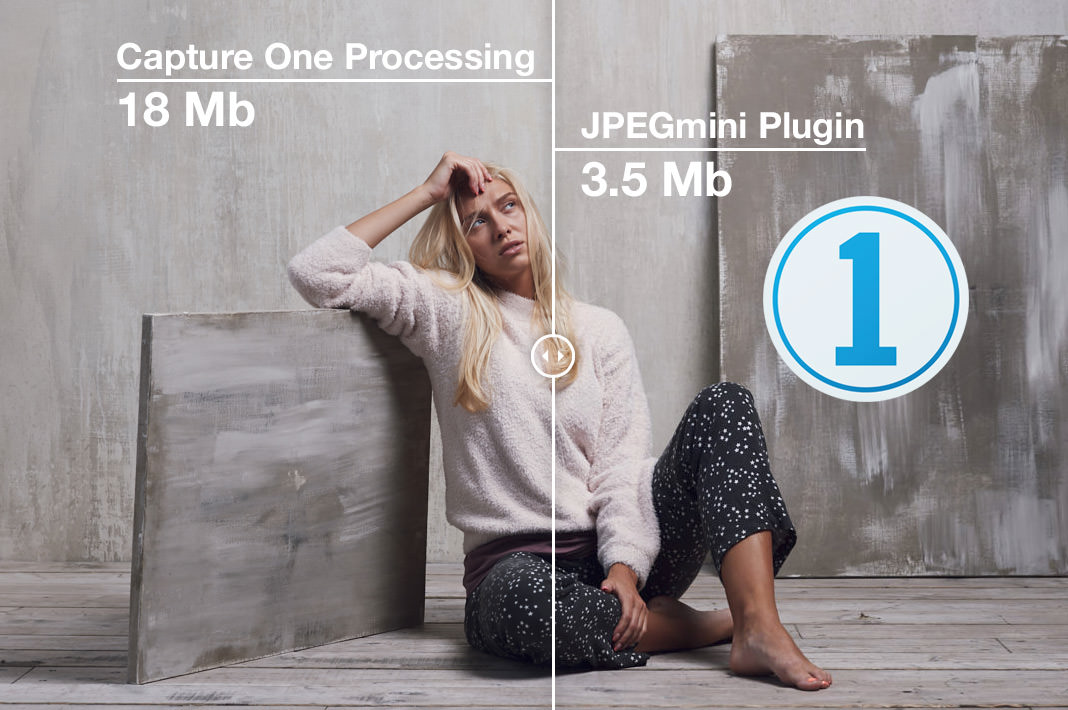
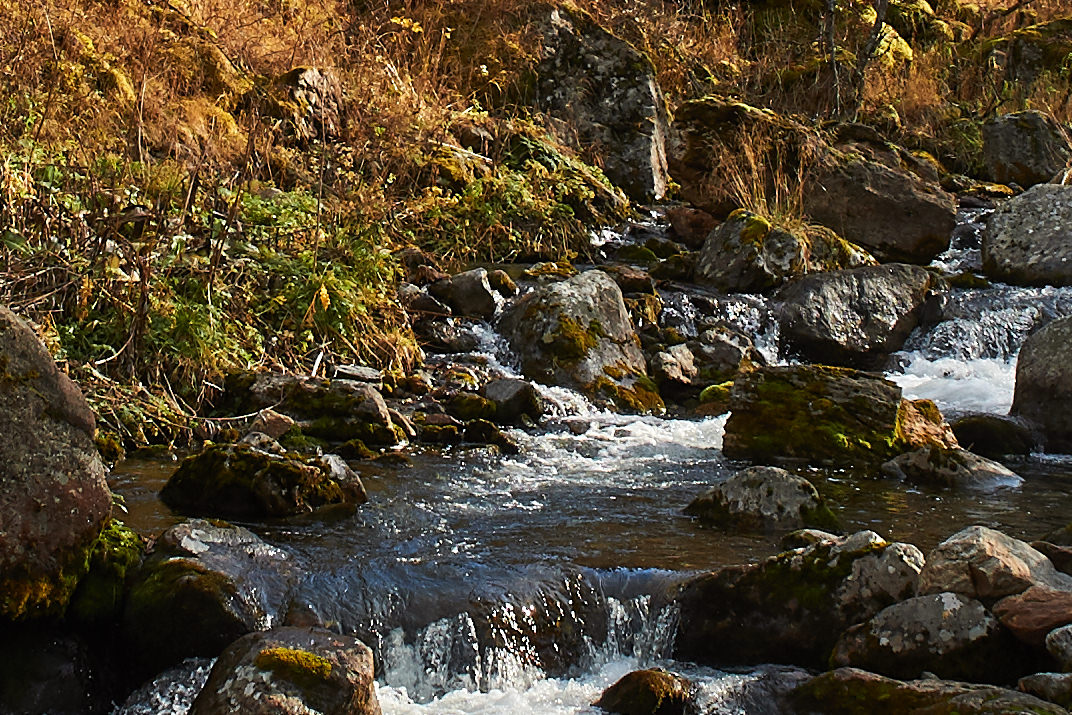
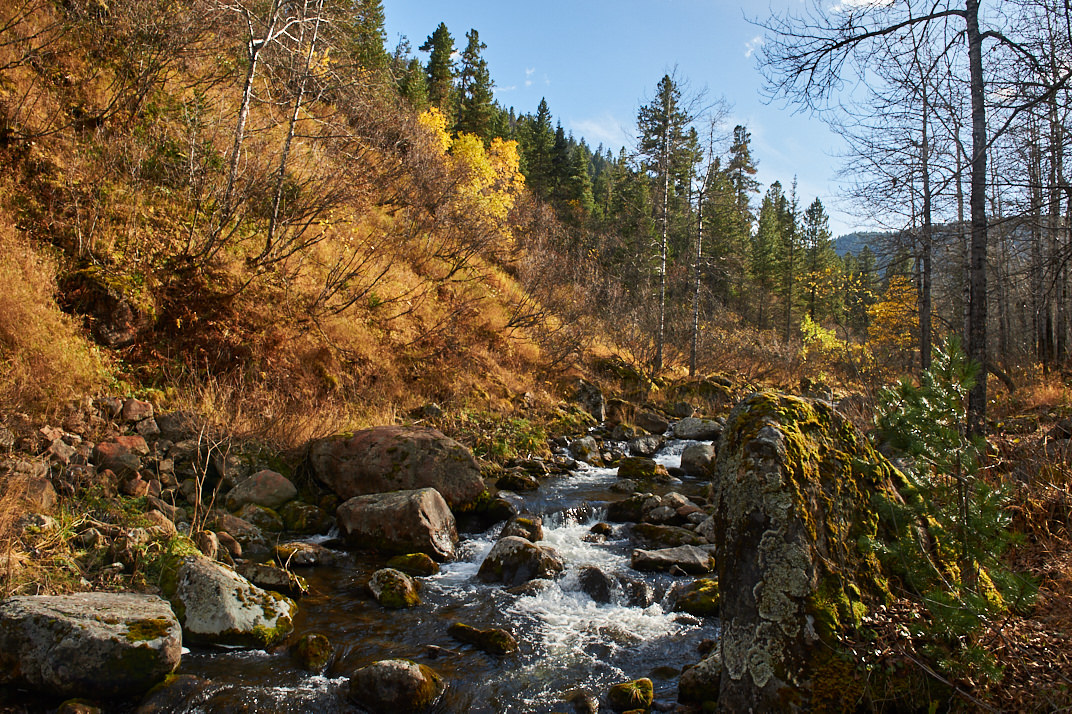
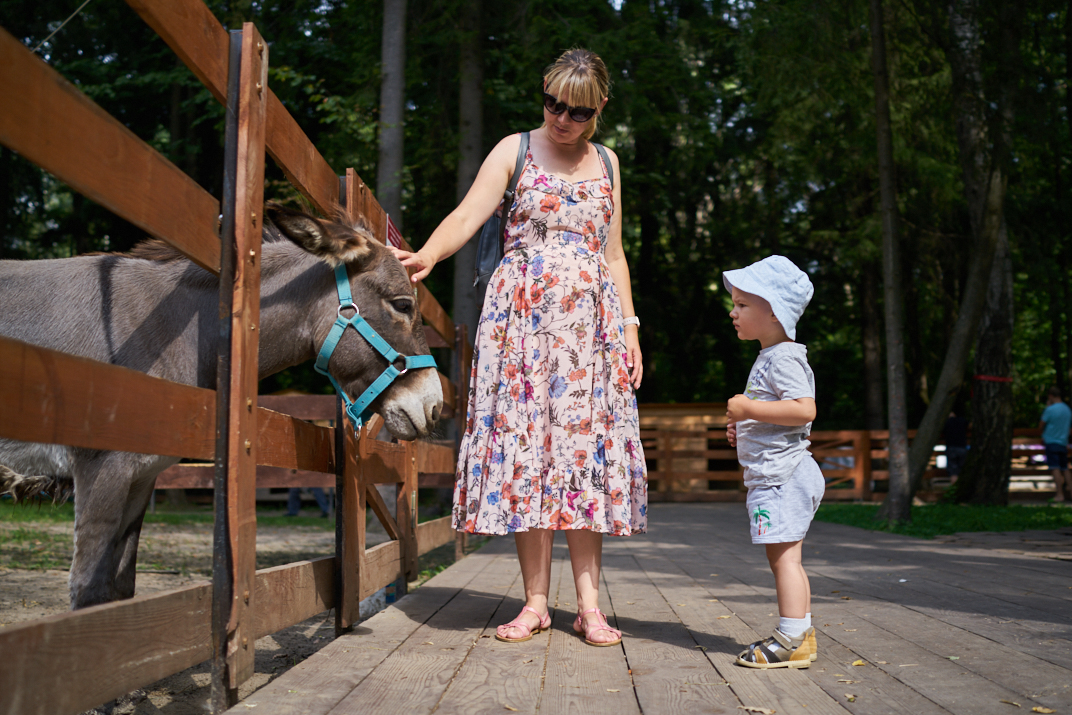
Full-Size Images
Here JPEGmini gives just crazy file size reduction rates!
Standard Capture One processing (JPEG, 100 Quality) makes this 6690px long edge image 18 Mb in size. Optimizing with JPEGmini reduces it to 3.5 Mb with no quality loss!
Here is a 100% crop of both images, so you can compare the quality:
Left: Regular Processing, 18 Mb
Right: JPEGmini, 3.5 Mb


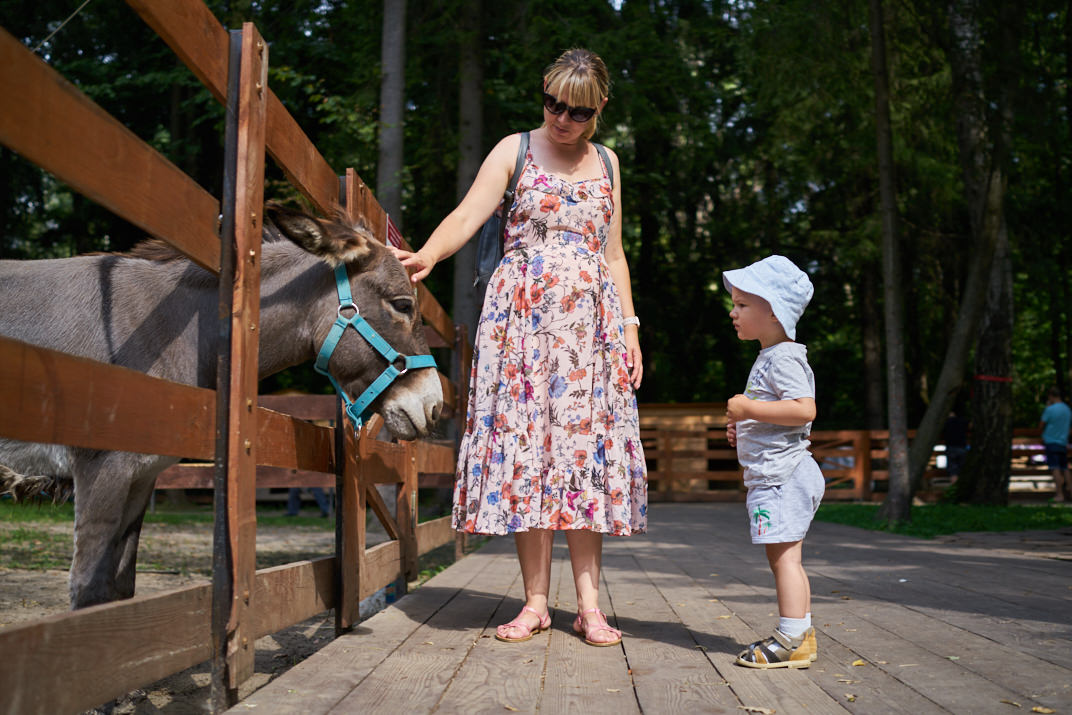
Two other test images also shows quite impressive results:
Left: Regular Processing, 26.8 Mb
Right: JPEGmini, 4.4 Mb

Left: Regular Processing, 24.7 Mb
Right: JPEGmini, 12.9 Mb

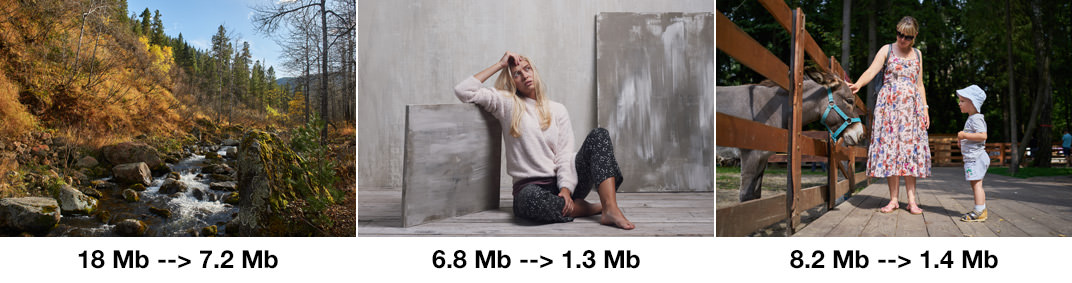
Hi-Res Images (4000 px long edge)
Sometimes clients ask for hi-res images to choose the best picture for the further retouching. It doesn’t make much sense to send full-size images here, so 4000 px long edge would be fine enough for this task.
Optimizing with JPEGmini significantly reduces the file sizes in this case as well:
So, if your clients require all the images to be sent to them for the primary selection, JPEGmini would save you a significant amount of disc space.
Hi-Res Web Images (1920 px long edge)
1920px long edge images are ok for retina displays and JPEGmini works well for this task too:

Low-Res Web Images (1072 px long edge)
1072px is the size I use for most of the illustrations on AlexOnRAW and the file size reduction is crucial here.
As you can see, JPEGmini offers here much better compression comparing to the regular Capture One processing:
Left: Regular Processing, 1.4 Mb
Right: JPEGmini, 483 Kb

Left: Regular Processing, 615 Kb
Right: JPEGmini, 128 Kb


Left: Regular Processing, 859 Kb
Right: JPEGmini, 169 Kb
However, it’s not quite fair to compare web images with Capture One processing, because many of us use Photoshop for this task.
Let’s compare JPEGmini with Photoshop’s Save for Web feature.
JPEGmini compressed my 1072px image to 128 Kb.
As you can see, we can get the same file size only by saving the image with 62 Quality settings in Photoshop:
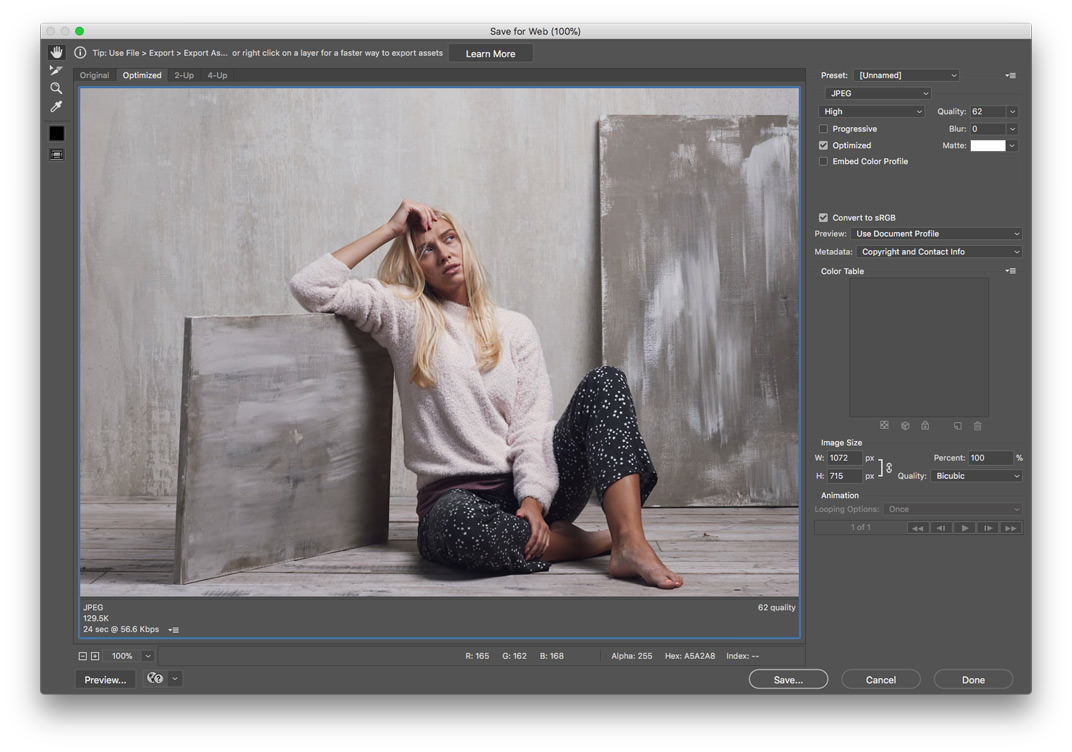
Plus, it’s quite difficult to seamlessly integrate Photoshop Save for Web feature into your Capture One workflow. On the opposite, JPEGmini offers it right from the box.
Is it worth the money?
I like how JPEGmini plugin integrates into Capture One and the quality of compression is truly superior.
If you’re running a blog with lots of illustrations or you regularly share with your clients a significant amount of images – JPEGmini definitely worth its money.
If you’re publishing your images on social networks only and you don’t pay for cloud storage of your images – I don’t think that you should think of saving the space.