

This post contains affiliate links and/or codes, so if you purchase a product through such a link or with such a code, I may receive a small commission at no extra cost to you.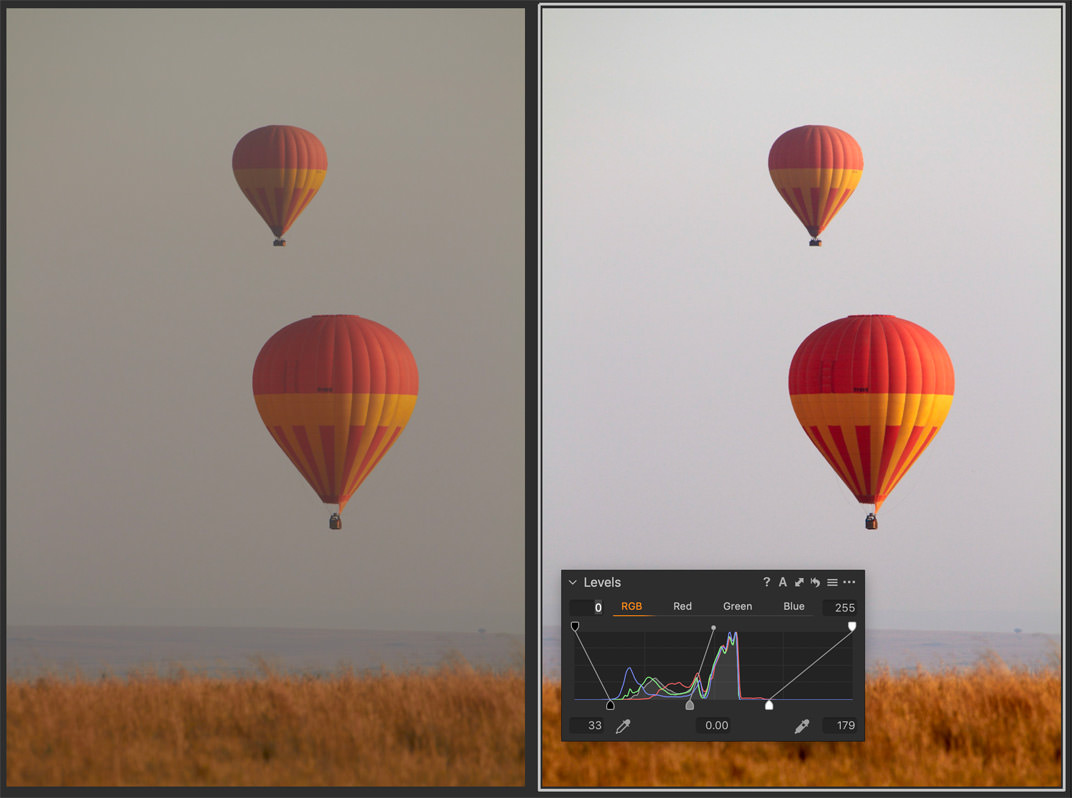
“Photographer’s Guide to Capture One 12” is a comprehensive guide to Capture One, which works just perfectly if you wish to become familiar with all the Capture One tools or to fill in some gaps in your understanding of how Capture One works.
Nils Wille Christoffersen, the author of the book, allowed me to publish four chapters from the book for free at AlexOnRAW.
This week I’m publishing a chapter about Levels – “Optimizing the Contrast with Levels”.
Lots of the photographers are familiar with it but are not good enough to use it in the workflow. “Photographer’s Guide to Capture One 12” works excellently to help you learn about Levels and other professional tools of Capture One.
In the full book, you will find 60 chapters (over 460 pages) of similar quality with more than 750 screenshots.
You can get a 10% discount for “Photographer’s Guide to Capture One 12”! Just enter this code ALEXONRAW at the checkout and you’ll immediately get the discount.
Optimizing the Contrast with Levels
The Levels tool is arguably the best way to set the base contrast of the image and should therefore be used as one of the very first tools together with the White Balance tool and the Exposure slider discussed in the prior chapter.
Setting the black and white point correctly is a crucial first step to obtain a great base contrast. By doing this, you are making sure that the image spans the full tonal range from pure black to white. If your image looks flat and dull, the chances are high that it doesn’t contain any tones near the blacks or whites. This will also be revealed in the Histogram where there will be empty spaces adjacent to the borders.
In the example below, most of the image data are in the middle of the Histogram, and the image looks flat and dull. Applying a correct black and white point remaps the tonal range and adds a much-needed boost to the base contrast. No other adjustments were between the two images:
Setting the black and white point manually
The black and white point correspond to the two markers at the bottom of each end of Levels histogram. Note how the markers are black and white respectively:
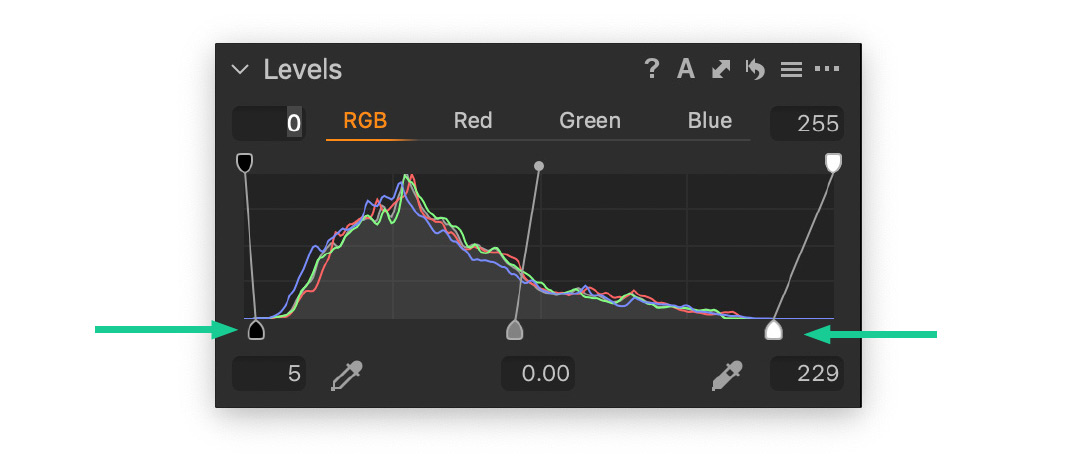
You can move them by clicking and dragging the markers inwards. The two markers should be adjusted, so they touch the point where the image data starts to appear at both ends of the histogram. You can also click on the number fields below the marker and type in a value.
Note that once you have set the black and white point, the image can appear a bit brighter or darker and you might want to adjust the midtones with the gray Gamma marker in the middle (explained below), or the Brightness slider or Curve tool.
You should also be aware that if you adjust the Exposure slider afterward, the black and white point will be shifted, and you should readjust them.
Setting the black and white point automatically
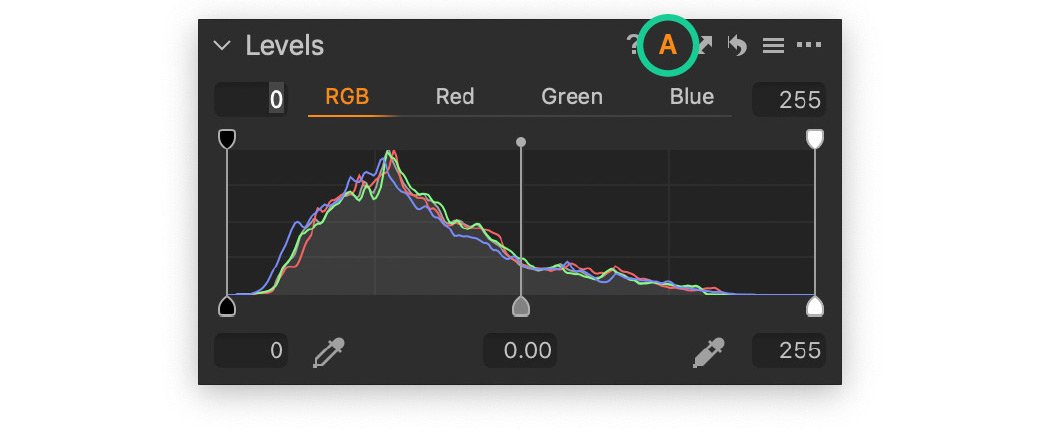
It can be somewhat time-consuming to fiddle with the markers on multiple images, so luckily there is a much faster and easier way to do it. If you click on the little A icon at the top of the Levels tool, Capture One Pro will set the black and white points automatically.
It is a highly recommended workflow as it is done accurately and fast.
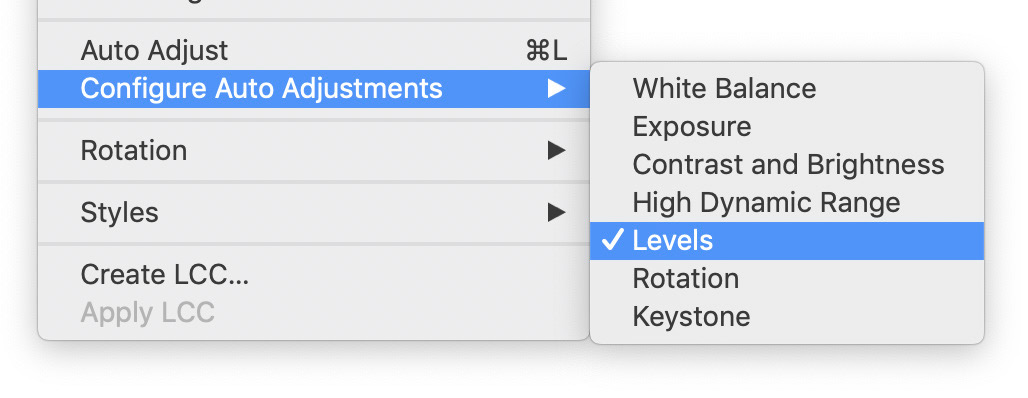
You can also use the keyboard shortcut command + L (Ctrl + L on Windows) if you go to the main menu and select Adjustments > Configure Auto Adjustments and ensure that Levels are selected in the submenu.
If you deselect all the other options, you will only apply Auto Levels with the keyboard shortcut, and it is definitely something you should consider speeding up your workflow.
Setting the Auto Levels Clipping Thresholds
Note that by default, Capture One Pro will set the black and white point so that some data in the shadows and highlights will clip slightly. This is by design to provide a pleasing contrast, but you can change this behavior in the preferences if you so wish.
Go to the main menu and select Capture One (Edit on Windows) and select Preferences… Then select the Exposure tab and look at the Auto Levels Clipping Thresholds at the bottom.
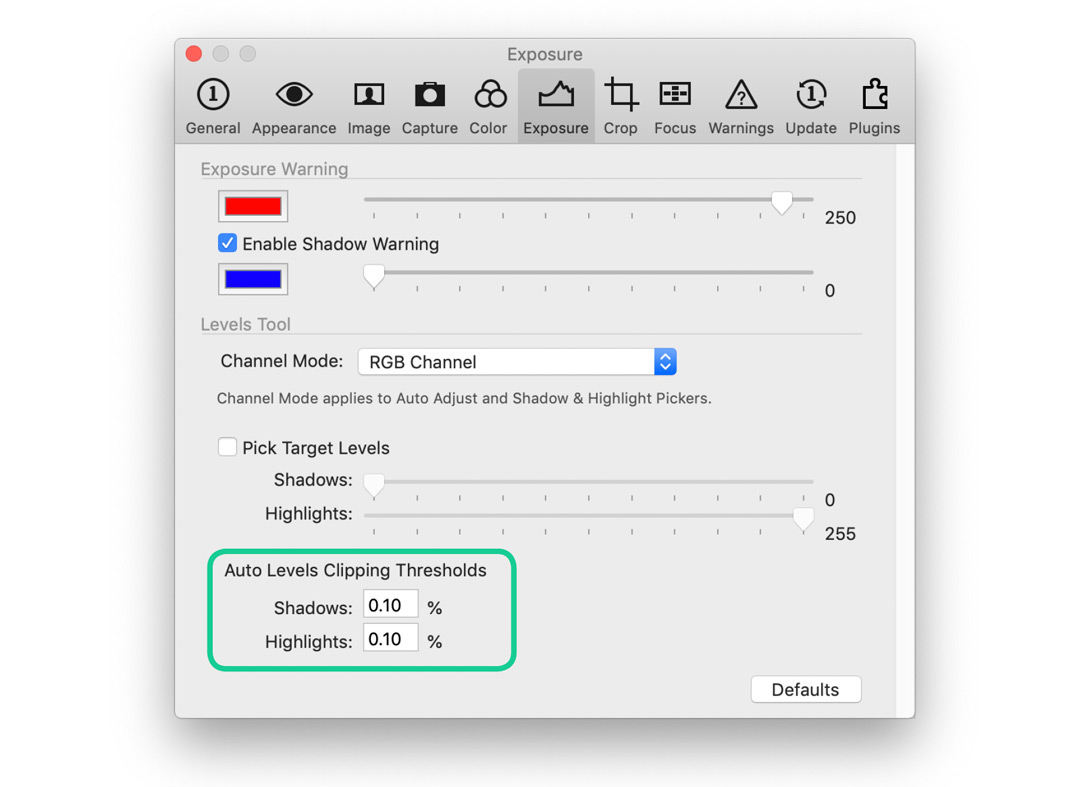
If you want to make sure that the Auto Levels features don’t clip the data, you can change these values to 0,0% (zero). Setting the Highlights value to 0,0% could be a good idea if you are keen not to lose any detail in a very bright scene.
Setting the black and white point from the image
You can also select either the Pick Shadow Level or the Pick Highlight Level Cursor tools at the bottom of the Levels tool. Then click on the image where you want the corresponding black or white point to be set. Note how an orange line in the Levels histogram will indicate where you are currently sampling from in the tonal range.
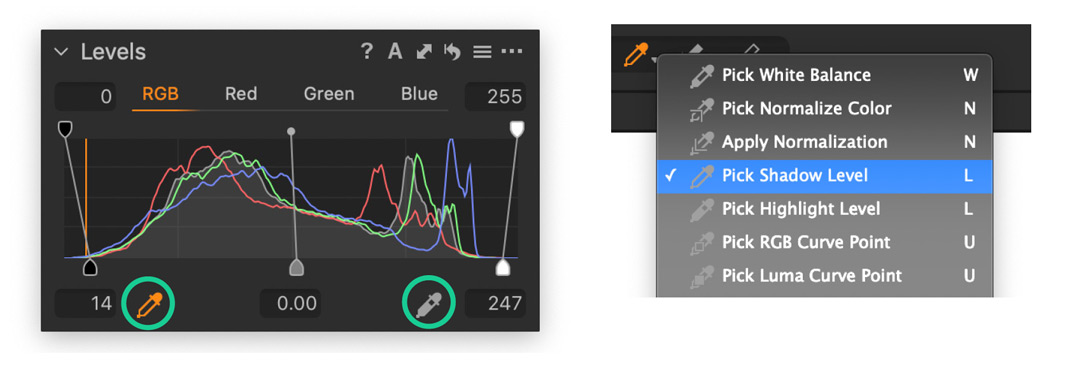
You might clip some shadows or highlights by using this method if you are not very careful, so this is best used in those circumstances where you have a precise point to sample your black and white point from, like a color checker board. Note that you can select the two Cursor tools by using the keyboard shortcut L and switch between them with Shift + L.
Adjusting the midtones with the Levels tool
In addition to the black and white point markers, the Levels tool also has a gray marker in the middle. This is used to adjust the brightness of midtones, and some refer to this as adjusting the gamma curve.
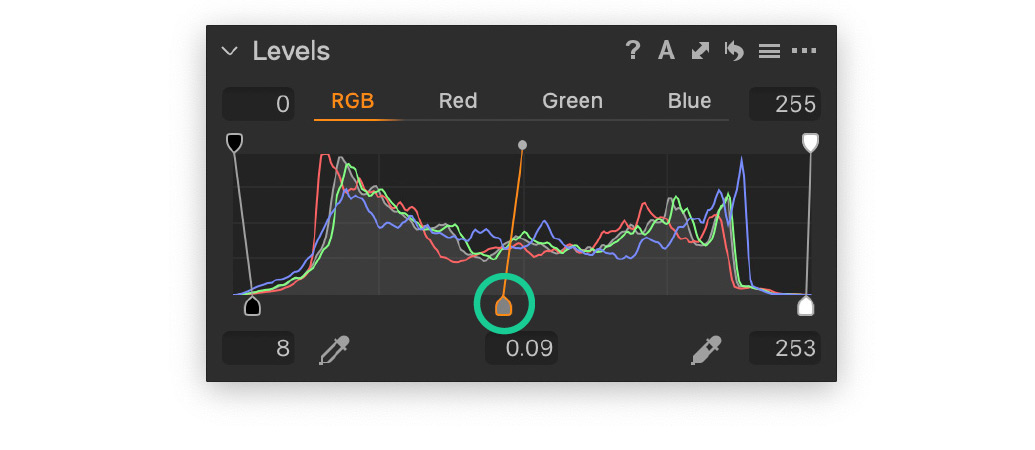
It will automatically readjust itself when you set a black or white point in order to keep the midtones at the same brightness level, but you can adjust it after the fact by dragging the gray marker. Moving it to the right will make the midtones darker, and vice versa.
One of the great benefits of using the gamma to adjust the midtone is that it will not affect the black or white point in comparison with for example the Brightness or Exposure sliders discussed in a prior chapter. On the other hand, it doesn’t provide the same control as using the Curve tool and can give a slightly flatter look with less contrast.
Get the full version of the Photographer’s Guide to Capture One 12 and learn about these additional features that are covered in the Levels chapter:
- Setting output targets
- Changing Channel Mode for scanned images
- Using Levels to play with color
- Saving as a Preset
- Copy and reuse an adjustment
- Making Localized Adjustments on a Layer
The eBook is available in both the ePub, PDF and Mobi (for Kindle) file formats which are included in the single purchase.
Get 10% OFF Photographer’s Guide to Capture One 12
How to Get the Discount?
1. Go to the store to buy the book.
2. At the checkout, enter this code ALEXONRAW and you’ll immediately get 10% off.