

Do you use custom workspaces in Capture One? They allow you to quickly switch interface setups and easily access tools for your current task. This week I’ve prepared five ideas for custom Capture One workspaces:
- Speed Edit Workspace
- Batch Editing Workspace
- Color Grading Workspace
- Studio Workspace
- Travel Workspace
Let’s see how we can build every workspace and speed up your editing!
How Custom Workspaces Work
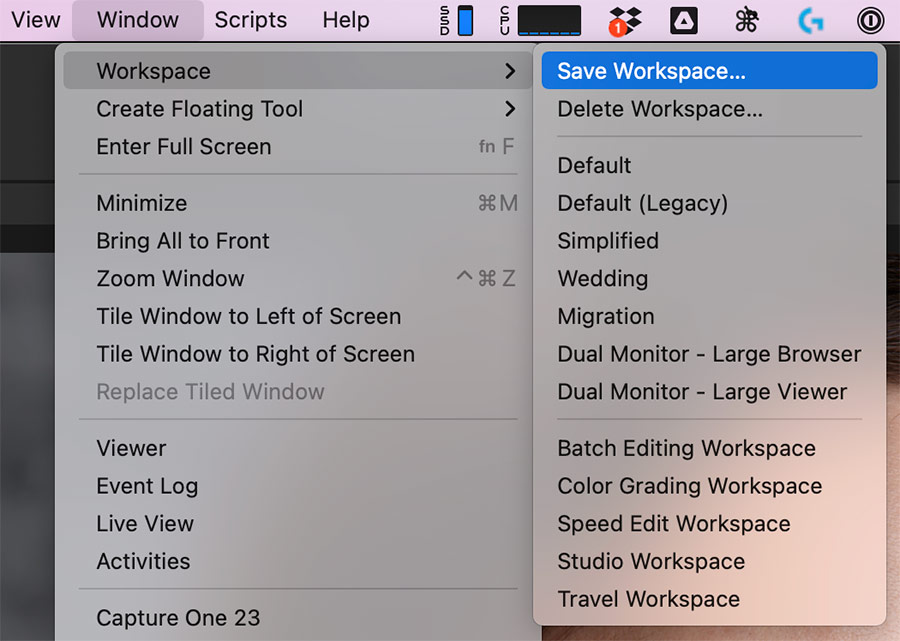
Capture One allows you to customize all interface areas, including every tool tab and the toolbar. Then, you can save it as a new workspace for a quick access:
I’ve prepared five ideas of various Capture One workspaces that I use in my work.
Speed Edit Workspace
This workspace is based on the chapter Speed Edit Workflow from my book Capture One Hidden Features (BTW, it is also on sale now):
“If you use Speed Edit (SE) keys, you might feel that the classical Capture One interface is full of redundant elements. When you can control all the essential adjustments with hotkeys, the tools themselves are just wasting space on your screen.
That’s why I’ve created a new interface concept that might inspire you to rethink your workspace too. The idea is to focus solely on an image. To achieve this, we’re going to remove all the tools that are accessible with shortcuts from the workspace.

The idea is to focus solely on an image. To achieve this, we’re going to remove all the tools that are accessible with shortcuts from the workspace. Next, we’re going to remove all the SE tools from the tool tab: WB, HDR, Exposure, Dehaze, Clarity, and Vignetting. I’ve made an exception for Levels since shortcuts don’t control it completely.
Now, we can fill up this tab with some advanced tools: Histogram, Layers, Rotation&Flip, Color Editor, Curve, and Color Balance.
Part of me always resists accepting new interfaces, so keeping some tools on a screen is a comfy way to get used to a new workspace. At first, it seems rather uncomfortable to get rid of all the essential sliders, but we actually have simply relocated them to your keyboard. Each keyboard row represents a tool that we have just removed:
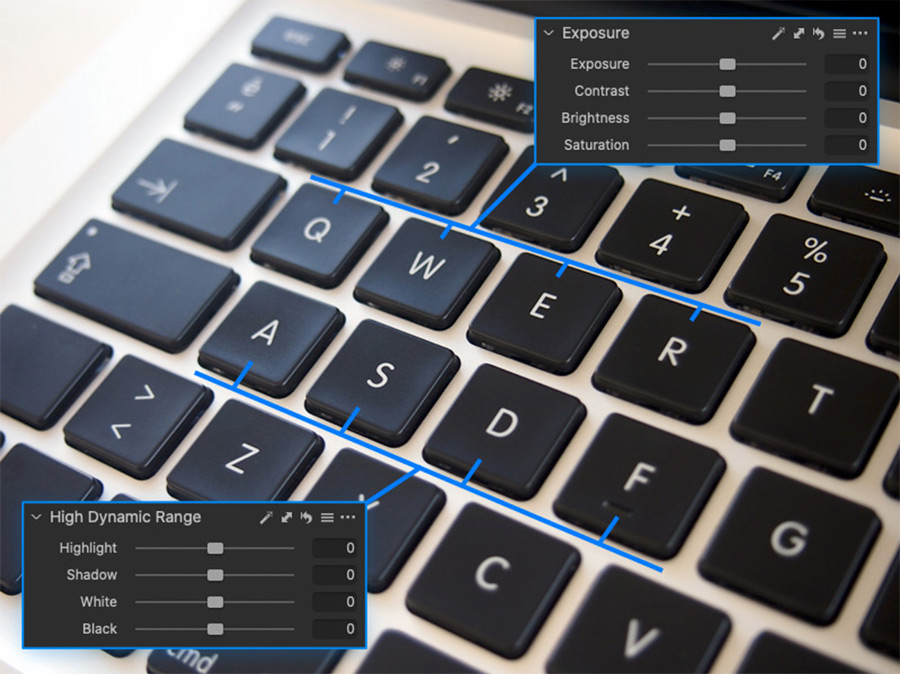
- The numbers row stands for White Balance
- QWER row for Exposure
- ASDF for HDR
- Z for Clarity and XCV for Levels (but you can easily change it)
Each key in a row represents a particular slider in a tool, like W – Contrast, E – Brightness, R – Saturation. Thus, all the tools are still here, but they are located on your keyboard now. Hold the key, and you’ll see the slider value on the screen:

Plus, we’re going to add Copy and Apply, Styles, and Variants icons in the toolbar for quick access:

Batch Editing Workspace
This workspace follows batch editing principles which I have described in my article Fast and Efficient Event Photography Workflow:
“In event photography, you need to place all the key tools in a single tool tab and remove/relocate all the other tools. Focus on the accessibility of the most used tools; every second spent on reaching a tool transforms into hours of wasted time.
So, what tools are we going to pick?

Pinned area:
- Adjustments Clipboard (useful for group editing, more on this in Part II)
- Smart Adjustments
- Exposure
- White Balance
- HDR (these are the three tools you’re going to use the most)
- Rotation and Flip
- Color Editor (Basic mode is now pretty compact)
Scrollable area:
- Clarity
- Layers (we’re not going to manage layers so often)
- Levels
- Color Balance (for some non-formal editing with color toning)
Color Grading Workspace
Color Grading Workspace is designed to provide quick access to all color grading tools in Capture One. For this, we can create two tool tabs:
In the first tool tab, we’re going to place all tools related to color correction:

Also, adding three versions of Color Balance for a quick access makes sense.
The second tool tab is dedicated to all types of Curves:
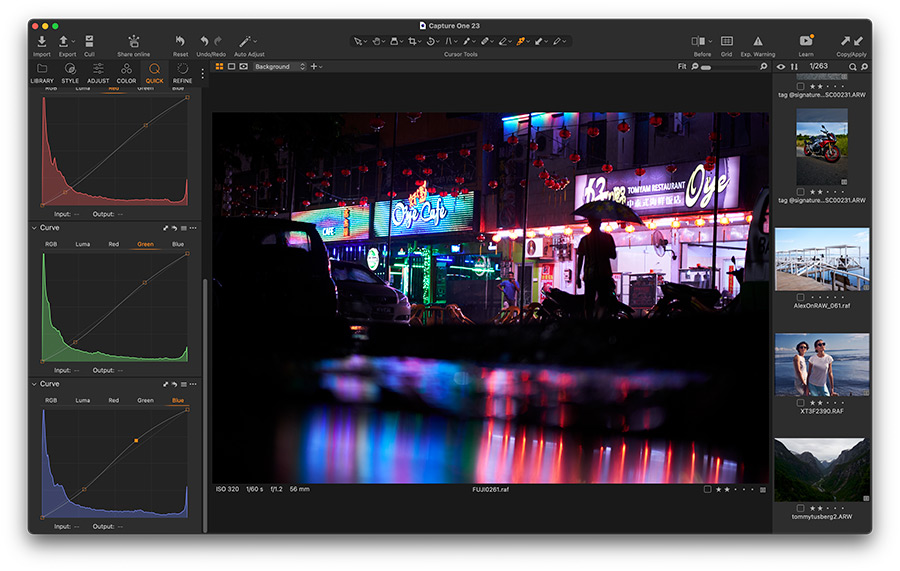
Curves are one of the most powerful color grading tools, and it’s important to make them easily accessible in your workspace.
Studio Workspace
This workspace is focused on tools for tethered shooting in a studio. Apart from camera-control tools, I love to have a quick access to the Focus tool, Styles, Smart Adjustments, and Crop.
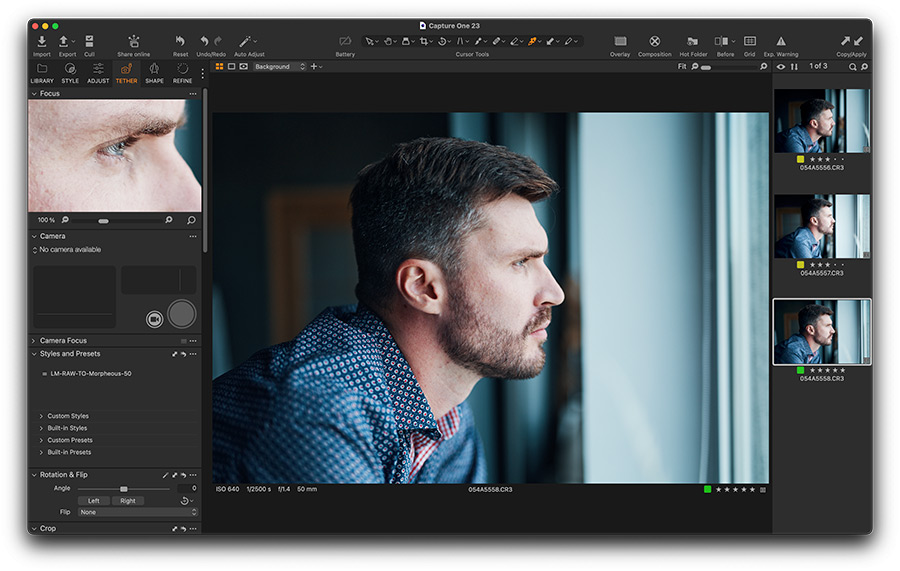
Also, for studio photography, it makes sense to add Camera Battery, Overlay, Composition, and Hot Folder icons in the toolbar.

Travel Workspace
Finally, this workspace is created for moments when you edit images while traveling, such as on a plane or a train. It offers quick access to the most important tools and adjustments in Capture One.

On the road, I prefer to have Copy and Apply, Select, and Variants icons in the toolbar:

All these workspaces are now available in the Ultimate Capture One Toolkit, among other unique Capture One tools:
- 40 Ready Looks
- 20 Curve Adjustments
- Color Shift styles
- Visual Accent styles
- Skin Tone styles
- Dynamic Symmetry grids
- Session & Catalog Templates
- Social Media and Cinema Aspect Ratios
- Social Media Export Recipes
And more!