

This post contains affiliate links and/or codes, so if you purchase a product through such a link or with such a code, I may receive a small commission at no extra cost to you.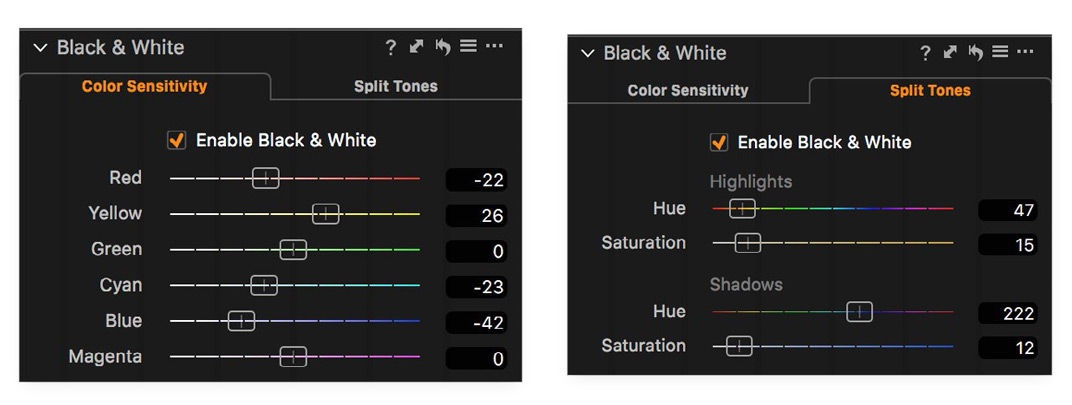
During March, every week I was publishing free chapters from the book “Photographer’s Guide to Capture One 12”:
- “Optimizing the Contrast with Levels”
- “Removing noise with Noise Reduction”
- “Normalize Tool in Capture One”
Time to publish the last free chapter “Converting to grayscale with Black & White”, where you will learn about creating B&W images in Capture One.
“Photographer’s Guide to Capture One 12” is a comprehensive guide to Capture One, which works just perfectly if you wish to become familiar with all the Capture One tools or to fill in some gaps in your understanding of how Capture One works.
In the full book, you will find 60 chapters (over 460 pages) of similar quality with more than 750 screenshots.
Plus, you can get a 10% discount for “Photographer’s Guide to Capture One 12”! Just enter this code ALEXONRAW at the checkout and you’ll immediately get the discount.
Converting to Greyscale with Black & White Tool in Capture One
Capture One Pro has an excellent and easy to use feature to convert your image to black and white. Simply go to the Black & White tool and select the Enable Black & White option. The colors are now converted to greyscale, and you can adjust the brightness level of six different color segments in the photo.

If you move a slider to a negative amount, that color area will become darker in the image, while a positive value will brighten it. For example, if you want to darken a blue sky to add drama to your black and white landscape conversion, you should move the Blue slider to a negative value.
You might find situations where the six base colors in the tool don’t cover a specific hue that you need to darken or brighten to get the black and white image just right. Luckily, you can turn to the Color Editor tool’s Advanced tab for help.

Just use the Pick Color Correction cursor and select the color that you want to adjust the brightness of. Don’t worry; this trick will work even though the image is now converted to black and white as Capture One Pro will still have access to the original colors. Then adjust the Lightness slider to either darken or brighten the color range. You can fine-tune the affected color range or add more color corrections with the Pick Color Correction cursor (see the Color Editor tool chapter for more information).
Creating a Split Tones look
You can also add a tint to the highlights and the shadows of your black and white image by using the Split Tones tab. Select the Enable Black & White option if it is not already checked.

You can now control what color tint you want to apply to the highlights and shadows respectively with the two Hue sliders and adjust their color intensity with the Saturation sliders. You will find it easier to discover the right Hue setting by using a high Saturation amount temporarily. Once you have dialed in the desired tint, move the Saturation slider back down to a good-looking amount.
Using Color Balance for Tri-Tone styles
One of the very nice improvements that were introduced in Capture One Pro 11 is the ability to add Color Balance tool adjustments on top of black and white conversion. Since the Color Balance tool adds a custom tint to the Shadows, Midtones, and Highlights respectively, you can in effect create beautiful Tri-Tone images.
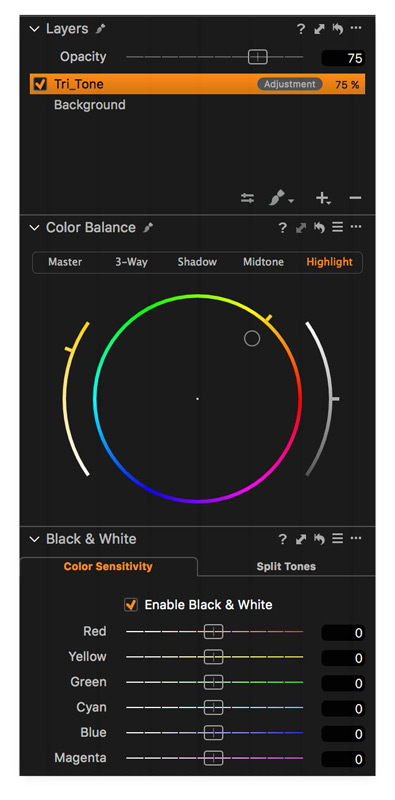
You can even create the Color Balance adjustments on a Layer and thereby limit the tinted color range to specific areas with a mask or simply tone them down with a lower Brush Opacity (see the Layers adjustment chapter for more information). This can be a very powerful workflow.
Using a Built-In Preset as inspiration
The Black & White tool comes with a long list of ready-made presets that is a nice resource for inspiration and can serve as a good starting point. Click on the Preset icon in the tool and hover your mouse over each preset to see the effect temporarily on the image. Then select the one that suits you best.
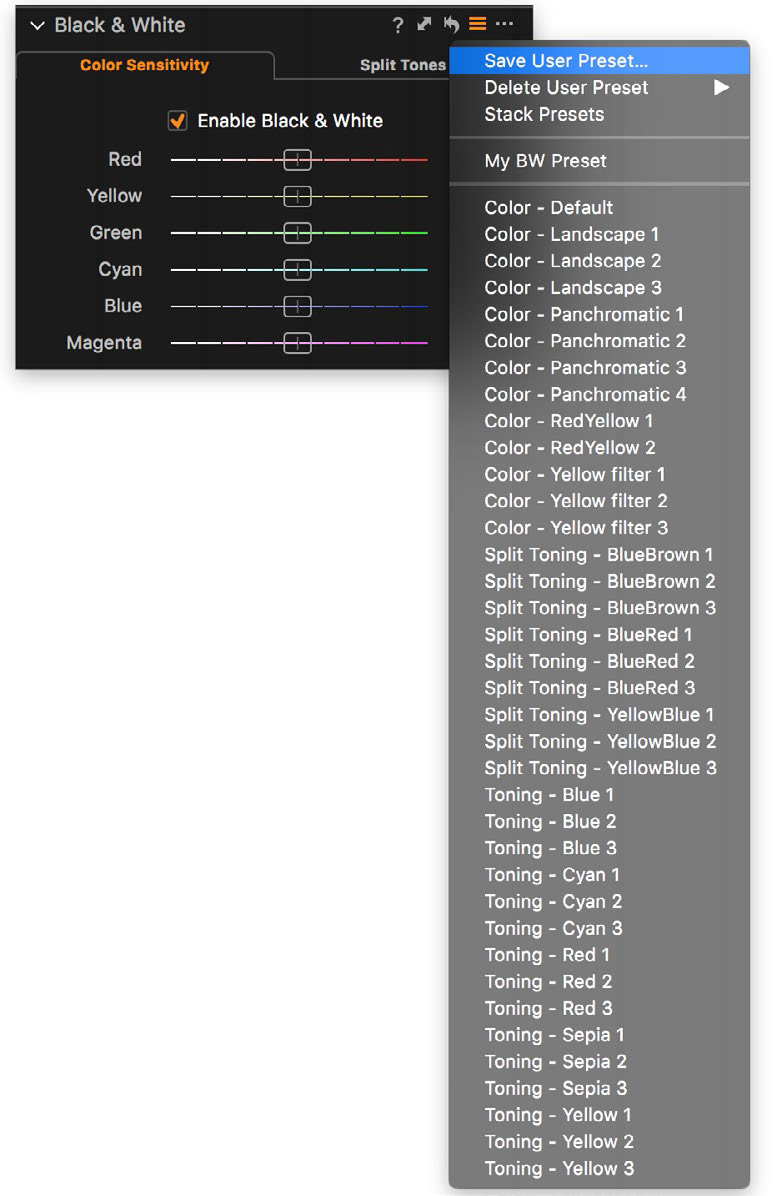
Note that you can also save your own Preset for later use by selecting the Save User Preset… from the drop-down menu.
Copy and reuse an adjustment
If you want to copy a black and white adjustment to other selected images, just click on the Copy icon. You now get the option to choose whether the black and white conversion, the color adjustments or split tones should be carried over to the other images.
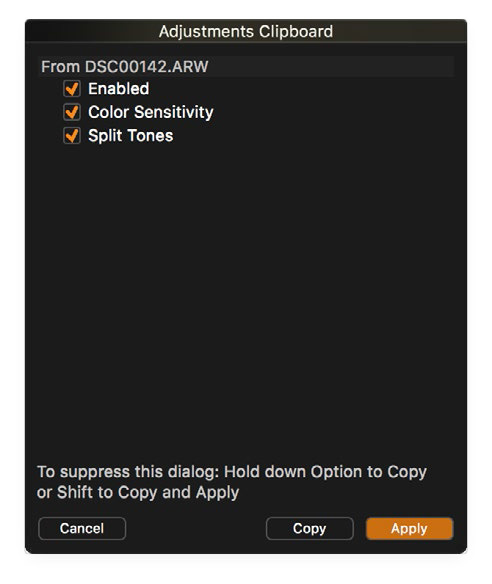
Note that you can copy the color adjustments and split tones to another image without having the black and white conversion enabled. Select the desired options and hit Apply to reuse them.
Tips for improving black and white adjustments
A black and white conversion is rarely looking perfect just by removing the colors. We have already explored how you can control the brightness of certain color areas in the image, but most of the time you will need to tweak the overall contrast too.
Using the Curve tool in the Luma mode is an excellent way to get the contrast just right in a black and white image. Since the Luma mode only affects the luminosity values, it will give you’re a more predictable result since you are working in greyscale.
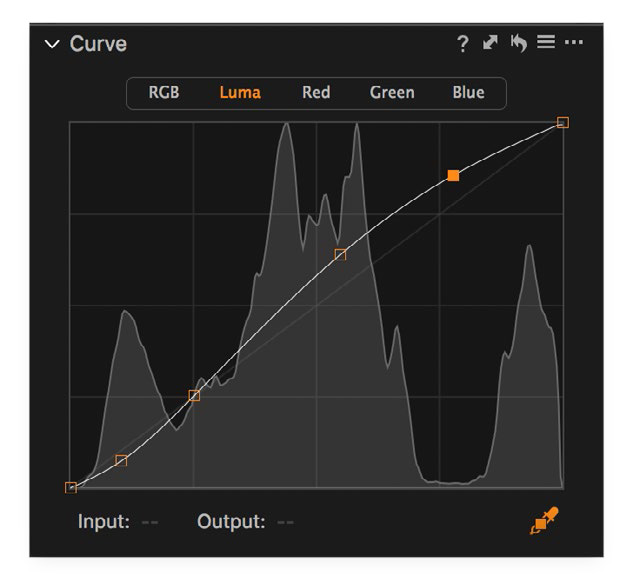
As very nice workflow is to select the Pick Luma Curve Point cursor on the Curve tool (or use the keyboard shortcut U) and then click with it on the part of the image that you want to brighten or darken. A point is now added to the Luma curve, and you can move it up or down depending on whether the area should be brighter or darker.
Most black and white images look best if you have the black and white point set correctly, which is easily done automatically by clicking on the A icon in the Levels tool. This will make sure that the image has a good-looking base contrast that you can fine-tune. You can then use the Highlight and Shadow sliders in the High Dynamic Range tool to help recover details in the darkest and brightest areas of the image.
You might think that the white balance is irrelevant when working on a black and white conversion, but it can actually have a big impact on the light balance and contrast of the image. Don’t forget to try and use the Kelvin and Tint sliders in the White Balance tool creatively to get a good starting point.
The Black & White tool is not present as a Layers adjustment, but this shouldn’t be an issue as you can use the other tools like White Balance, Color Balance, Exposure, Curve, and Clarity locally with layers and masks on your black and white image. These are really all you need to tweak the light balance and contrast to perfection.
Tip: If you want to make just a part of the image black and white, you could create a Layer and mute the colors with the Saturation slider in either the Exposure or the Color Balance tool. Then apply a mask to the area where you want to remove the colors.
Get 10% OFF Photographer’s Guide to Capture One 12
How to Get the Discount?
1. Go to the store to buy the book.
2. At the checkout, enter this code ALEXONRAW and you’ll immediately get 10% off.
Here you can download 5 styles and 5 style brushes from the Pro Color Grading Set free of charge!

Simply subscribe to the AlexOnRAW newsletter by entering your email in the form below. After subscribing to the newsletter, you’ll immediately receive five sample styles. Also, you’ll regularly get a friendly newsletter with free Capture One tutorials, image editing tips and tricks, and news from Capture One community.
The full set includes 50 unique styles. All the styles support layers, and you’ll also get 50 style brushes to draw with the same color gradings on your image.