

Recently Rocky Nook published a new book “Capture One Pro 9: Mastering Raw Development, Image Processing, and Asset Management” written by Sascha Erni.
With Rocky Nook’s permission, we will publish four parts of the book during the next few weeks:
1. An Overview of the Rendering Pipeline
2. Color Editor: The Basic Tab
Today we’re publishing the third article – “Adjustment Layers and Masks”.
4. Understanding the Capture One Sharpening Tool
The New AI Masking Tool
Have you tried out Capture One AI Masking yet?
It’s a fantastic new tool that can create complex masks in just seconds. I wanted to share a detailed guide with you on how to use this tool.
Adjustment Layers and Masks
Local adjustments in Capture One are facilitated using masks stored on separate image layers.
Layer functionality enables you to keep your editing steps organized and apply creative effects to selected image areas.
Layers are an essential part of most contemporary image editing processes.
Capture One’s Local Adjustments functions are based on the same principle, enabling you to precisely select the area an adjustment affects.
For example, you can increase exposure for some areas while retaining the original exposure levels in the rest of the image.
Layers also make it simpler to organize individual editing steps, and you can superimpose your adjustments or switch their effects on or off as necessary.
A clear layer-naming scheme also makes it easier to keep track of the individual steps you’ve applied.
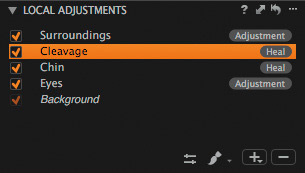
Layers enable you to apply adjustments locally, using a brush to “paint” your adjustment into the image — or, more accurately, you mask specific areas with the brush and apply your tool(s) of choice to the masked areas.
The list of tools that can be applied locally is growing all the time and consisted of the following as of this writing:
- White Balance (see section 5.3)
- Color Editor (see section 5.6)
- Exposure (see section 6.1)
- HDR (see section 6.2)
- Clarity and Structure (see section 6.4)
- Purple Fringing (see section 7.3)
- Sharpening (see section 9.2)
- Noise Reduction (see section 9.3)
- Moiré (see section 9.6)
- Curve (see section 6.3)
These are, of course, all tools that it makes sense to apply locally. Vignetting (see section 6.5) and lens corrections (see section 8.3), on the other hand, are tools that are designed for application to the entire image.
Let’s look at an example based on White Balance settings.
It’s likely you’ve captured images using mixed natural and artificial light sources, or ones in which sunlit and shaded areas are of equal importance.
The human brain can compensate automatically for such complex lighting conditions but camera sensors can’t.
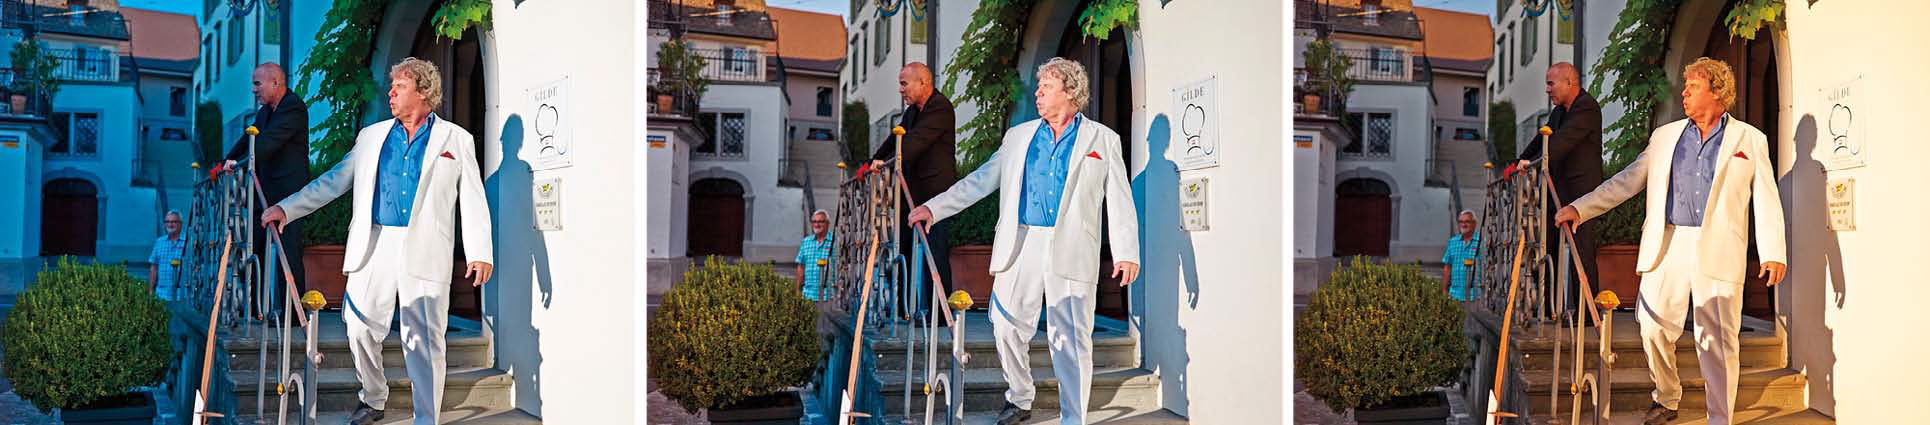
The image in the center shows the result of applying a local white balance adjustment.
Local adjustments present virtually endless editing options. For example, to remove a red-eye effect, all you have to do is select the subject’s pupils and adjust Saturation for the selection to –100. To emphasize lips, simply select them and increase the Clarity setting. To remove wrinkles, mask the face and reduce the Clarity and Structure values accordingly.
As an alternative to the color key method described in section 5.6, you can mask the image area you wish to tone, invert the mask, and desaturate the rest of the image to black and white. In addition to limiting the effects of your adjustments, local adjustments are fantastic creative tools, too.
The options available in the Local Adjustments tool are as follows:
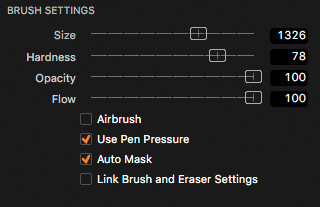
- Brush Settings: Click the double-arrow button at the bottom of the tool panel to adjust the Size, Hardness, Opacity, and Flow values of the brush. Flow defines how quickly the build-up of your virtual brush is supposed to happen and is most useful when you choose the Airbrush option. Brush Settings is also where you can activate the Auto Mask and Use Pen Pressure options. Also, with Link Brush and Eraser Settings, Capture One will use the same settings for both the paint-on brush and the eraser brush, making it easier for you to undo your strokes on the fly.
- Draw Mask: The next button activates the brush that is used to “paint” an adjustment into the Viewer image.
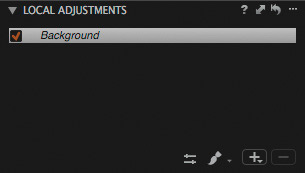
- “+” and “–”: Use these buttons to create and delete layers.
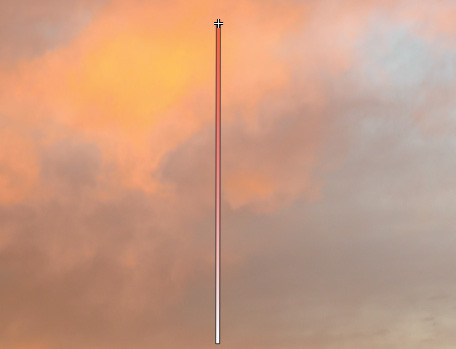
The Auto Mask function makes selecting complex objects a breeze.
The Auto Mask function uses brightness, contrast, and color detection algorithms to guess where the outline of the mask needs to be. It works very well for objects with a fairly obvious outline, such as a person in front of a studio background, the sky in a landscape, or an object photographed on a light table.
It’s ideal for quickly creating complex masks without having to do too much fiddly work with the eraser, and it’s so sophisticated that it “notices” if you accidentally mask part of an obvious outline.

The Auto Mask option saves a lot of painstaking brushwork.
The “+” and Draw Mask buttons offer various options that you can select by clicking and holding.
The “+” button’s default action is to create a new layer, and a click-and-hold (or right-click) reveals Clone Layer and Heal Layer options (see section 10.2).
The brush options enable you to show or hide the mask, or show it only while you’re drawing.
You can also control the show / hide toggle using the M shortcut. The menu is where you can switch between drawing and erasing, and the eraser can also be activated using the E shortcut.
QUICK TIP
The B (brush), M (mask), and E (eraser) shortcuts make it simple to work on an image without having to use the mouse or your graphics pen to switch the cursor function.
And by the way, a graphics tablet is the ideal tool for performing local adjustments, especially if you program its custom buttons with the masking shortcuts listed here.
Selecting the Gradient Mask option transforms the cursor into an arrow that you can use to drag a gradient in the Viewer image.
This is a great tool for simulating a graduated filter or applying any other adjustment — for example, to increase Clarity from the top to the bottom of the frame or saturation from left to right.
The Show Selection Points option applies mainly to Clone and Heal layers, which we’ll discuss in the next section. The tool’s action menu contains commands for inverting, copying, and applying the mask to other layers.
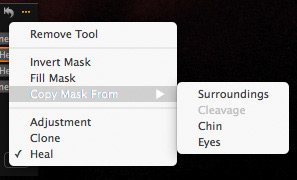
- Invert Mask: Use this option to make a “negative selection” that you want to leave untouched when you apply an adjustment.
- Fill Mask: Use this option to fill the outline you draw with the brush. This option means you don’t have to “color in” your mask by hand. If you haven’t drawn an outline, Fill Mask masks the entire layer. This can be useful if you need to increase the value of an adjustment beyond its intended range (see section 6.2 for an example).
- Copy Mask From: Copying a mask from one of the other layers in an image overwrites the current mask. This is useful if you need to apply different tools to the same area.
QUICK TIP
Give your keyboard’s Shift key a shot: If you press and hold the Shift key while painting, the brush will draw only straight lines—horizontal and vertical.
If you want to do a second stroke, pressing Shift prior to painting will connect the new stroke with the previous stroke’s endpoint.
The behavior is hard to explain in words; it’s easier to understand if you try it out. Open an image, add an Adjustment Layer, Show Mask, and go for it.
You can adjust the relevant options in the Local Adjustments tool or in the Viewer context menu.
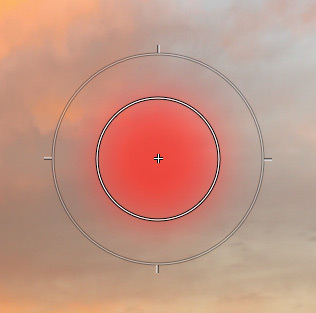
The inner circle in the masking cursor is the area of maximum opacity and shows where your adjustment will take effect. The outer circle shows the limit of the currently selected brush size, which you can adjust using the Size slider in the Brush Settings menu.
Opacity at the outer edge is zero and increases to the value you’ve selected in the center. This enables you to alter the smoothness of the transitions between masked and nonmasked areas.
Size, Hardness, and Opacity settings cannot be adjusted once a brushstroke has been applied.
QUICK TIP
The degree of precision required in a mask depends on which tool you’re using and the content of the image you’re editing. Generally speaking, masks for dark areas don’t need to be as precisely drawn as those in brighter areas. Rough masks are fine, too, for applying context-sensitive tools like Moiré (see section 9.6) or HDR (see section 6.2).Let’s look at an example: If you want to brighten a dark image area, you don’t have to perform painstaking brushwork in a 100% view—all you have to do is draw a rough mask and increase the Shadow value in the HDR tool. If, on the other hand, you want to apply an Exposure adjustment to the same area, the mask needs to be more precise from the start, because the tool’s effect doesn’t take the surrounding pixels into account. If you need to darken a light area using the Exposure tool, the mask needs to be very precise indeed, whereas it can be a little rougher if you use the Highlight Adjustment in the HDR tool (although it still has to be more precise than the one you use to brighten shadows). Whichever tools you use, the stronger a local adjustment, the more precise its mask has to be.
You can purchase the whole book “Capture One Pro 9: Mastering Raw Development, Image Processing, and Asset Management” at Rocky Nook on-line store.