

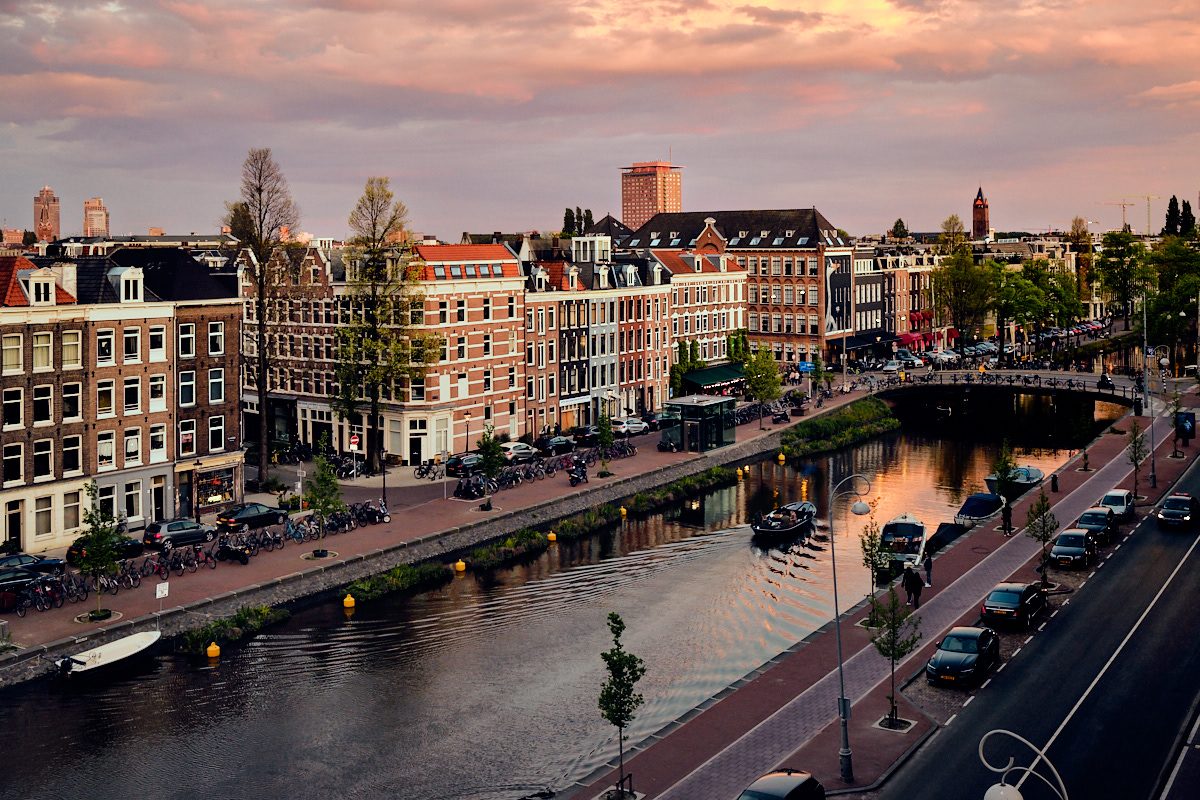
I originally made 2 edits of this same photo – one in color and the other in B&W. After some deliberations, I decided to submit the more "romantic" color image over the more B&W "documentary" styled photo edit. Aside from improving the overall exposure and contrast elements, I decided to enhance the colors already present by adding some color grading to the entire image while boosting the clarity & structure moreso in the row of buildings. Overall, I was trying to achieve the look of a large format Cibachrome print which exhibits saturated colors (I also used the VELVIA film simulation on my background layer), sharp details and beautifully distinct grain when examined up close at print sizes of approximately 30 X 40 inches! Some minor perspective corrections as well as a resulting crop was also performed and a few minor cloning chores on the road on the bottom right made for my "final" edit of this FUJIFILM image. 🙂