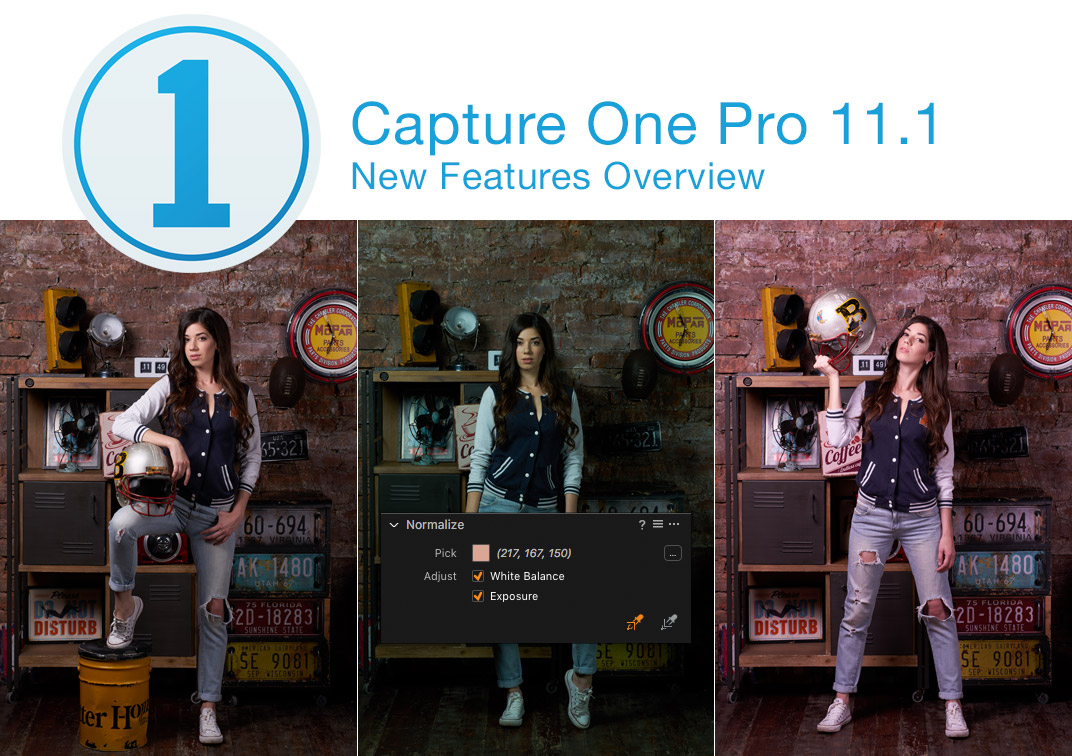
Today, Phase One released Capture One Pro 11.1 – a solid update that nicely develops the eleventh version ideas.
In Capture One Pro 11.1 you’ll find a completely new feature – the Normalize tool and a bunch of improvements to styles in layers workflow.
Plus: new cameras support (Sony A7 III, Fujifilm X-H1, Olympus E-M10 MkIII), a pack of free styles, enhanced LCC, and a well-rounded work with bugs.
Let’s discuss all the new features of Capture One 11.1 upgrade in details.
Video Overview
Want to see Capture One 11.1 features in action and to get answers to your questions?
The next episode of the Capture One Live Show is all about Capture One 11.1 update.
Join and watch it live on April 24 at 5 pm CET (11 am NY, 4 pm London)
New Normalize tool
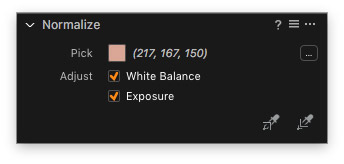
The idea of Normalize tool is pretty exciting:
You can pick a color sample from an image, say, skin tone, and apply it to the relevant area on a different image. Capture One would auto-adjust White Balance and Exposure of the target image to match the sample.

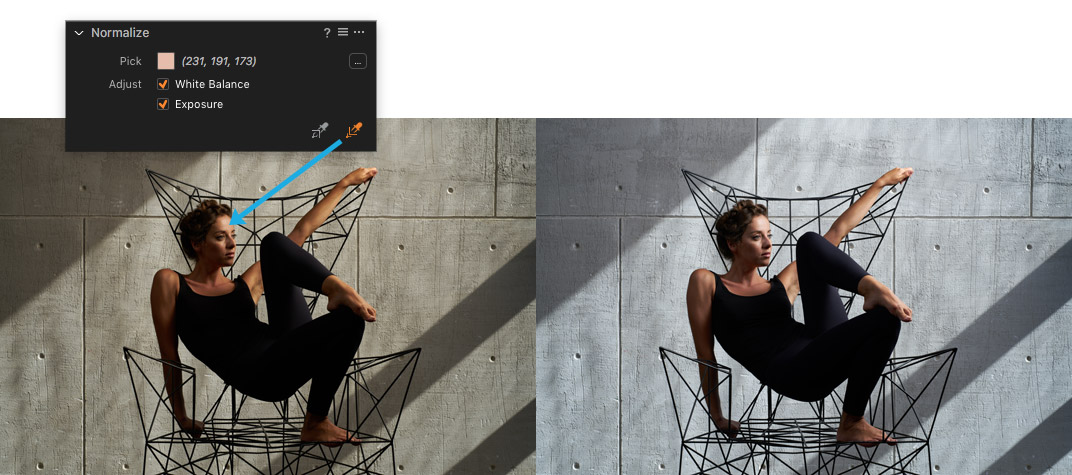
Experienced Capture One users would immediately think: “Hm, sounds familiar… Wait a second, it’s White Balance Skin Tone!”. That’s right, Normalize tool is the successor of WB Skin Tone tab. That’s why in Capture One 11.1 developers simply removed this tab from White Balance tool, improved it with Exposure correction and based the new tool on it.
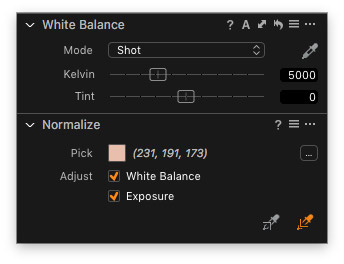
Also, in the new Normalize tool, you can set specific RGB/HSB numbers to modify a sample and to get the most accurate color.

Now, let’s see how it works in practice.
I’ll start the test with these portrait images, which were taken under similar conditions:

As you can see, Normalize tool works pretty well here. But what if we complicate the task by using quite different images?

Not bad for a basic correction, but the problem is that Normalize tool operates only White Balance and Exposure settings. To make such images look similar, you simply need more tools.
Ok, now, let’s bring some images with similar objects to the test:

A pretty nice result of White Balance and Exposure correction.
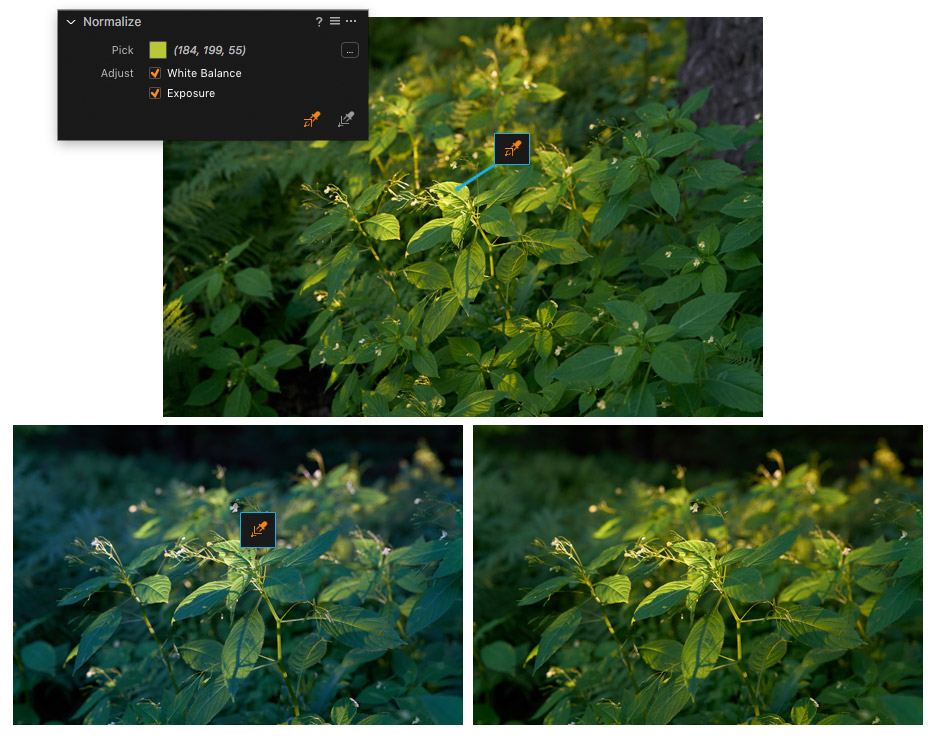
Obviously, Normalize tool is not a magic “make beautiful” button, but it can make your processing a bit faster and easier.
Here are some useful tips for Normalize tool:
- Quickly switch between Pick/Apply tools. You can switch between Pick/Apply Normalization tools by holding the Alt key. If the Pick tool is selected, Alt key will reverse it to Apply tool and vice versa.
- Save samples as presets. Normalize tool supports presets, that’s why it’s a good idea to save your favorite color samples as presets.
- Pick samples from any images. You can pick sample color from JPG files as well as from RAW. That means you can use any image you like as a reference for Normalize tool.
The only thing that bothers me is that unlike White Balance Skin Tone, the new Normalize tool doesn’t work in layers. It was a pretty handy feature to create a mask based on skin color and correct it with WB Skin Tone. But I hope Phase One would somehow fix it.
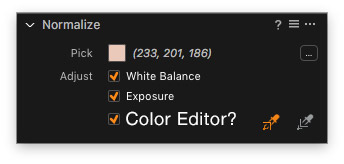
At the same time, I see a huge potential in Normalize tool. I think the current version is just a proof of the concept. Now I’m looking forward to working with Color Editor in Normalize tool, that might be a gamechanger.
Create Style Layers from the Styles tool
Styles in Layers is one of my favorite features of Capture One 11. Here I shared some tricks to enhance your workflow with Styles in Layers.
Capture One 11.1 release improved styles in layers workflow.
Now you can apply a style to a layer straight in Styles tool; right-click on a style opens the new menu:

- Apply to Background. It simply applies a style to the main image as before.
- Apply to Selected Layer. A style will be applied to a selected layer. Note, that this option doesn’t create a mask on the layer and to see the style effect you would need to draw it.
- Apply to New Layer. This option creates a new filled layer and applies a style to it. BTW, the new layer will have the same name as the style, which is pretty convenient.

With Capture One 11.1 it’s much easier to apply styles to layers. I use styles in almost every editing, and this is the exact feature I was waiting for since the Capture One 11 release.
New Shortcuts
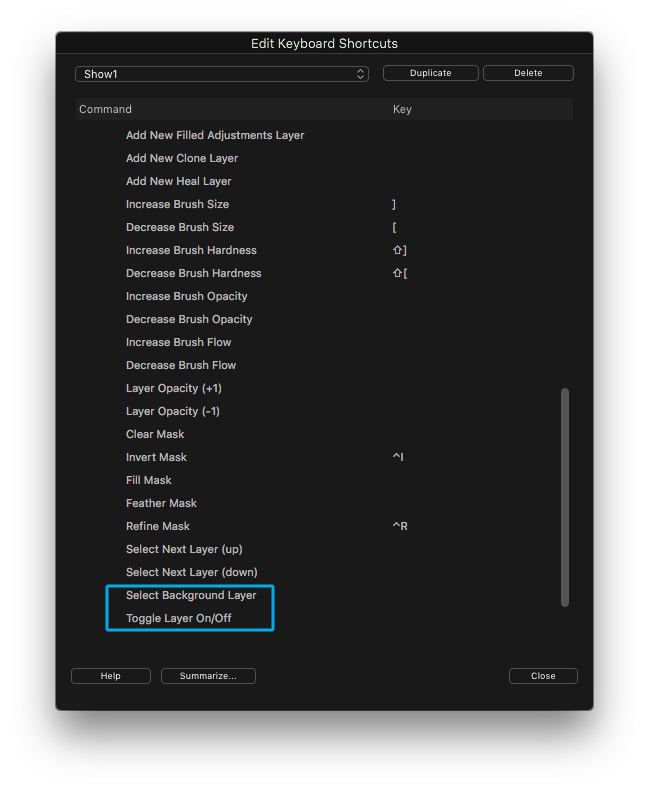
In Capture One Pro 11.1 developers have added two new shortcuts for layers: “Layer On/Off” and “Select Background Layer”. That’s a handy improvement, I’ve seen lots of requests for these shortcuts.
“Spring” styles
Also, in the new update, you’ll find a free “Spring” styles pack with ten pretty nice styles.

Enhanced LCC presets
LCC – Lens Cast Calibration is a unique feature of Capture One. It requires a special LCC plate to make a sample picture:

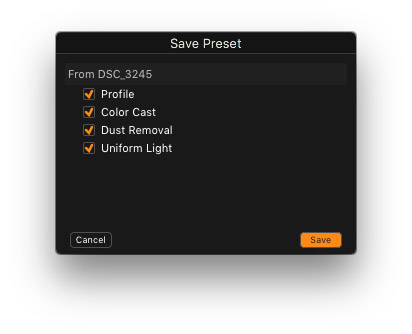
Using this sample, you can quickly remove sensor dust from your images, fix a color cast or make a uniform light in your picture.
With Capture One 11.1 you can save the lens profile and shift X/Y data as part of LCC preset.
Capture One now also suggests which LCC profile would fit your image better:

Expanded Apple Script
In Capture One 11.1 developers extended the list of functions which are available for Apple Script. For example, now, your scripts may contain Layer and Color Balance adjustments. Also, you can use Camera Focus commands and perform auto corrections on your image. Here is the full list of updated Apple Script functions:
- Document Templates
- Camera attribute stepping
- Easier Favorite collection creation (can be file (URL) or text (POSIX path))
- Auto adjustments
- Variant Reset
- Open Scripting Dictionary from within Capture One
- Camera Focus commands
- Back-up Document
- Layer Adjustments
- Color balance Adjustments
Other Improvements
- Capture Pilot 2.0 adds camera control support for Sony
- The Resource Hub has been introduced to offer quick access to free learning resources via a dynamic on-screen portal
- Faster import for large collections on Mac
- Faster “locate” directories (in Catalogs) on Windows
- Customize Toolbar now supports Icon & Text when selected (Mac)
- Floating tools persist when switching focus to another app (Mac)
- Improved Live View for D850
- Faster tethering performance on Windows
New Cameras Support
Capture One 11.1 carries support for Sony A7 III (yay!), Fujifilm X-H1, Olympus E-M10 mkIII and some other new cameras:
- Leica CL
- Leica M262
- Leica TL2
- Leica V-Lux Typ 114
- Leica X-U
- Olympus E-PL9
- Panasonic G9
- Panasonic GH5S
Extended
- Nikon D5, D850, D500 : 12-bit uncompressed support added
New Lenses Support
- Canon EF 24-105mm f/4L IS II USM
- Leica Elmarit M 90mm f2.8
- Leica Summicron M 90mm f2
- Sony E 18-135mm f/3.5-5.6 OSS (SEL18135)
- Sony FE 24-105mm F4 G OSS (SEL24105G)
- Tamron 16-300mm F/3.5-6.3 Di II VC PZD MACRO B016
- Tamron 28-300mm F/3.5-6.3 Di VC PZD A010
- Tamron SP 35mm F/1.8 Di VC USD F012
- Tamron SP 70-200mm F/2.8 Di VC USD G2 A025
- Tamron SP 90mm F/2.8 Di MACRO 1:1 VC USD F017
Bug Fixes
Bug Fixes Mac
- Capture naming with a “.” causes malfunction
- Capture One hangs when deleting color picks from a layer using color editor
- Flipping an image Horizontal or vertical does not flip its adjustment layer and mask
- File Permissions not working on the shared folder
- Incorrect counts in the “Generating Previews” activity
- Toggling Chromatic Aberration will enable custom CA even if Default was selected
- Multiview masking and undo loses the mask
- Browsing through images can be slow
- Searching for keywords very slow on large keyword library
- Broken undo when drawing mask
- One-click “Copy and apply” adjustment disabled
- Saving Custom ICC not shown the first time
- Import fails if a dot “.” is used in import naming
- “Move watermark” cursor tool icon missing
- Can not use certain raw files for overlay
- Crash when renaming multiple images in List Browser
- Locate for a drive does not work
- EIP does not export if the name contains “.”
- Go to Map for Geotagging does not work
- Duplicate checker identifies duplicates from temporary folders
- Filtering IPTC Location Metadata with ‘\’ at the end of a field results in a crash
- Using watermarks in the print dialog is slow
- Exporting variants doesn’t work
- Shutter speed format in filters is not human readable
- Guide lines of grid on Live View in Mac won’t turn off
- Navigator is not representing cropped images correctly
- Print templates displayed as ‘custom’ when applied
- Cannot change folder name to capital first letter and vice versa
- Batch tool shows incorrect resolution for QuickProof JPGs
- Annotations are drawn below overlays on canvas
- Sync folder fails if the Importer is shown
- Units in print dialog are always reset to inches on restart
- Opening Session from external hard drive leads to license warning
- Keystone shortcuts not available on Mac
- Mac – Black & White Tool reset functionality
- Remove Folder does nothing
- Styles in Next Capture Adjustments not remembered on restart
- Missing expansion tooltips on labels and checkboxes
- AppleScript: ‘current collection’ reference broken for nested collections
- AppleScript: Exposure meter values are “clipped” to range -2 to +2
- AppleScript: Error when delete variants without telling a collection
Bug Fixes Windows
- Deleting all files in catalog collection and clicking undo will not restore images to “All Images”
- Rating stars number not displayed in the Filter Tool using Windows 7
- Reopening a catalog with imported sessions, breaks the file hierarchy
- Viewer not changing picture after color tagging image in the viewer
- Mouse button release is sometimes not detected
- Cant maximize application after minimizing
- Previews skipped when shooting rapidly with When Ready
- White balance is reset when disabling layer
- Styles tool doesn’t respect ‘Edit All Selected Variants’
- Noise reduction slider shortcuts missing on Windows
- Smart albums with “No color tag” as criteria, show no images
- Import All is greyed out while images are loading in importer
- Smart albums with “No Rating” as criteria, show wrong amount of images
- Floating Styles and Presets tool is not in sync with docked
- Cannot export original as EIP if already an EIP image
- Clone variant ignores user’s Clarity Method for layers
- Missing viewer readouts for grayscale proof profile
- Cloning variants with crop moves the crop a couple of pixels
- Mismatch between number of images and dialog box in the Trash folder
- Live View window does not update correctly changing size at a 100%
- If filtering by a keyword then removing that keyword the filter remains active
- Windows file associations can not be changed for Capture One
- “Redo” shortcut cannot be set to Ctrl+Shift+Z
- Re-opening a catalog with saved date filter at year or month level shows incorrect hierarchy
- Select variant shortcuts are available while showing any modal dialog
- Duplicating a process recipe resets the scale measurement unit to px
- Styles & Presents not in the same order in Adjustments Menu and Styles Tab
- Focus tool naming misalignment
- Curves tool values appearance misalignment
- Resetting the “Import from” tool in the importer does not remove ‘old’ folder name
- Import Images and “Backup To” enabled, results in 2 backup folders where one is empty
- Naming in Auto Adjust Win/Mac misaligned
- Style not always checked correctly on startup
In The End
Recently I’ve published a list of features which were changed in Capture One 11 since Capture One 9 release. There is a bunch of fantastic tools: starting from reworked Styles and improved layers to new processing features and enhanced file management.
Capture One 11.1 gives you even more reasons to upgrade: better styles in layers workflow, completely new Normalize tool, additional shortcuts and a pack of free styles from Phase One!

Author – Alexander Svet
Alexander Svet – professional photographer and specialist in image processing.
Phase One Certified Professional and Capture One trainer.
AlexOnRAW.com

