

Some of my colleagues are still using old versions of Capture One and thus are missing a lot of new RAW editing tools. That’s pretty reasonable – update costs money and you’ve already got used to good-old editing tools…
Well, this is exactly how you’re slowly strangling your creativity. At some moment you will notice that photographers around you are editing images better, faster and with next-level results.
The reason for this is rather simple – bit by bit they were implementing innovative tools in their workflows! Now, these photographers are using all of them and you’re still tied to some habitual tools from the past.
If you’re still using Capture One 9 or an older version – just read this article. You’ll be impressed by how many capabilities you have already missed over recent years.
If you’re using Capture One 10 – you’ve missed a bit less, but still, you don’t have access to a mass of fantastic new features.
If you’re using Capture One 11 and don’t really want to spend money on upgrade – in the article, you’ll find out how to save on upgrading to Capture One 12!
1. Improved Layers
The first thing you would notice after switching from Capture One 9 is that layers are now completely built into the workflow.
They have Opacity, new interface, new tools for masks and new hotkeys. Color Balance, Levels, and almost all the other Capture One tools now work with layers.
It has a huge impact on RAW editing, here are some examples of what you can create with updated layers.
1.1. Layer Opacity
Layer Opacity simply gives you much more freedom for RAW editing. You can apply complex adjustments to a layer and change its opacity to find the best look.
For example, let’s take this image, where I created a mask from a door in the background and adjusted Curves, Clarity, and Exposure on the layer. Now I can change the opacity of the layer to choose the one which fits better.

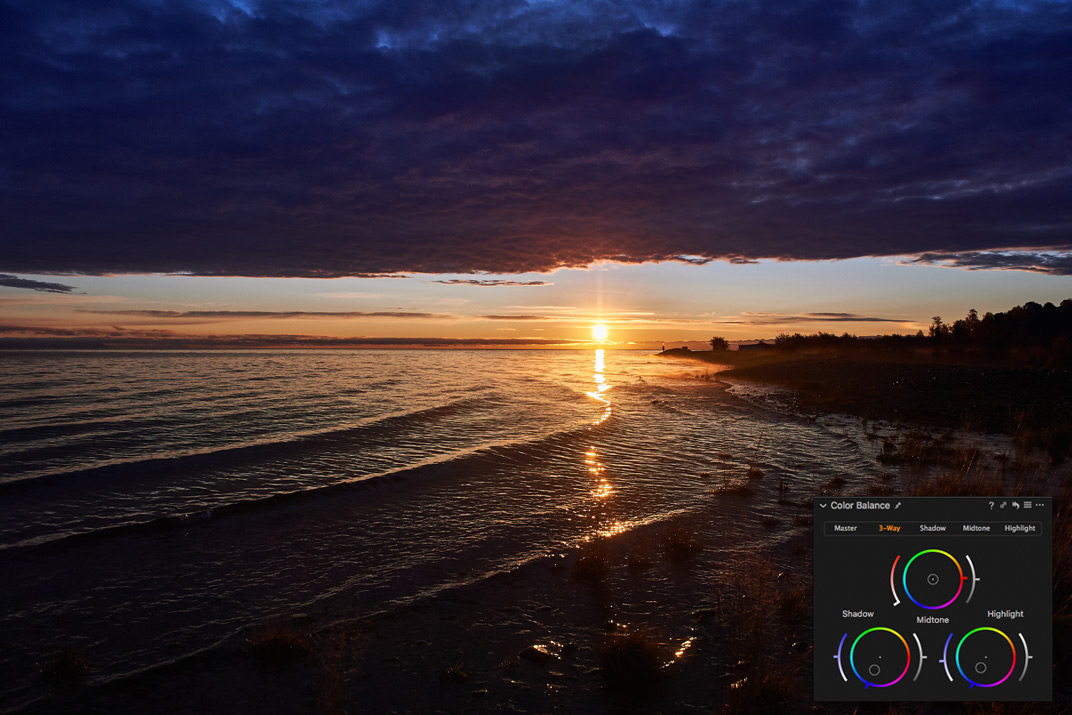
1.2. Color Balance in layers
Color Balance is a tool intended to work in layers. Because color toning works perfectly as a local adjustment, it was designed to work locally.
Sky in the image needs a bit of color toning? Gradient mask and Color Balance, few clicks and you’re done.

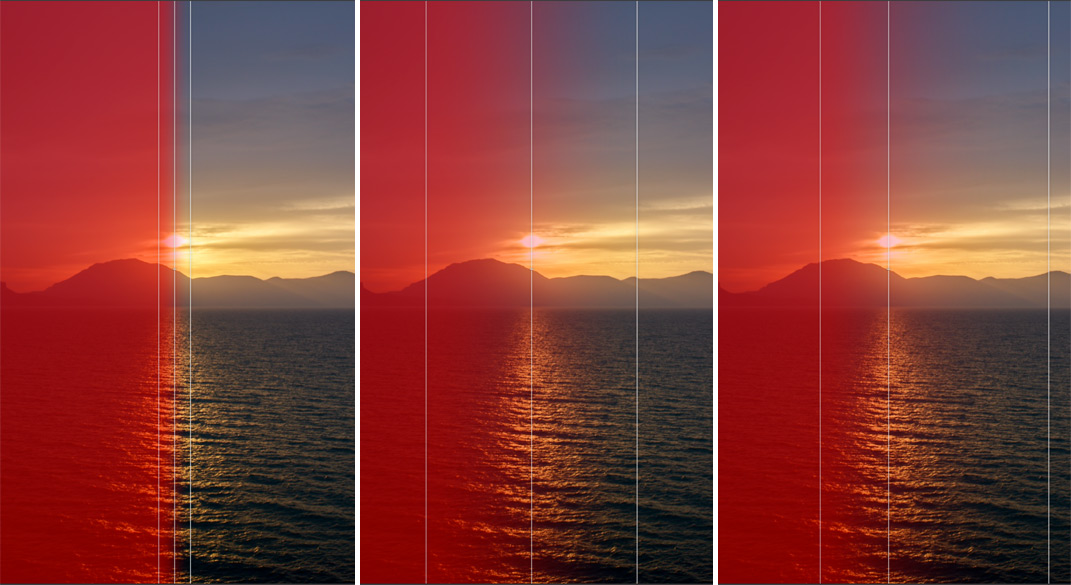
1.3. Levels in layers
The main purpose of Levels is to change black and white points on an image. Here you could ask: “What is is the benefit of using Levels in layers if I can change black and white points locally with Curves in Capture One 9?”
There is one considerable difference: when you’re adjusting black and white points with Curves, the result is not affecting Levels and Curves histograms.
Thus, after the correction of black and white points, you would have less space for further adjustment of the Curve.
Here is how it looks in practice:

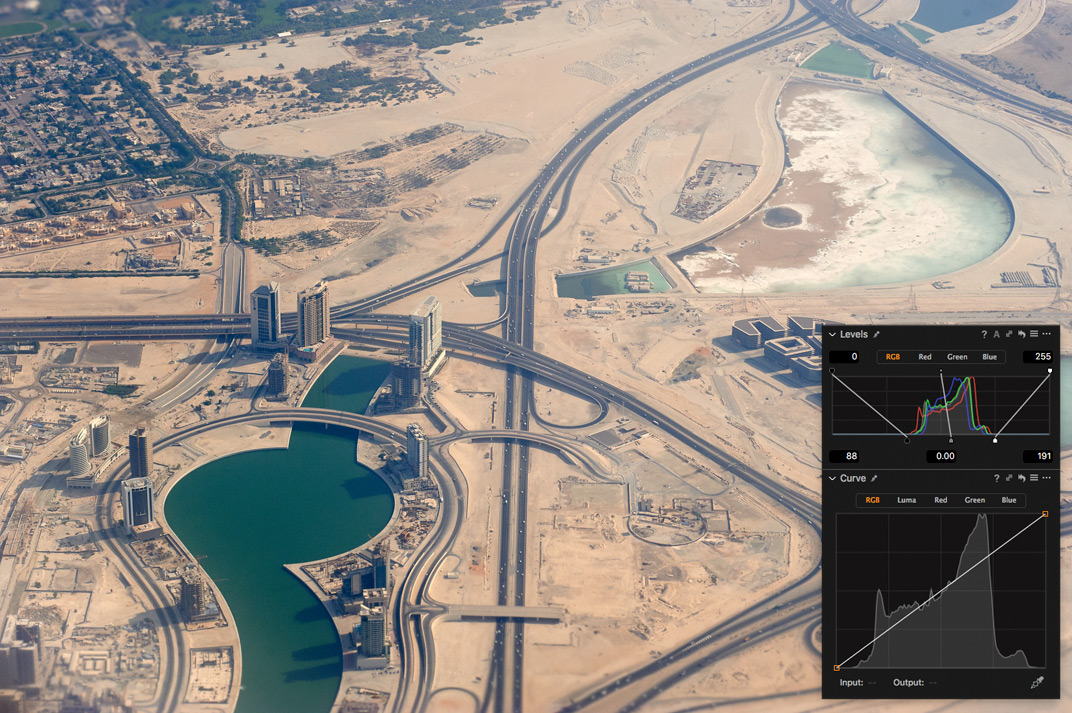
What do we see?
1) Black and white point corrections significantly improved the image.
2) Levels were used on a filled layer which gives us an ability to change it’s opacity or erase a part of the mask.
3) The correction affected Curves histogram that makes it much easier to work with Curves now.
If you would use Curves instead of Levels on this image you would get this result:

As you can see, it makes any further Curves corrections notably less convenient.
1.4. New tools for masks
Since the ninth version, Capture One got some helpful tools to draw masks faster and easier, such as Feather tool and Grayscale Mask.
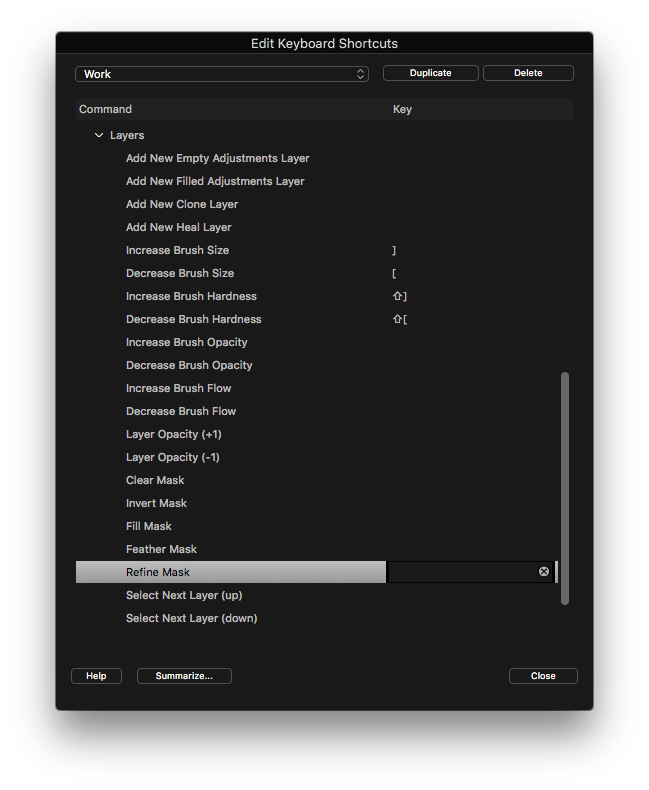
The real game-changer is the new Refine tool; now you can just draw a mask and not worry about how accurate it is – Capture One would handle this for you.
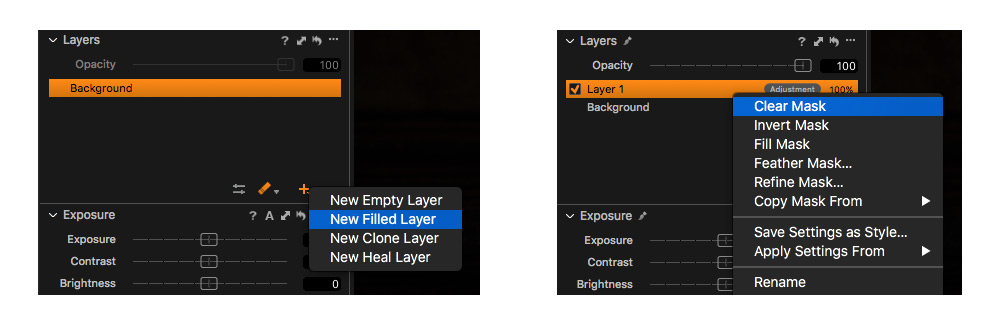
Here is how it works: draw an inaccurate mask, choose Refine mask, done.

Want some more? Try it with masks from Color Editor – you’ll be impressed!
Also, In Capture One 11 you can create a filled layer or clear the mask with just one click.
BTW, a lack of keyboard shortcuts in Capture One 9 is fixed, and now you can set a hotkey for all the layer actions.
1.5. New Gradients
Gradients in Capture One 12 were completely rebuilt to make the drawing faster and more convenient:

Now, you can easily move a specific part of the created gradient!
Just try this feature and you will understand that you’ve really missed it in the previous versions of Capture One.
Plus, we now have a radial gradient in Capture One!

This was one of the most anticipated updates of Capture One ever and there is a good reason for this – radial gradients are extremely useful when you need to quickly draw a mask on your image, leaving some area untouched.
1.6. Luminosity Masks
Luma Range Masking is a fantastic new tool to create masks from luminosity. Basically, you can mask some highlighted area or shadows in just a few clicks.

This tool brings completely new possibilities of HDR editing in Capture One:


Plus, it significantly improved Levels capabilities of Capture One. Now, you don’t need to worry about data which you might lose due to inaccurate usage of Levels.

In Capture One 12 you can create a new layer, apply Levels tool on to this layer and have full control over the Levels effect with the new luminosity masks. Simply remove dark or highlighted areas from the layer mask and thus from affecting them by Levels as well!

In my Capture One 12 video review, I’m showing how you can use Luma Range Masking in practice.
2. Reworked Styles and Presets
Capture One 9 seriously limits your work with styles and presets: drop-down menu blocks the image you’re working with, you can’t apply a style to a layer or change an intensity of the style.
Fortunately, 10.1 and 11 releases delivered a completely new experience of working with styles and presets.
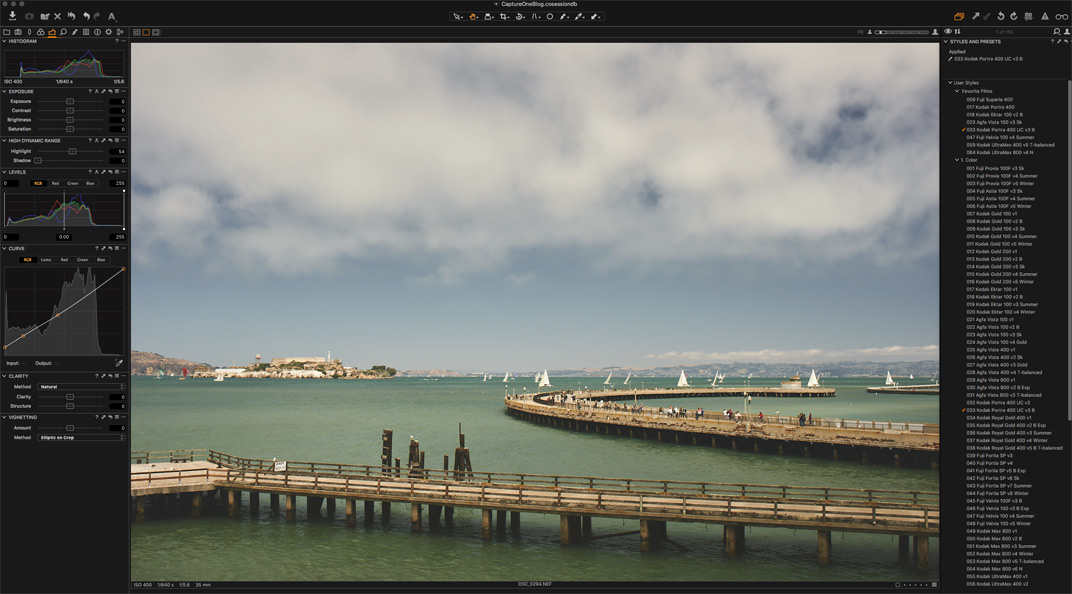
2.1. New Styles Interface
In Capture One 11 all the styles and presets are located in one window; it makes style applying much faster and easier.

On top of the tool, you’ll find applied styles list, below it – User & Built-in styles and presets.
To navigate through your collections faster, you can expand/collapse each section.

BTW, Styles tool in Capture One 11 is as resizeable and relocatable as any other tool in Capture One.
2.2. Styles and Presets for Layers
This is a huge breakthrough in the RAW editing. First of all, you now have control over style intensity – simply apply it to a layer and change the opacity!

The second use case is not so evident but delivers fantastic results.
With Capture One 11 you can apply styles locally, using all the tools for masks and layers. It’s not just “draw a mask and apply a style to it”, you can solve much more complex tasks.
Let me give an example: in this image, from my trip to Baikal, I wish to edit only rocks in the picture without affecting red parts and a tree.

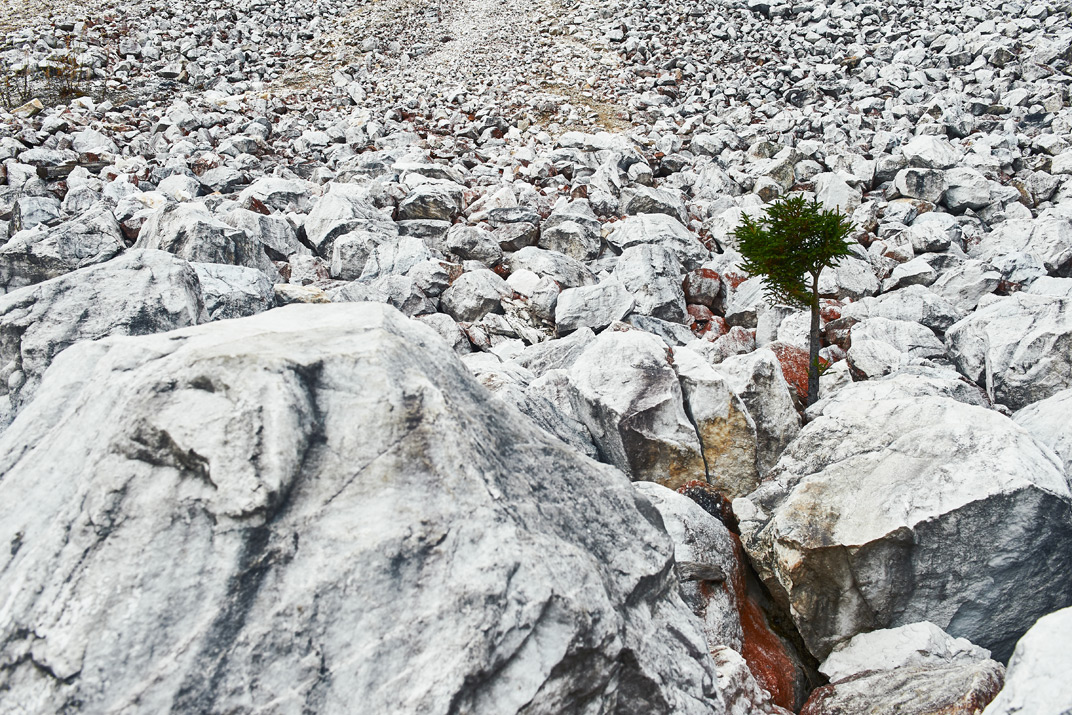
In Capture One 11 it can be done in few clicks:
1) Creating a mask from green and red color.
2) Inverting this mask.
3) Applying style
3. New Processing Features
Capture One 10 and 11 releases brought a bunch of superb improvements to processing. Now you have all the control over the image you will receive after the processing.
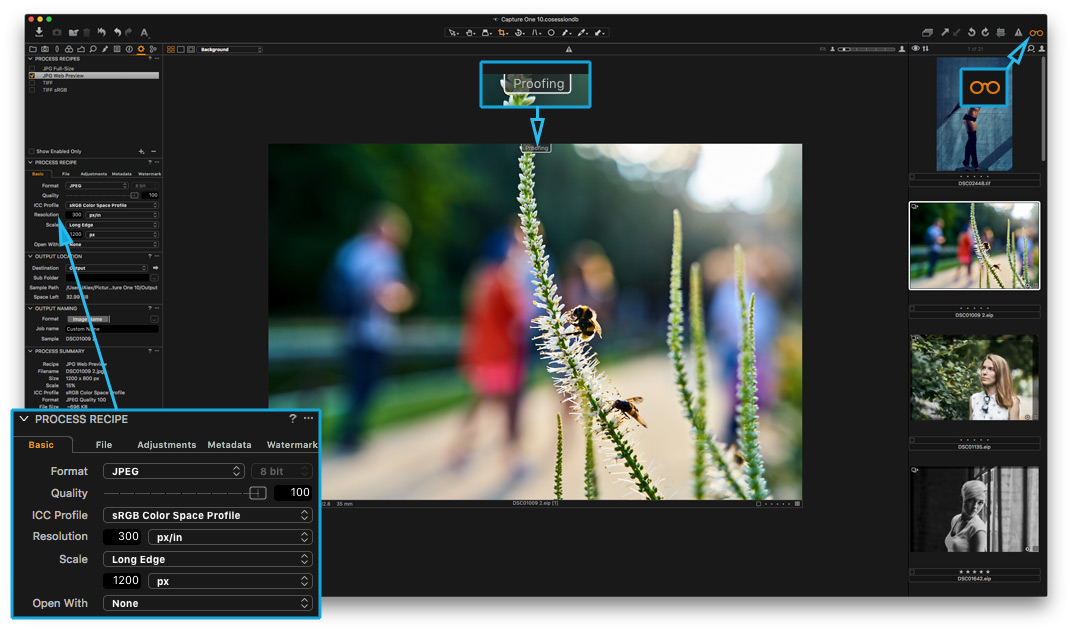
3.1. Output Proofing
Output Proofing shows you the final image right in Capture One before you would process it.

Ever wonder how your sharpening would look like in the smaller internet-size image? Turn on Output Proofing, and you’ll immediately see the “processed” image without processing. Proofing allows you to check if your picture looks good with a selected color profile. Even JPEG compression artifacts can also be simulated.
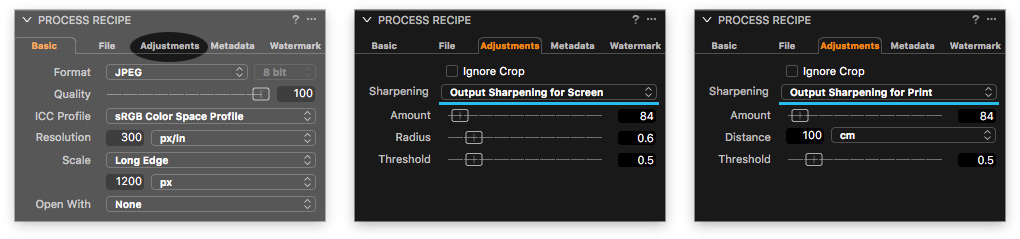
3.2. Output Sharpening
Output Sharpening allows you to add an additional sharpening for a particular processing recipe. Now you can set different sharpening for different image sizes and processing purposes (internet or prints).
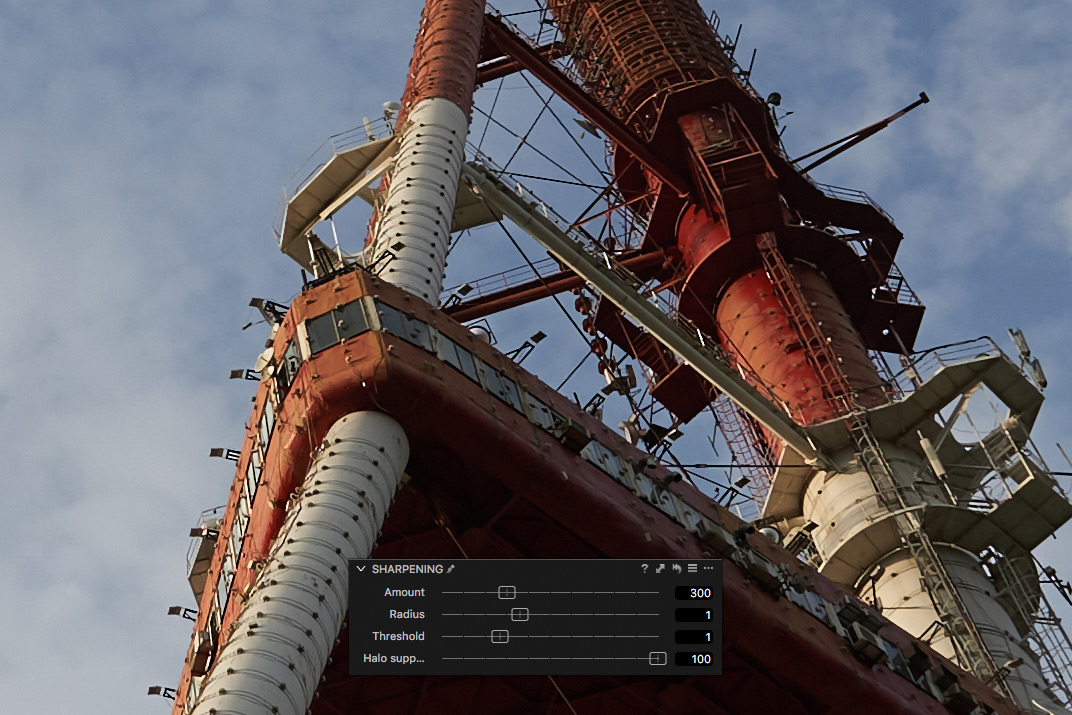
BTW, Capture One 11 has Halo suppression slider to remove specific «halo» effect and all the sharpening sliders are now able to work in layers.

3.3. Annotations for retouchers
With Annotations tool, you can draw notes for retouchers right in Capture One and export them as a layer in a PSD file.

3.4. Export with Assets
As well as annotations, overlay and watermark can also be exported as PSD layers in Capture One 11. Crop settings can be saved as a path in a PSD file.

3.5. LAB readouts
In Capture One 9 there is only one tool related to LAB – Luma Curve which works basically as Lightness channel in LAB.
Now you can measure color in LAB using numbers shown below the toolbar and color readouts.

3.6. Token Watermarking
Token Watermarking allows to automatically generate watermarks based on image metadata.

For example, if you have a group of authors, there is now no need to add specific watermarks for each one of them. Simply add token “Creator” and Capture One will take the name from Creator IPTC field.
4. Better File Management
One of the weakest parts of Capture One 9 was file management: overcomplicated deleting process, no tool to work with duplicates during the import and a lack of PSD support. All these issues have been fixed in Capture One 10 and 11.
4.1. New Delete Concept
Since the 10.1 release, Capture One has three simple options for deleting files, and each one of them might be assigned to a hotkey:
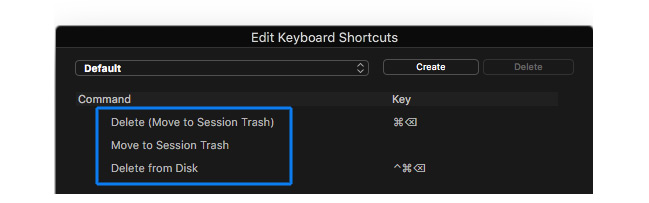
1. Delete
The safest way to delete an image; in the most cases that option would only remove the picture from the album.
2. Move to Trash
Always moves an image to a catalog/session trash.
3. Delete from Disk
Always deletes an image from disk.
4.2. Duplicate Checker for the Importer
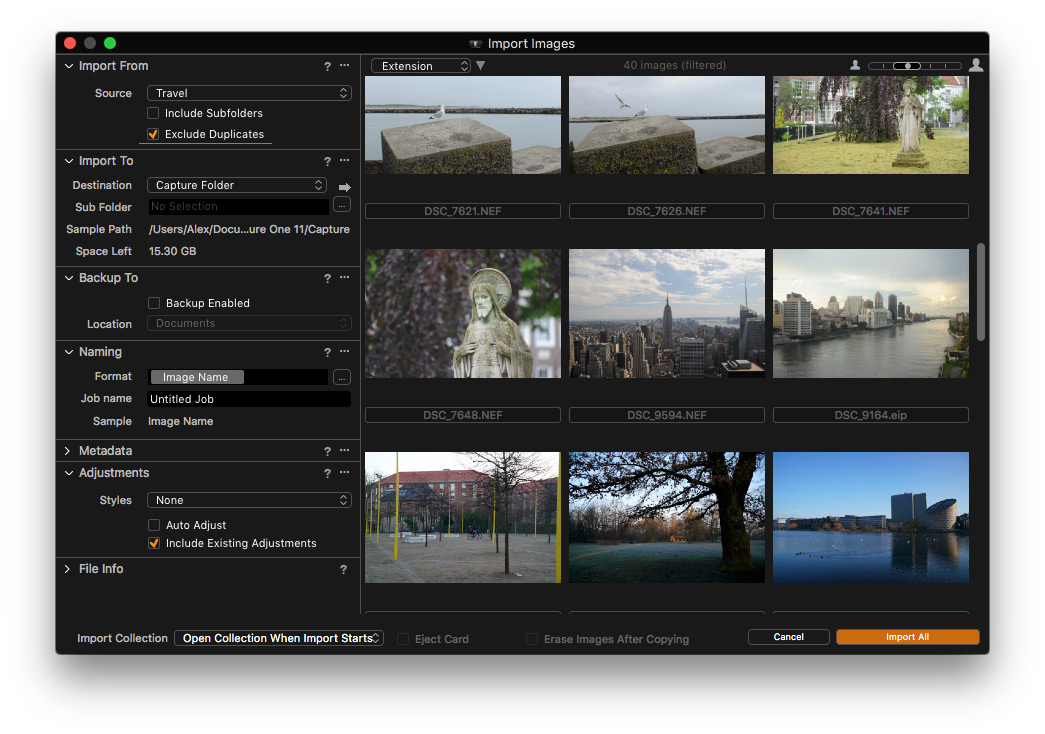
A simple checker that solves all the issues with duplicates of images during the import.
4.3. Move folders in Catalogs
Now you’re able to move folders inside Catalog’s “Folders”, and they will also be moved on your hard drive.

That means, if you wish to relocate the folder with your images, you can just drag it to a new place in Capture One, and it would automatically be moved on your HDD as well.
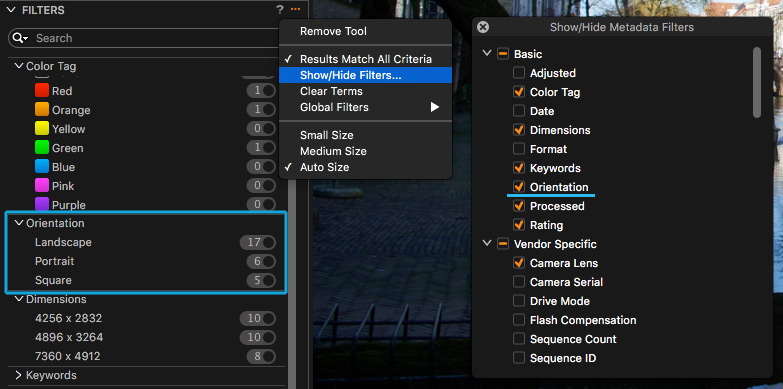
4.4. Filter for orientation of images
In Capture One 9 you can’t filter images by orientation, and that’s not really convenient sometimes.
This issue was fixed in Capture One 10, and now there are three options available: landscape, portrait, and square.
4.5. PSD support
In Capture One 11 there is no full PSD support, but you can now view and store PSD files in Capture One.
Editing and re-processing PSD into a new file would flatter PSD layers, but for an archive management purposes, it’s a quite useful feature.
5. Capture One Fujifilm
If you’re a Fuji photographer and you’re still using Capture One 9 or 10, you’ll find out just a mass of new features in Capture One 12.
First of all, Capture One Pro now supports Fujifilm Film Simulations!
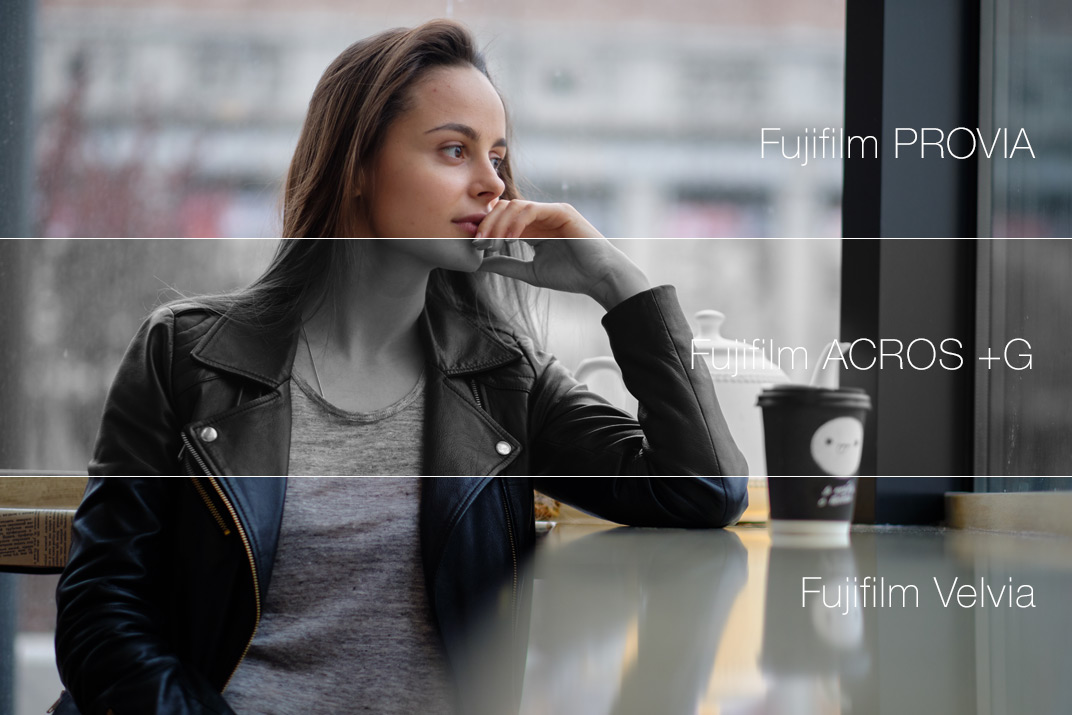
Fujifilm Film Simulations are located in Base Characteristics tool and offers all the classic Film Simulations:

Plus, with Capture One Pro you can now use the tethered shooting feature with Fuji cameras. And if you’re a lucky owner of Fuji medium format camera, Capture One now supports its RAW files.
Those are not all the good news for Fuji camera owners.
Starting from 10.1 release Capture One finally supports Fuji Compressed RAW files and auto masking was updated to support any editable file type, including Xtrans.
6. New Handy Features
Besides improved layers, redesigned styles, and new tools for file processing and management, you’ll find a number of different handy features in Capture One 11.
6.1. “Before/After” button
Yes, upgrading from Capture One 9 would give you a “before/after” button in Capture One!
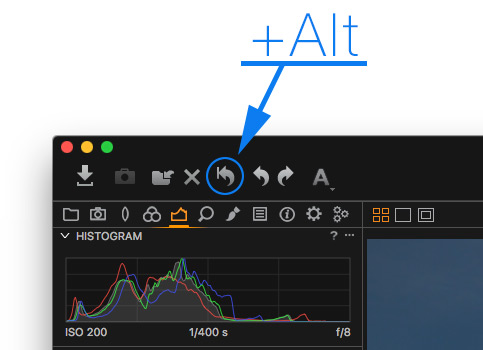
Simply hold the Alt key and click Reset icon to see all the adjustments temporarily switched off.
6.2. Copy/Apply Crop
In Capture One 12 you can finally turn off auto coping of the Crop settings!
That’s a tiny improvement, but it makes batch editing significantly more convenient!

6.3. Camera Focus tool

Camera Focus tool allows you to automatically and manually adjust focus during the shooting. And the best news is that Camera Focus tool works with Sony, Nikon, and Canon cameras as well as with Phase One IQ/XF.
6.4. Compressed RAW Support

In Capture One 9 some useful features like Lens Correction, Chromatic Aberration Analysis and LCC weren’t available for compressed RAW files.
Now all these tools work great with Canon mRAW/sRAW and Nikon RAW M (and RAW S for D5 and D500).
6.5. Vectorscope orientation color wheels
Switching from Capture One 9, you’ll also find new vectorscope orientation color wheels as an additional option to the standard layout.

If you’ve never seen this type of color wheels, you’re probably not working with video. If you do – then Capture One would become now a little bit more convenient and habitual for you
6.6. Tangent devises support

Capture One 9 missed support for editing devices which are often used by professional retouchers.
Now you can connect Tangent devices with Capture One and gain an amazing analog control over color correction and processing.
Recently, I’ve got a chance to test a full Element Kit with Capture One and here you’ll find my review where I described how it feels to edit images with Tangent panels.
6.7. Improved performance
Almost every upgrade since Capture One 9 contained some performance improvements, and as a result, you would notice that Capture One 12 operates much faster.
Also, Back-up/Restore Catalog features were considerably updated to automatically help you with repair in case of crash or corruption of the catalog.
Pricing
Upgrade price to Capture One Pro 12 starts from 130 EUR.
Pro Sony/Fujifilm licenses can also be upgraded – starting from 106 EUR.

Author – Alexander Svet
Alexander Svet – professional photographer and specialist in image processing.
Phase One Certified Professional and Capture One trainer.
AlexonRAW.com