This post contains affiliate links and/or codes, so if you purchase a product through such a link or with such a code, I may receive a small commission at no extra cost to you.
This week we’ll talk about AI skin retouching, and I’ll share a chapter from my new book Capture One Hidden Features with you!
AI-Powered Skin Retouching
I’ve been looking for a reliable AI retouching software for years. There is a whole bunch of apps available for auto-retouching, but somehow none of them have fit my workflow. I’m sure you are familiar with this typical blurry and over-retouched look of some ‘auto-retouching’ apps.
Finally, I’ve found the app that matches my quality expectations. The developers of 3D LUT Creator, a pro-tool for color grading, have released a series of top-notch AI retouching plugins, including two plugins that are focused on skin retouching:
I’ve started working with Heal and Dodge&Burn plugins about a year ago and I have retouched a couple of thousands of images since then. It’s not ideal, but it is the most advanced AI retouching tool I have ever tried. What is even more important — I can finally rely on auto-retouching in my work.
So, let’s run some tests and see the retouching quality these plugins can offer. Also, I’ll show you how I’ve integrated them into my Capture One and Photoshop workflow.
How Does It Work
First of all, you’ll need both Heal and Dodge&Burn plugins for full-featured skin retouching. The plugins work as separate apps, but they are designed to accompany each other.
- The Heal plugin cleans the skin from minor defects such as pimples, blemishes, and post-acne marks.
- The Dodge&Burn plugin smoothes problematic areas such as skin bumpiness, bags under the eyes, veiny hands and feet.
It makes sense to run the healing first and then process the image with Dodge&Burn. Here is how it works in practice.
Let’s take this portrait with noticeable skin bumpiness:

You can use Heal and Dodge&Burn as standalone apps or implement them into your Capture One or Photoshop workflow. I’ll simply drag-n-drop the image into the Heal app. After brief processing, AI retouch has fixed the all minor defects of the skin:

You can adjust Sensitivity to modify the retouching impact on your image. If you need to preserve innate features like moles, you can manually mask them out from retouching:
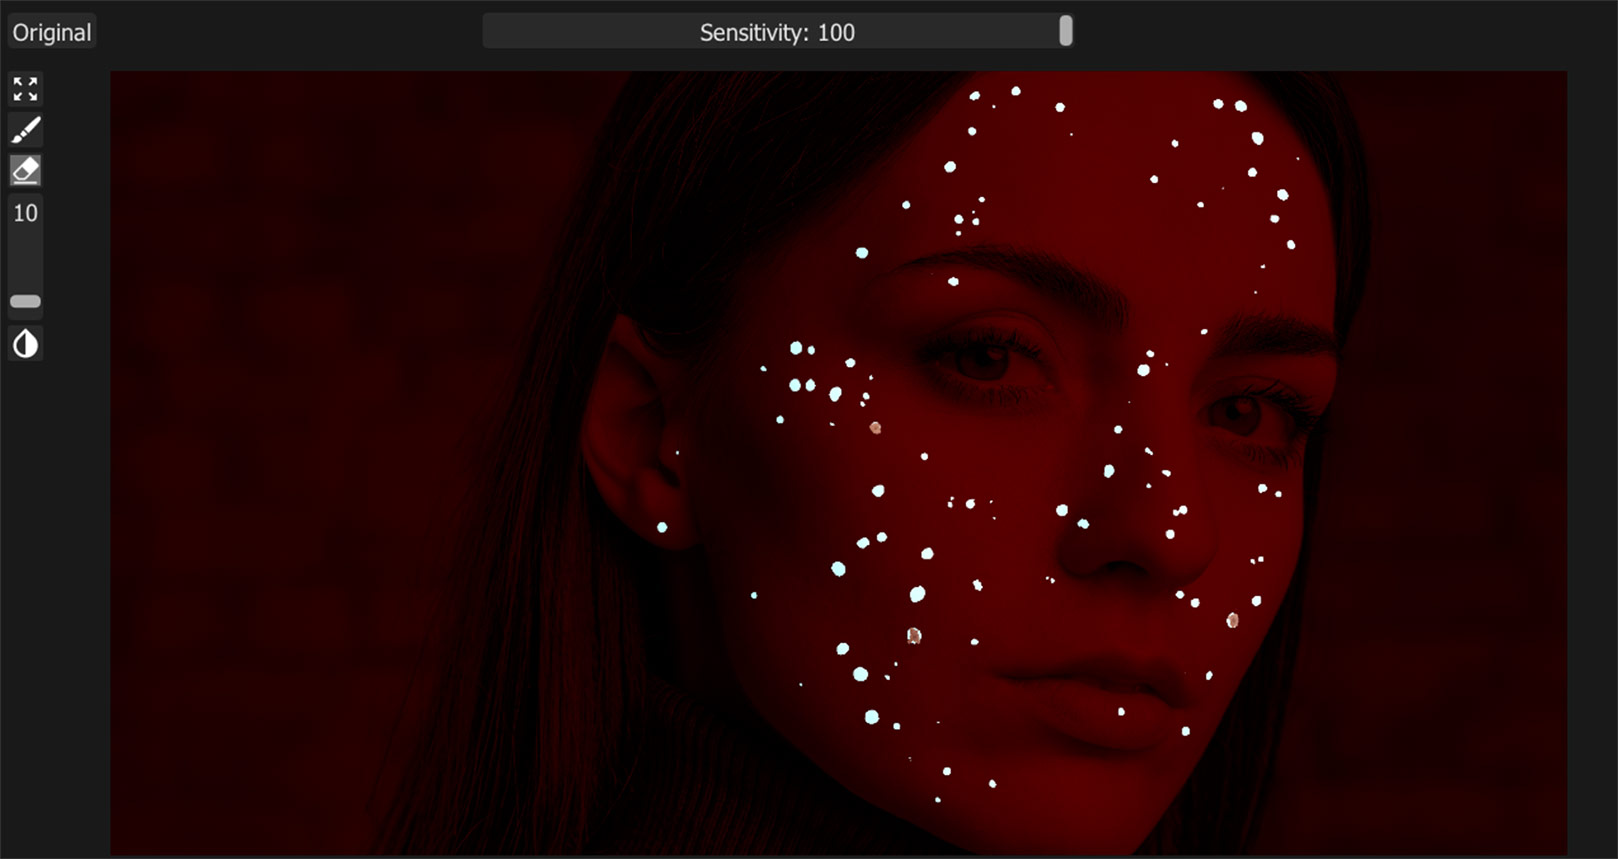
After the Heal app, we run the Dodge&Burn processing to make the skin look smoother. Later in the text, I’ll show you how to combine these two steps into a one-click Photoshop action. Dodge&Burn offers similar settings; you can protect specific areas from being affected by the plugin and control retouch impact with the Blend slider.

Now, let’s compare the original shot with the fully-retouched image:
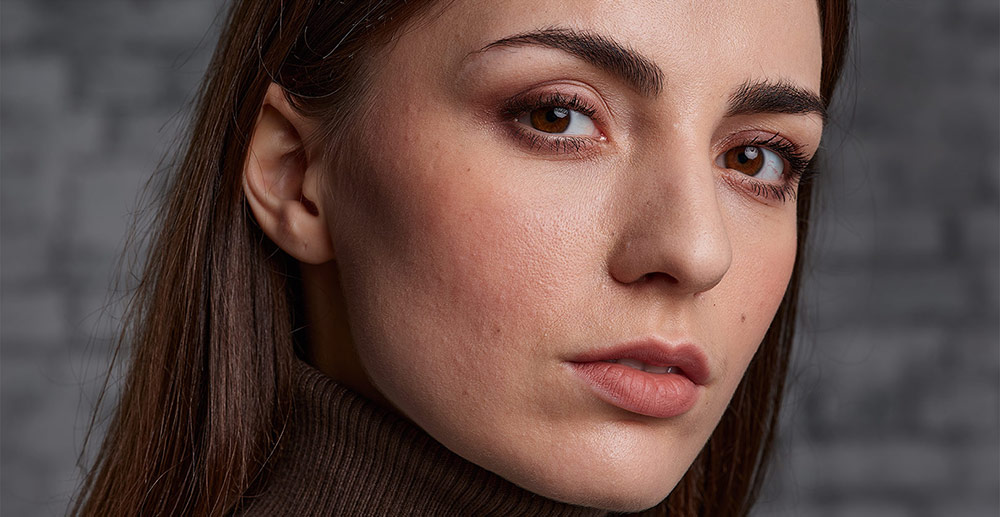

As you can see, AI retouch hasn’t blurred out this image; the skin structure looks natural, even tiny facial hair remain in place.

And we have this clean result with the AI retouching only; no manual correction was involved. You can try it out yourself; on the product page, click More Info to download demos of each plugin:
All my readers can get 20% OFF every Retouch4me plugin.
Simply follow this link, and you’ll automatically receive a 20% discount.
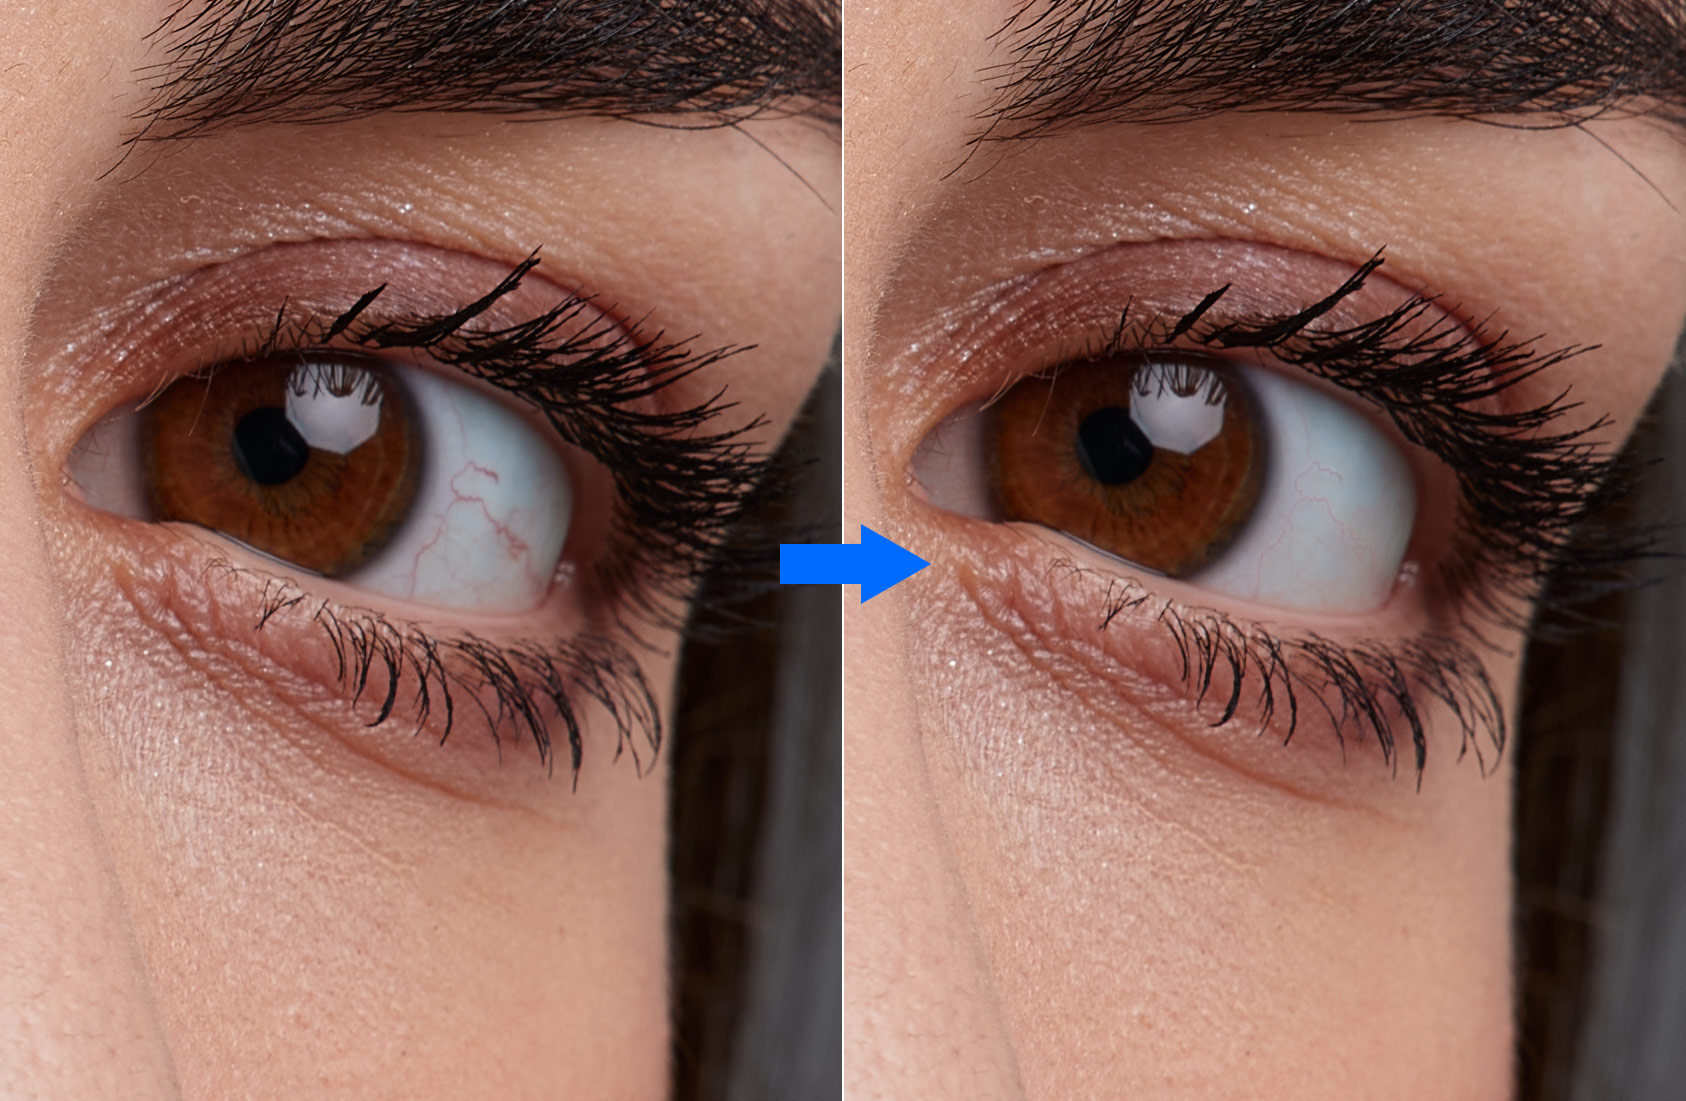
BTW, on this image, there are noticeable eye vessels, and you can easily diminish them with the Retouch4me Eyes Bundle plugin:
Retouch Quality
Now, let’s take more images to the test and see how the plugins deal with different kinds of skin issues. Heal and Dodge&Burn apps easily handle any common issues making the skin clean and smooth:


The AI engine tends to retouch moles, but you can always mask them out from retouching.

AI retouching deals pretty well even with more problematic skin, but it depends on a particular image. Most likely, plugins will not fix scars or other personal features, as well as some uncommon pimples.
Heal and Dodge&Burn apps can work with different people on an image, so you can easily retouch a group portrait as well.
What I love the most is the natural look of the retouch. It doesn’t ‘enhance’ people or make them appear different. AI engine makes people look just as they expect to see themselves in a photo.
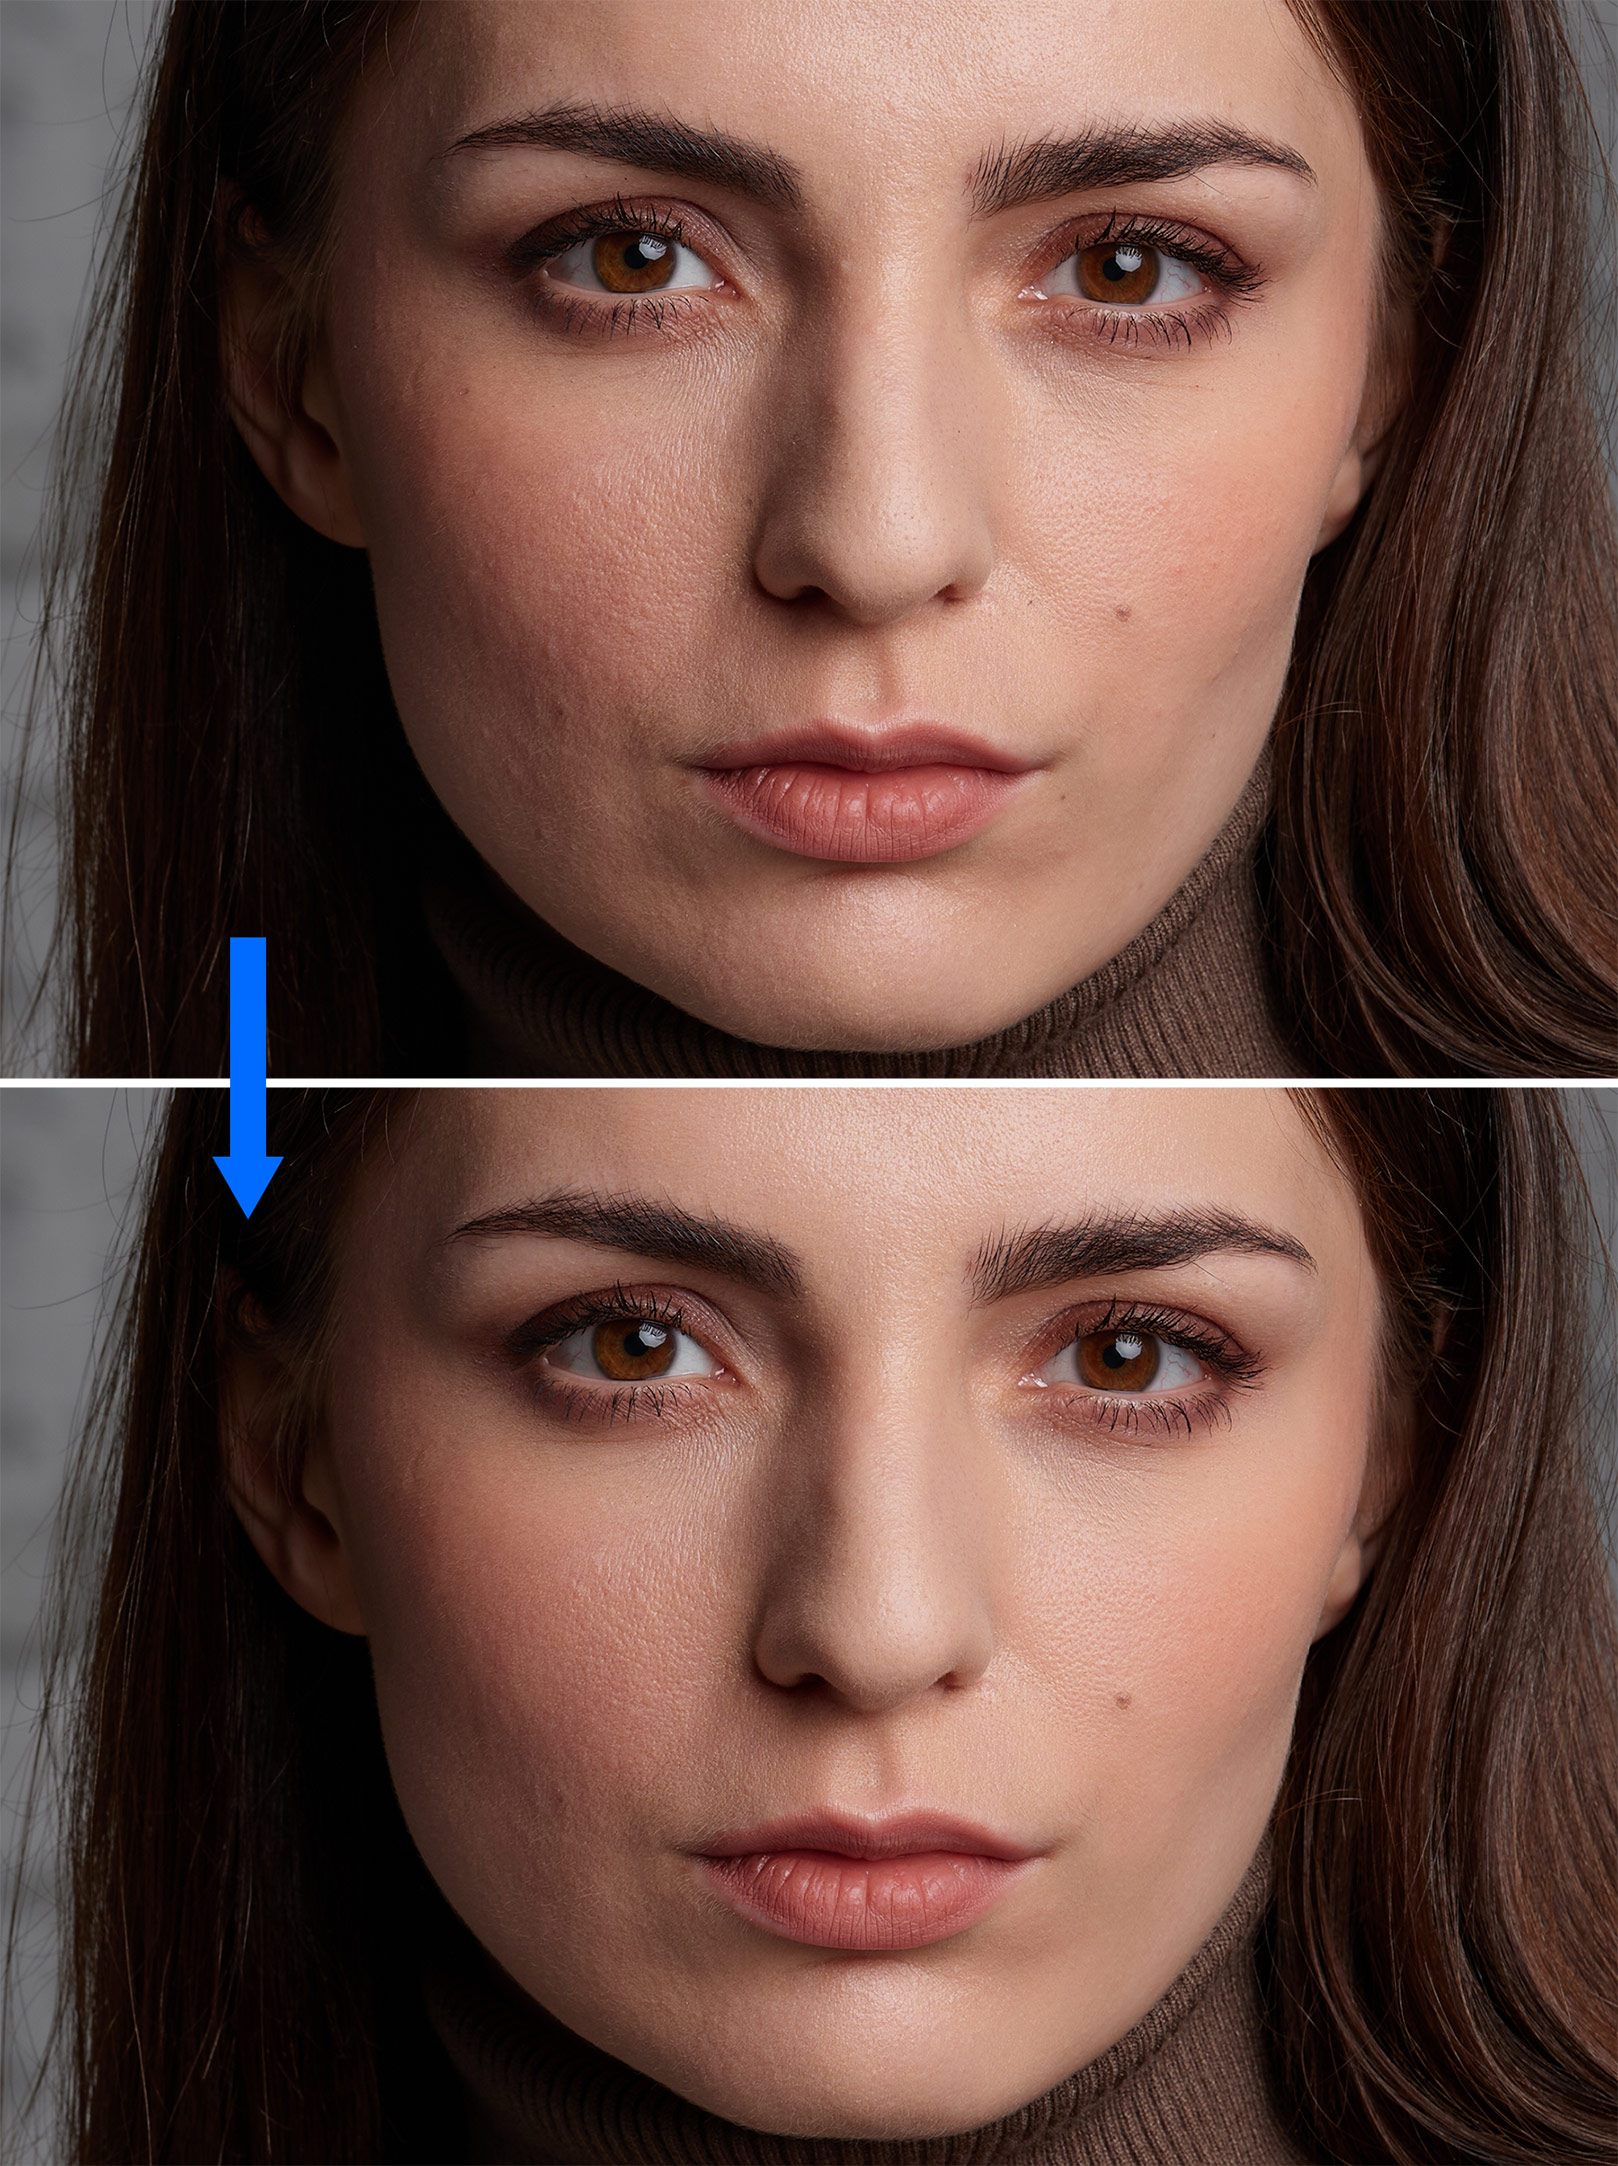
When I’ve been testing the apps, I’ve taken pictures of several acquaintances and showed them the retouched results only. Their reaction was: “So… Where is this AI retouch you were talking about?” and when they saw the original images, it was like: “Oooh…!”
Retouch4me plugins don’t blur your images even when they deal with noticeably problematic skin:
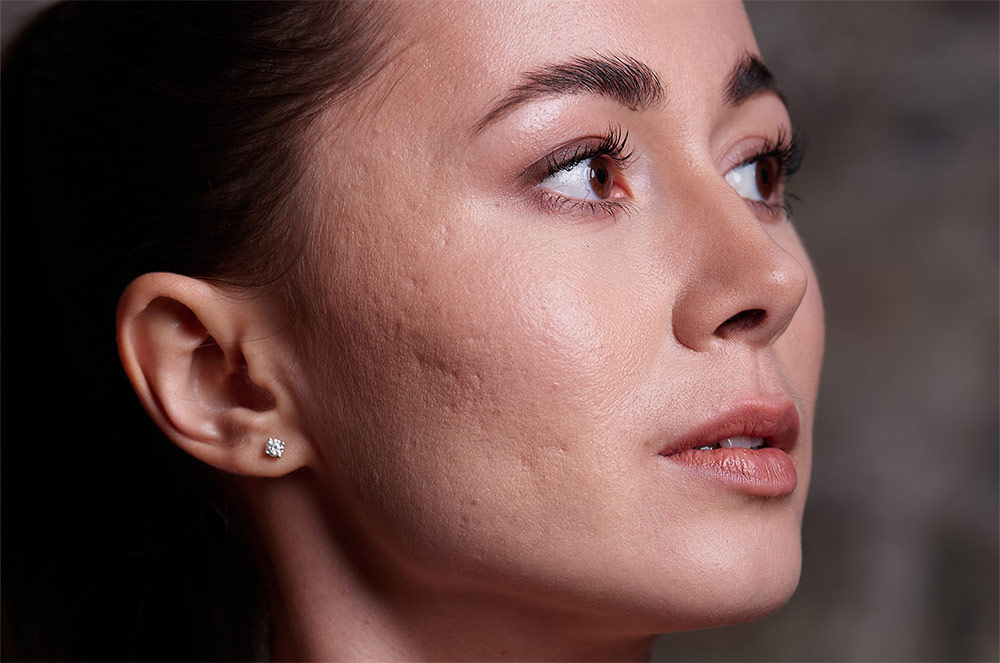
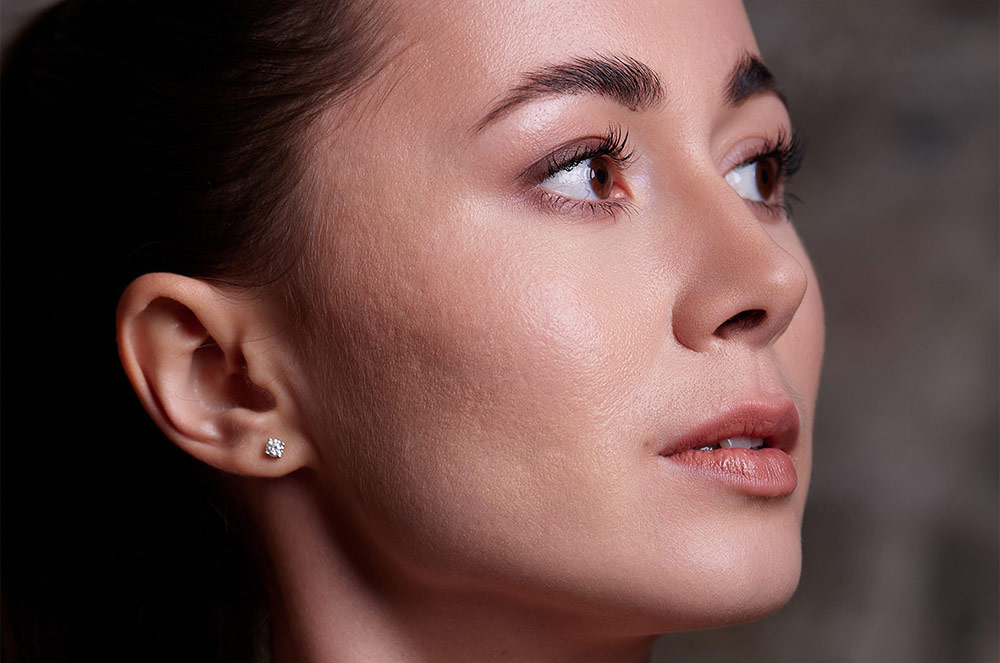
The artificial look was my main issue with auto-retouching before. It was ok for a bulk retouching of some simple images, but I would never process important photos using it. With Retouch4me plugins, I can safely process images without worrying about getting fake or blurry results.
Maybe the final image is not perfect, but it looks natural and realistic. Even at 100% zoom, you still have all the fine details:

Now, let’s see how you can implement these plugins into your workflow.
Capture One and Photoshop Workflow
You can send images from Capture One to Retouch4me plugins using the Edit With feature for roundtrip workflow. It works the same way as with any other third-party app. If you don’t see a Retouch4me plugin in the app list, simply add it using the Other option:

After retouching, the image will automatically appear near your RAW in Capture One. Still, you’ll need to repeat this process for retouching using the second plugin. That’s why it’s way more convenient to record a Photoshop action that processes an image with both apps in a single click. Here is how it works.
First, open an image in Photoshop and start recording an action:
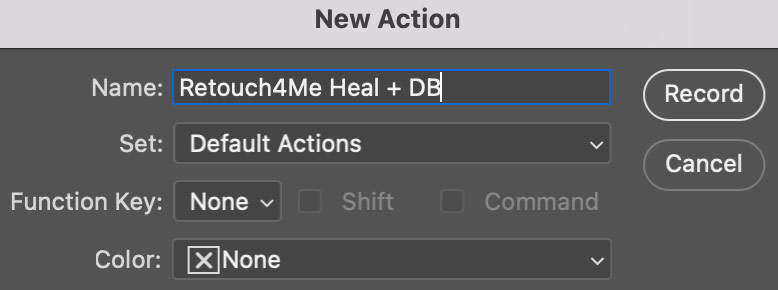
Then, run the Heal plugin in Photoshop. It comes with the Heal app and will automatically appear in the Filters menu. In the plugin window, set retouching impact and click Apply. The retouching will be recorded in your action:

Next, run the Dodge&Burn plugin the same way, save your image, and close it. Stop recording. Your action should look like this:

If you’re not familiar with Photoshop actions, feel free to download mine here. Load it into the Actions tool, and your one-click workflow is ready!
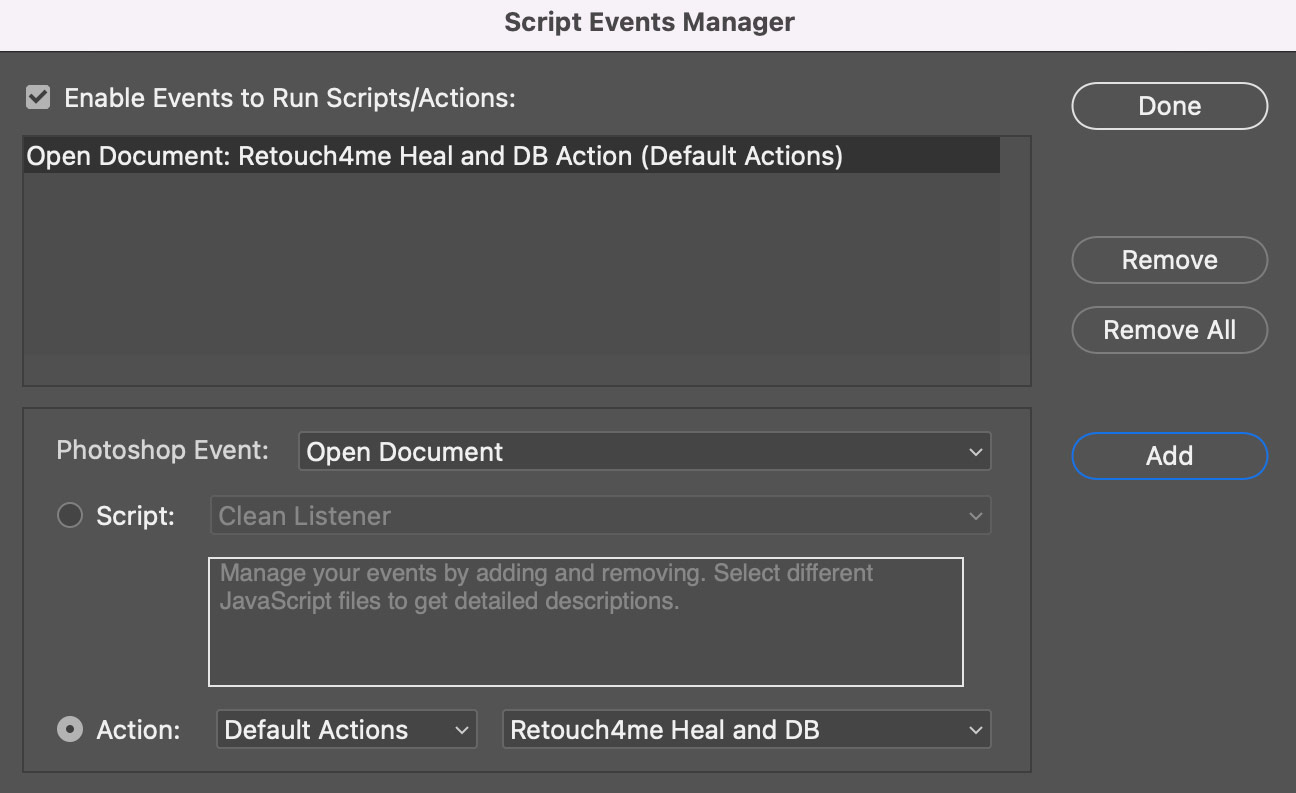
To get even more seamless processing, you can set Photoshop to run this action automatically when you send an image from Capture One. Go to File>Scripts>Script Events Manager and enable events to run scripts/ actions. Next, create a rule that when you Open Document, Photoshop will run your Retouch4me action:
The full book includes 200+ pro hints to improve your Capture One workflow and four chapters from the book you can download free of charge!

You can download four chapters from the Capture One Hidden Features ebook free of charge:
- 3. Must-Have Shortcuts
- 14. Hidden Features of Layers
- 27. The Power of Mask Inversion
- 38. Automation with Macros
Simply subscribe to the AlexOnRAW newsletter by entering your email in the form below. After subscribing to the newsletter, you’ll immediately receive the four chapters from the book. Also, you’ll regularly get a friendly newsletter with free Capture One tutorials, image editing tips and tricks, and news from Capture One community.

