

Have you already tried the new Dehaze tool in Capture One 21?
In my Capture One 21 overview, I’ve shown some of my favorite hints on using Dehaze with foggy and hazy images. Still, there is one another exciting feature:
You can easily add more depth and dimension to portraits with Dehaze.
It seems counterintuitive since regular portraits have no haze to remove, and you can quickly ruin a portrait with a blunt Dehaze adjustment.
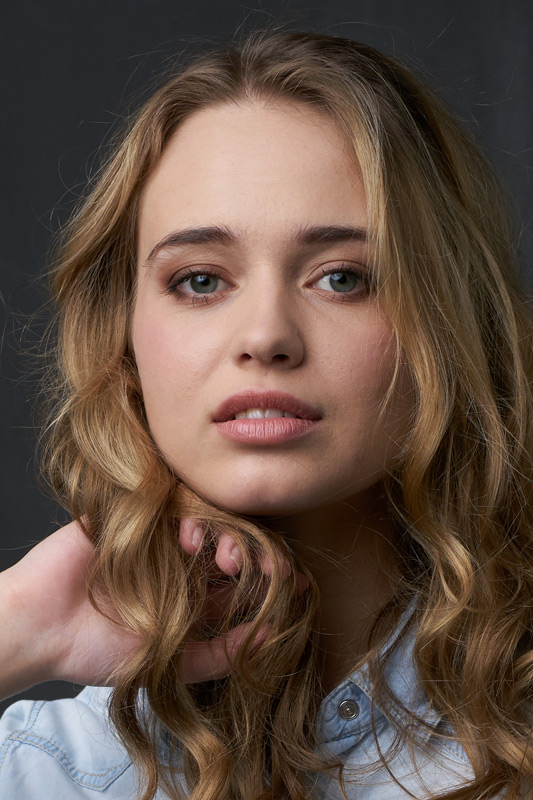
So, let’s take this image and see how we can enhance it with Dehaze.
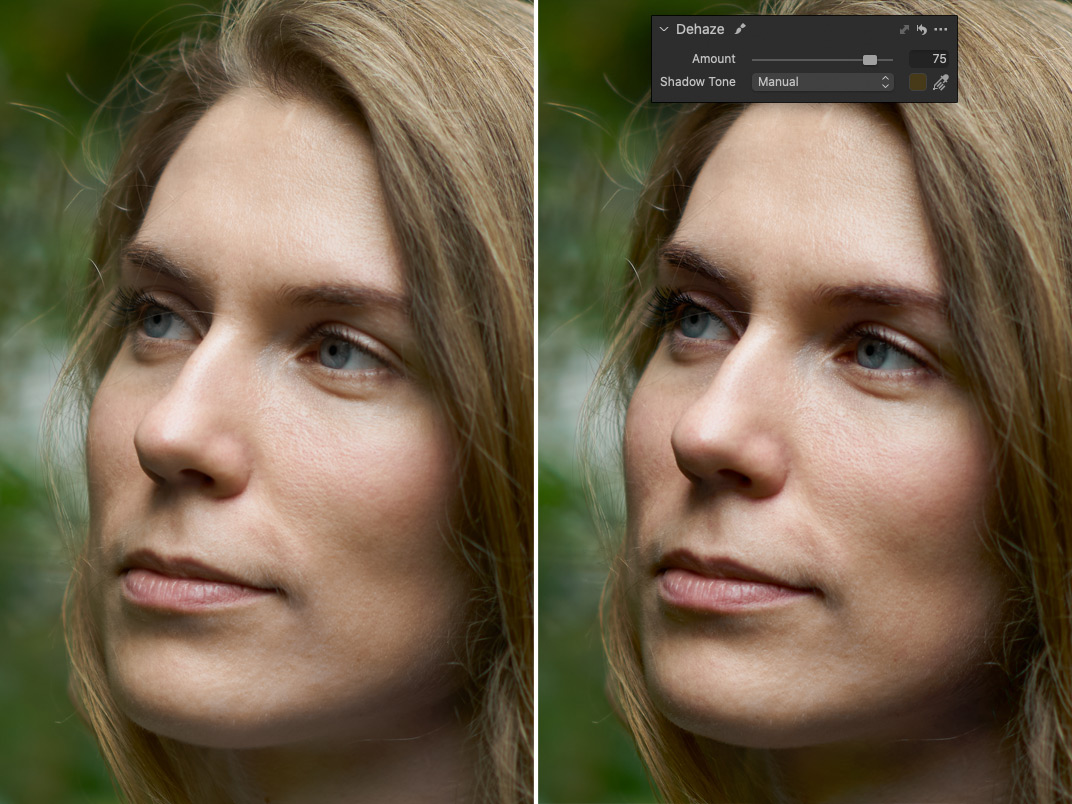
First, I’ll try a regular Dehaze correction. You can adjust the impact and pick different Shadow Tones, but the result is pretty weird in any case:

Obviously, this doesn’t work, and we need to find some other way.
The key to using Dehaze with portraits is the Luma Range mask.
You need to create a Luma Range mask that doesn’t include highlights and has a wide Falloff to soften mask transition.
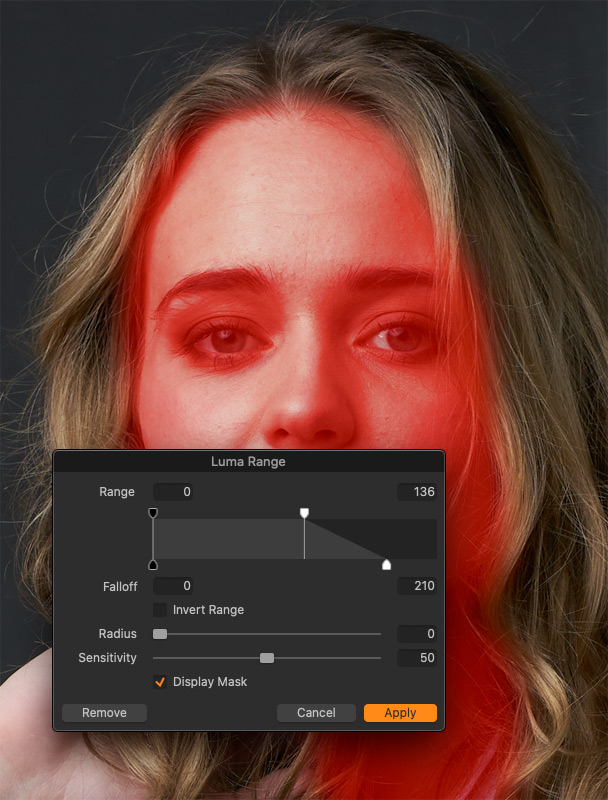
The particular settings can vary for different portraits, but the idea is the same.
Now, let’s rasterize the mask and erase areas on the eyes, eyebrows, and lips. Leaving them untouched will give us a more natural look. Refine the mask, and we’re ready to apply the Dehaze.
To get a correct Shadow Tone for this layer, you need to recalculate it:

If Auto doesn’t fit well, or you’re looking for a bit of a different color correction – set the Shadow Tone manually. I recommend you to pick it on the shady but not dark areas of the skin.
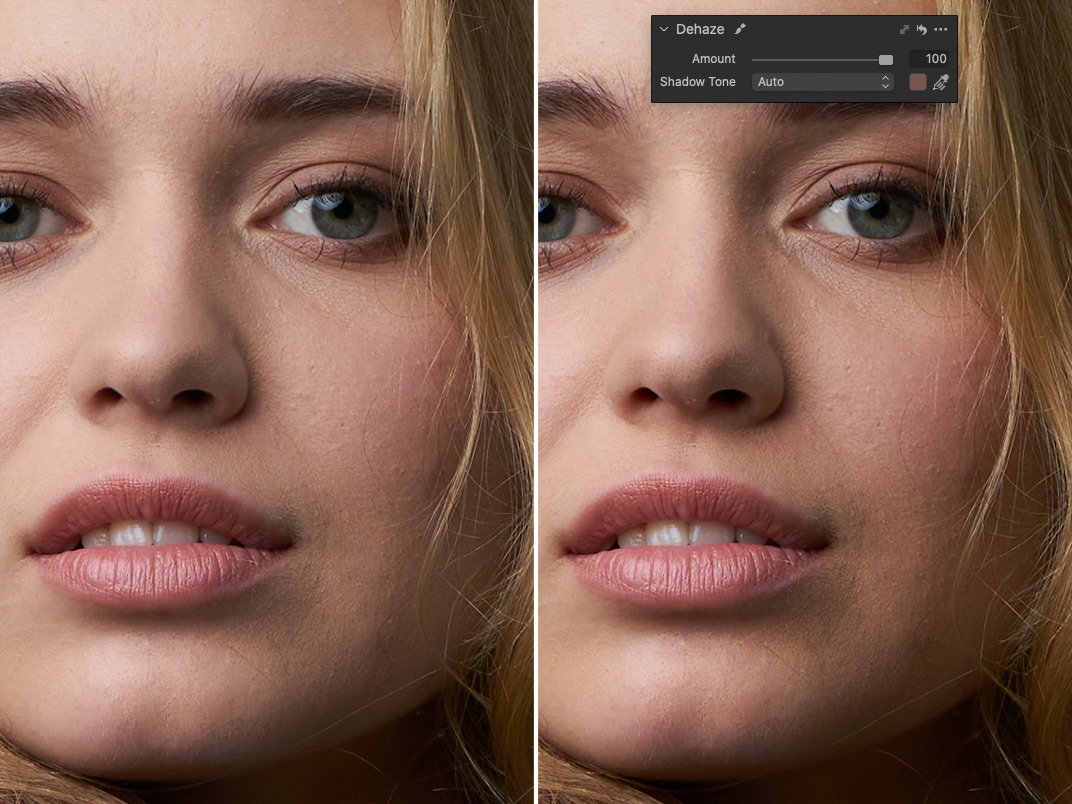
So, here is how the Dehaze adjusts our portrait now:

Dehaze very gently adds more depth and dimension to a portrait.
Moreover, other tools can’t replicate this effect.
Contrast has a way more direct impact on an image:

For the same task, the RGB Curve affects color overintensively, and Brightness/Exposure/HDR correction gives an utterly distinctive look:

Photographer Walter Rowe has first discovered this feature, so check out his video too!
Let’s do one more edit:
First, we’re applying Luma Range mask:

Rasterizing it and clearing eyes and lips from the mask. Now, here is the Dehaze with custom Shadow Tone:
Feel free to recover dark shadows a bit with HDR:

There is one more curious hint for using Dehaze with portraits. We’ll discuss it in one of the next posts, so stay tuned folks!
Capture One Hidden Features eBook

Capture One Hidden Features is a collection of more than 200 pro hints to improve your Capture One workflow, structured into an easy-to-read book.
You can download four chapters from the Capture One Hidden Features ebook free of charge:
- 3. Must-Have Shortcuts
- 14. Hidden Features of Layers
- 27. The Power of Mask Inversion
- 38. Automation with Macros
Simply subscribe to the AlexOnRAW newsletter by entering your email in the form below. After subscribing to the newsletter, you’ll immediately receive the four chapters from the book. Also, you’ll regularly get a friendly newsletter with free Capture One tutorials, image editing tips and tricks, and news from Capture One community.