


Today we’ll talk about hidden features of layers in Capture One, and I’ll share with you a chapter from my new book Capture One Hidden Features. You’ll learn how to create two gradients on a single layer, speed up editing with brush shortcuts, skip copying layers, and more!
Feel free to download this one and three other free chapters here.
Hidden Features of Layers
In recent years, the Layers tool in Capture One has drastically evolved. You can now create complex masks in a couple of clicks and perform all the editing in layers. Here are my favorite unobvious features of layers!
Taking Full Control over Gradients
Use these simple tricks to gain full control over gradients:
- To change a gradient smoothness – hold down Shift and move lines.
- To relocate a gradient – hold down Cmd (Ctrl in Windows) and drag a mask.
- To move lines separately – hold down Alt and move lines.
- To rotate a gradient by a 45-degree angle – hold down Shift and rotate the radial gradient.
- To change the shape of a radial gradient — move one of the anchor points.
- To lock the opposite point and change the shape of a radial gradient — hold Alt and move one of the anchor points.
- To change the scale of a radial gradient — hold Shift and move one of the anchor points.
- To lock the opposite point and change the scale of a radial gradient — hold Alt + Shift and move one of the anchor points.
Brush Shortcuts
You can change all the brush settings with shortcuts and cursor movements. For instance, to adjust brush size, simply hold down Ctrl, Opt, and left-click-n-drag mouse or trackpad.
Here is the full list of the quick control keys:
Mac
- Size: Ctrl + Opt + left-click and horizontal drag (right/left)
- Hardness: Ctrl + Opt + left-click and vertical drag (up/down)
- Opacity: Shift + Ctrl + Opt + left-click and horizontal drag
- Flow: Shift + Ctrl + Opt + left-click and vertical drag (up/down)
Windows
- Size: Alt + right-click and horizontal drag (right/left)
- Hardness: Alt + right-click and vertical drag (up/down)
- Opacity: Shift + right-click and horizontal drag (right/left)
- Flow: Shift + right-click and vertical drag (up/down)
BTW, the same shortcuts work with Magic Brush as well!
Brush Icon
You can quickly understand whether you’re adjusting the main image or a layer merely by checking this brush icon:
 The brush icon will appear on most Capture One tools if you have selected a layer.
Finishing Gradients with Brush and Eraser
Gradients in Capture One can be edited just like regular masks, and I use this feature a lot! The only thing you need to do is rasterize a layer with a gradient. You can then easily erase a part of a gradient to exclude an unwanted element from the mask or reduce layer impact on it.
Rasterizing Luma Range Mask
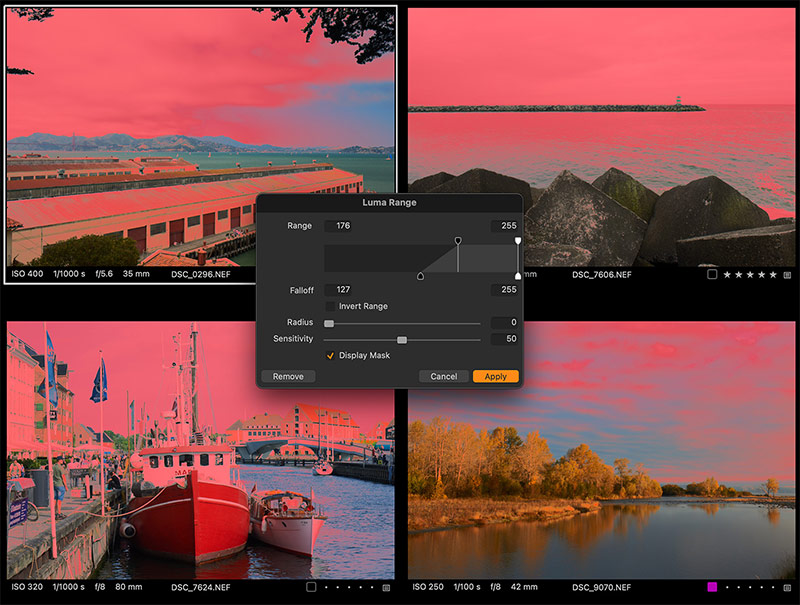
Speaking of rasterizing, there is a curious feature of the Luma Range tool. Luma Range doesn’t transform your mask. It simply hides parts of the mask according to the selected luminosity range.
Why is this important? Your layer mask stays the same; thus, you can’t refine the Luma Range mask. Fortunately, you can easily avoid this restriction by rasterizing the mask. With rasterizing, you truly transform it into a regular mask so that you can perform all kinds of layer actions.
The same feature allows you to create a new filled layer, apply Luma Range and copy/paste it to a group of images. The mask will look differently on every image:
Duplicate a Layer Mask with Adjustments
There is a simple life hack to duplicate a layer mask with adjustments:
- Create a clone variant of your image
- Copy/paste layers from an original image You’ll get the same image with duplicated layers.
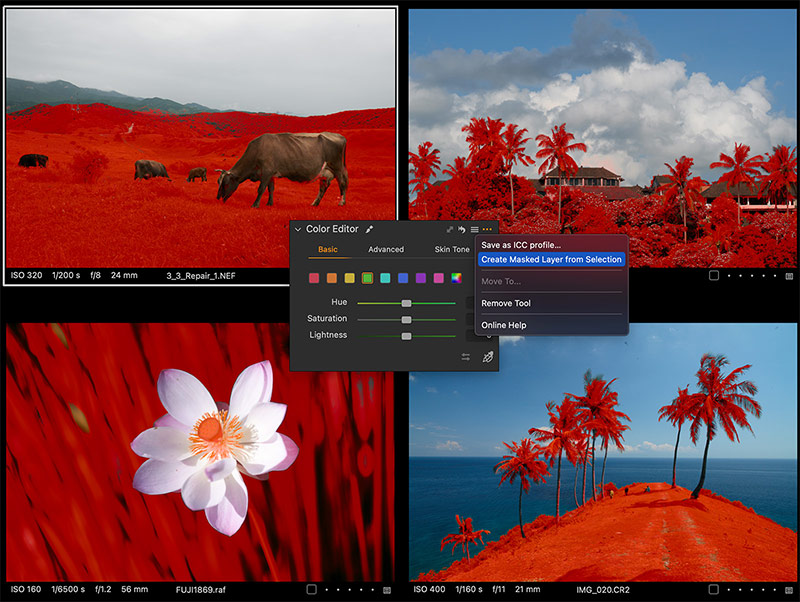
Black & White in Layers
Unfortunately, the Black & White tool doesn’t support layers. However, there is a workaround to get a pretty similar effect.
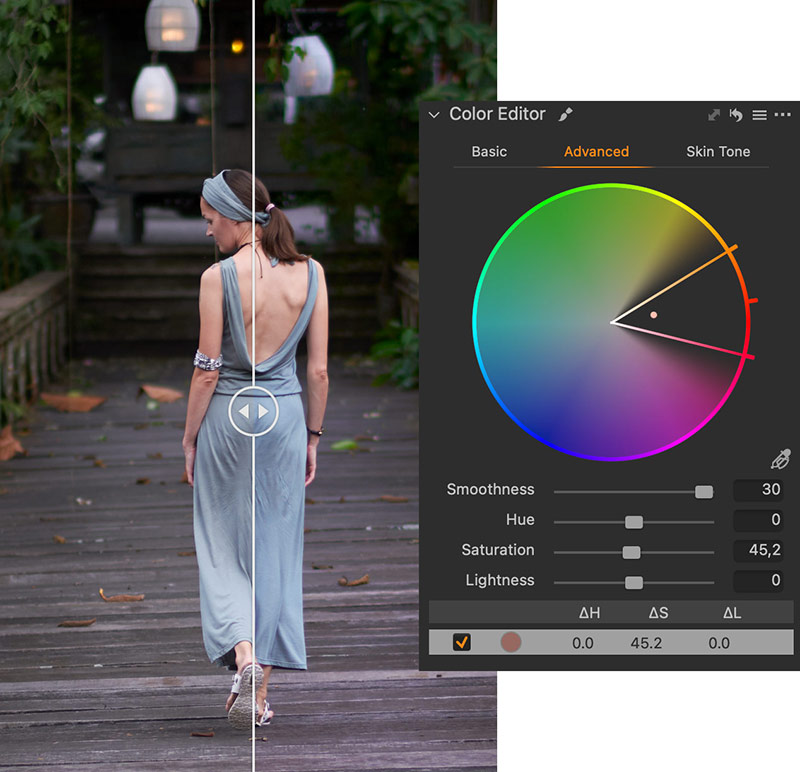
The main feature of the Black & White tool is the ability to adjust color channels in B&W mode. You can get similar control over color by desaturating an image in Color Editor and using Lightness sliders.

BTW, the RAW file of this image is available in my 100 RAWs for Image Editing Practice set.
Keep in mind that Basic Color Editor is always a safe choice; you can’t ruin an edit with it. Advanced mode offers more editing freedom, but you have to know what you are doing.
The effect will slightly differ from the B&W tool, but it will allow you to use it in layers!
How to Skip Copying Layers
Sometimes you might need to skip layers when copying adjustments. By default, Capture One applies all the adjusted settings, and first, you need to turn it off here:

Next, in Adjustments Clipboard, manually select all the tools you usually copy, except for Layers. Now, you can copy adjustments using Copy/Apply shortcuts, and it will not affect layers on your images.
BTW, in the final part of the book, I’ll show you how to create a macro that removes layers during copying automatically.
Batch Masks from Color
Mask from color can be created for a bunch of images simultaneously. Simply select all the required images and run the process — each image will get a unique mask!
Drawing Two Gradients on a Single Layer
Technically, Capture One allows drawing only one gradient per layer. However, a radial gradient in Capture One supports a significant level of transformation, and you can quickly form it into an elongated shape, making two gradients out of one.

Mixing Layer Features
Finally, all layer features work just perfectly together.
For example, you can create a mask from color, refine it, and then remove some parts from this mask with Luma Range. Rasterize this mask, and you can now erase some objects, copy the mask, or invert it.
This is the key to efficient layer workflow in Capture One. It’s not just about making some local adjustments. You can get fantastic results if you re-adjust your mindset to incorporate all these features into your editing.
The full book contains 200+ pro hints, 40 chapters, 234 pages, and free bonuses!

You can download four chapters from the Capture One Hidden Features ebook free of charge:
- 3. Must-Have Shortcuts
- 14. Hidden Features of Layers
- 27. The Power of Mask Inversion
- 38. Automation with Macros
Simply subscribe to the AlexOnRAW newsletter by entering your email in the form below. After subscribing to the newsletter, you’ll immediately receive the four chapters from the book. Also, you’ll regularly get a friendly newsletter with free Capture One tutorials, image editing tips and tricks, and news from Capture One community.
Free Bonus with the Book
You’ll get three bonuses with the book:
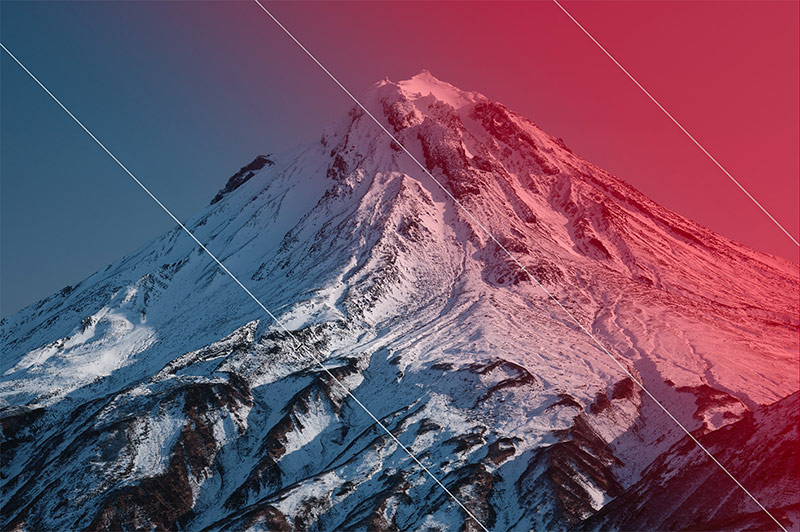
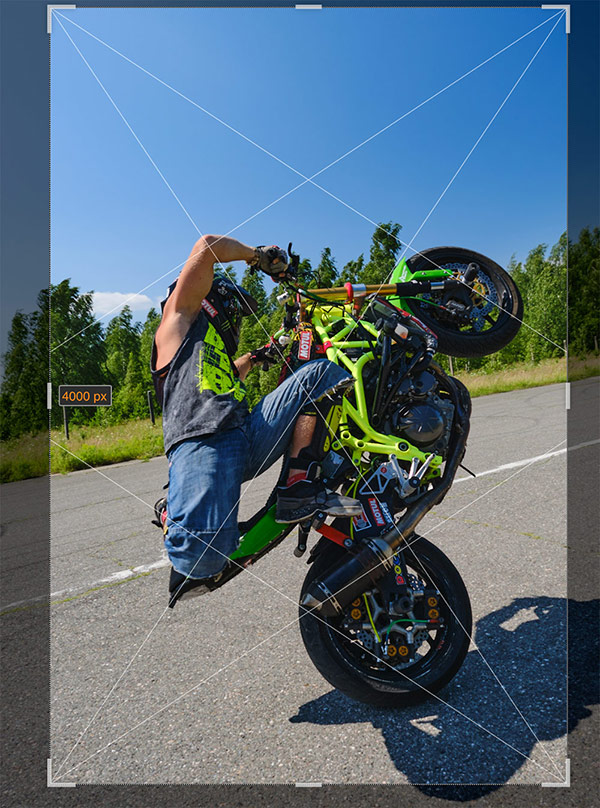
Dynamic Symmetry Grids

By default, Capture One offers three classical grids to make cropping easier: Rectangular, Golden Ratio, and Fibonacci Spiral.
However, in my work, I use the fourth grid – Dynamic Symmetry.
The Dynamic Symmetry grid allows you to evaluate composition faster. It gives you a better perspective of how composition works with your image and thus makes cropping easier.
Since Capture One is missing this grid, I’ve created five transparent PNG files with dynamic symmetry lines for different aspect ratios and orientations:
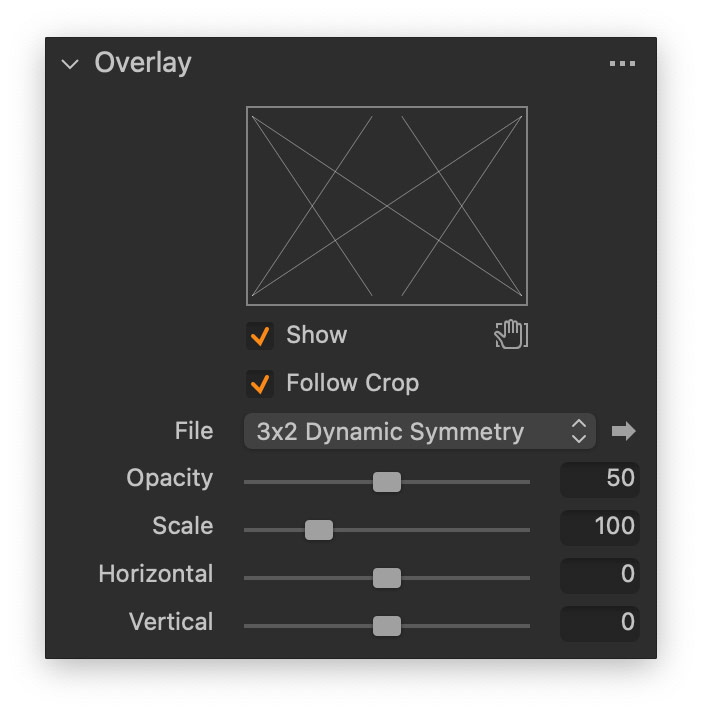
Simply add these files to the Overlay tool, and you’re ready to use them!
Reset Adjustments Styles
Usually, styles in Capture One are used to apply some adjustments. However, you can use them to reset adjustments as well!
For my book Capture One Hidden Features, I have created a set of ten styles to reset different groups of tools:

These styles come as a free bonus with the book!
5 Style Brushes
One of my book’s chapters is all about creating custom style brushes.
Here you’ll learn how to create a style brush that increases saturation without affecting skin tone:
A style brush that removes the magenta color cast, or, one of my favorites, a style brush to enhance your images with colorless contrast:
