This week we’re diving into the hidden world of ultra-efficient editing in Capture One!
You’ll learn how to:
- Implement Auto and Smart Adjustments into your workflow
- Edit images faster with technical styles
- Automate actions with scripts and macros
Let’s start with the best practices for Auto and Smart adjustments in Capture One.
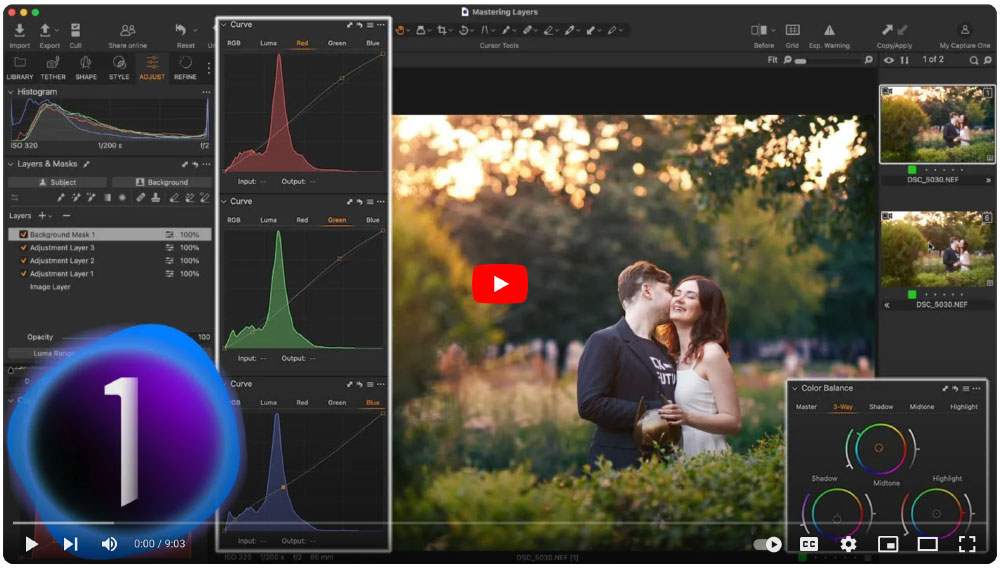
Using Auto and Smart Adjustments in Capture One
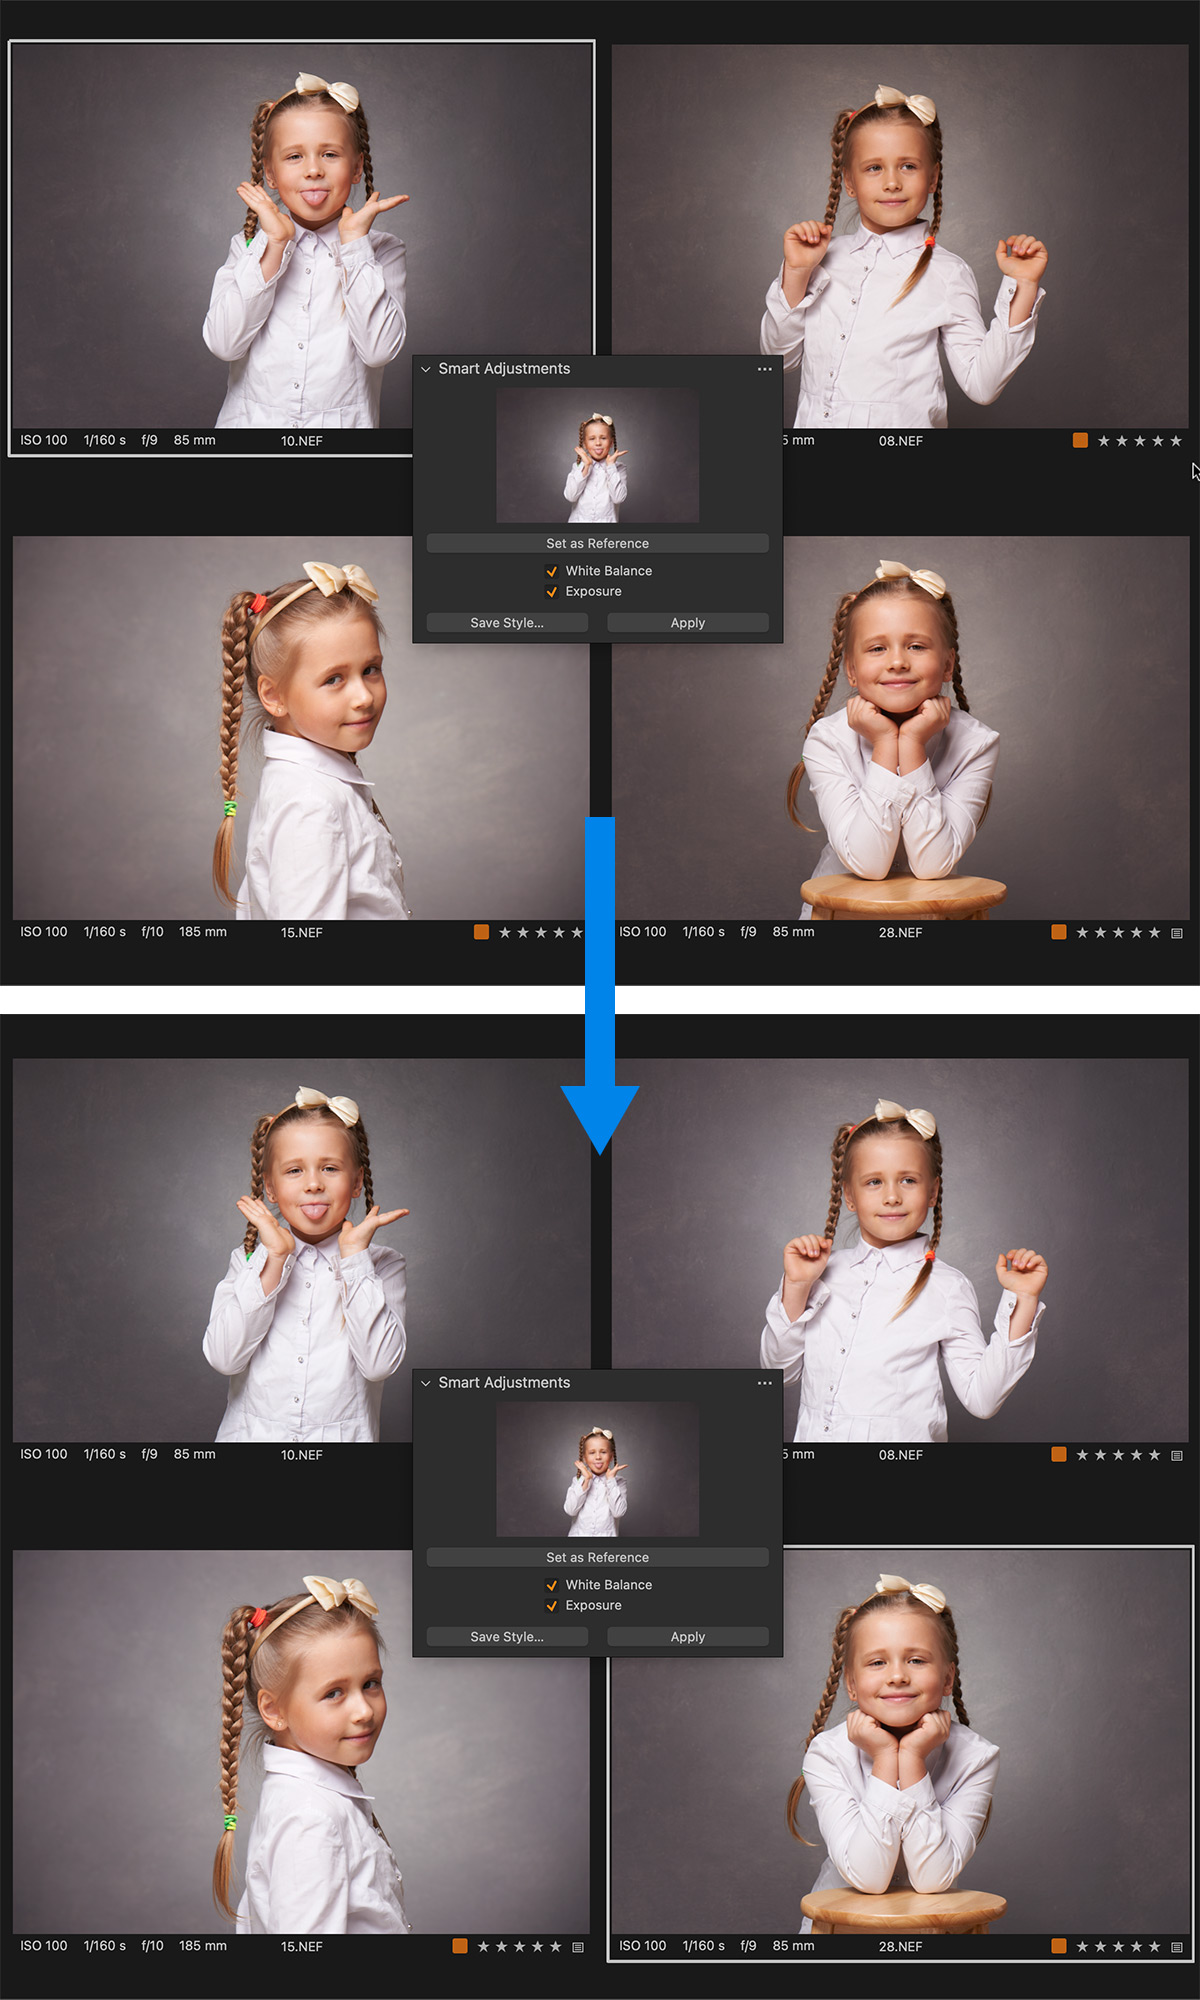
Smart Adjustments is the most advanced auto-editing tool in Capture One. It allows you to set a reference shot and adjust WB and Exposure according to this image.

Usually, Smart Adjustments is the first step in my image editing workflow.
I start by choosing referral shots from every scene and adjusting Exposure and White Balance on them. Then I’m using Smart Adjustments to even out the basic look of all the images.
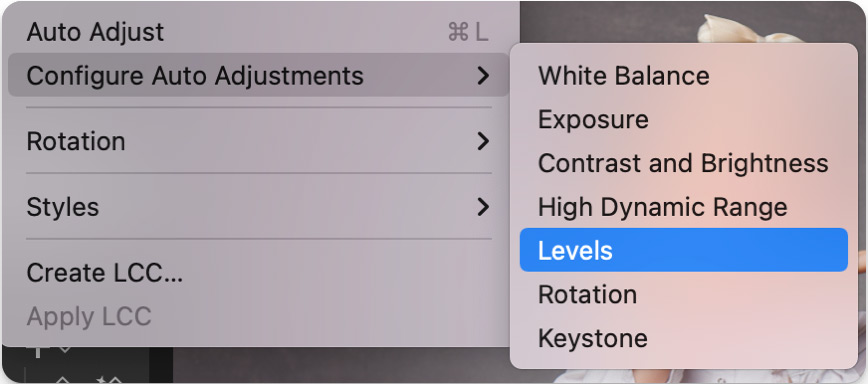
The next step is Auto Adjustments.
Auto Adjustments is a less intelligent tool, but still useful to speed up some corrections. The most important question here is which tools to auto-adjust?
We have just set WB and Exposure, so there is no point in auto-adjusting them. At the same time, Auto Adjustments is almost useless for setting up HDR, Contrast, and Brightness.
So, basically, there are three tools you can safely auto-adjust:
- Levels
- Rotation
- Keystone
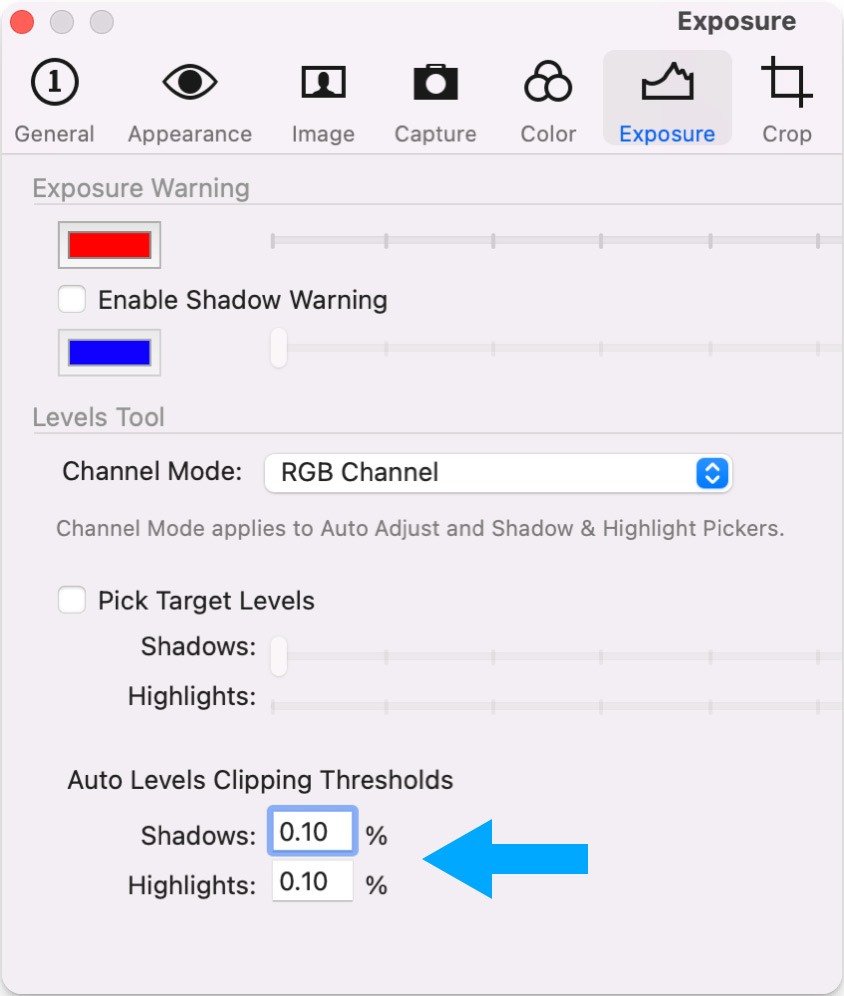
For Levels, you can set clipping thresholds, ensuring you’ll not lose any valuable data.
Together, Smart Adjustments and Auto Adjustments can handle almost all the basic editing for you.
In my new course, AI-Powered Workflow for Photographers, I’ll show how I use them in practice in Capture One.
- You’ll learn how to edit images faster and more efficiently in Capture One.
- You’ll see how I use styles, auto-adjustments, and Smart Adjustments to prepare high-end image editing in a couple of hours.
- You’ll learn how to integrate Capture One into an AI-powered workflow.
I guarantee you’ll get the knowledge that will allow you to transform your workflow and edit images faster than ever.
But if I’m wrong – I’ll refund you the money, no question asked.
Edit images faster with technical styles
As you have set Exposure, WB, Levels, and Rotation, it’s time to finish basic corrections using technical styles.
Technical styles are designed to solve some particular editing task.
For instance, a technical style can accompany Auto and Smart adjustments with universal HDR and Contrast adjustments, like this:

It makes sense to develop a set of technical styles for the various types of images you’re working with.
For instance, technical landscape styles usually include some safe Dehaze and Clarity adjustments:

It makes sense to develop a set of technical styles for the various types of images you’re working with.
For instance, technical landscape styles usually include some safe Dehaze and Clarity adjustments:

Starting from Capture One 23, you can save layers in styles, opening even more opportunities for technical styles. A typical portrait style can include Darken and Lighten layers with pre-defined adjustments:
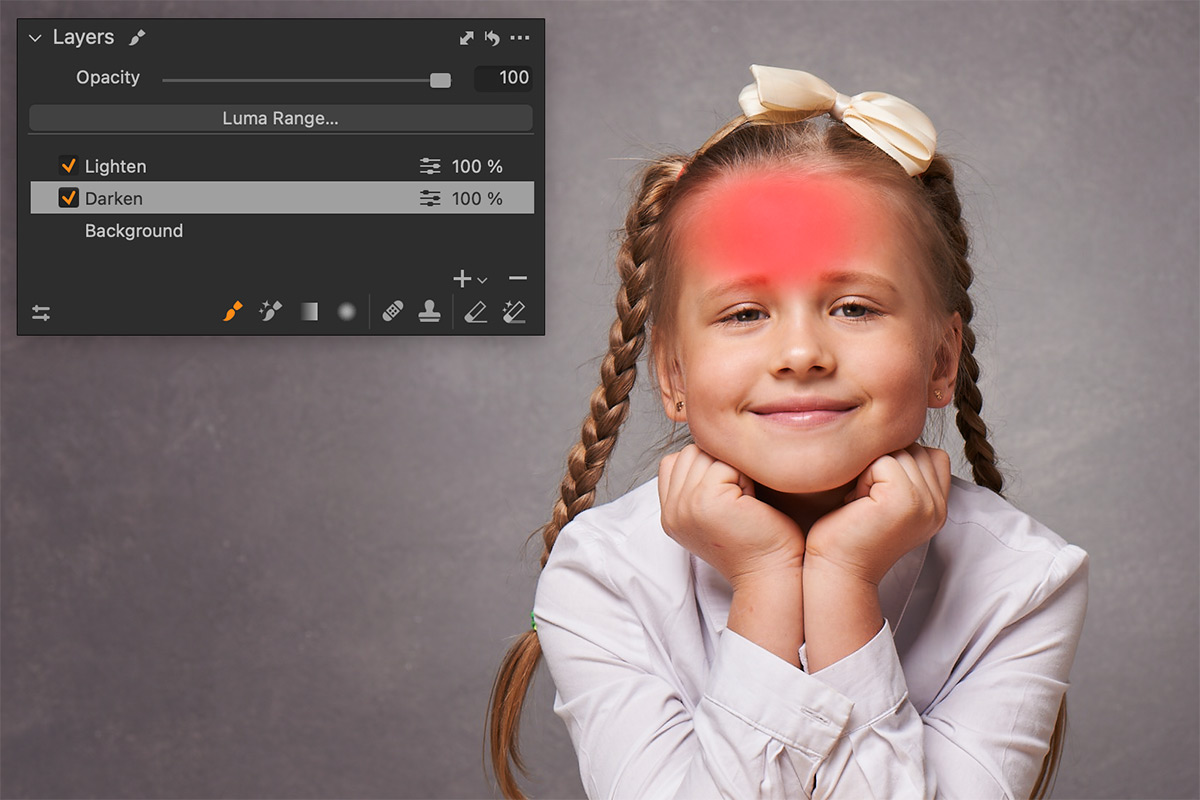
Thus, you can quickly select a layer and start drawing with these adjustments on a portrait. Such styles work similarly to style brushes, but you can prepare a set of various layers and apply them in a single click.
Another idea for technical styles is to save a set of adjustments that make a visual accent on some parts of an image: skin tone, details, or environment.
In the Ultimate Capture One Toolkit, you’ll find 10 visual accent styles.
The Accent on Environment style enhances all colors on an image except skin tone hues. Try to apply it in layers or as a style brush for the most accurate impact on your image.
The Enhance Foggy Shot style is designed for hazy images. Keep in mind that it’s barely suitable for portraits or high-contrast landscapes.

The Accent on Cool Colors style accurately dims warm colors and enhances cool colors, focusing the viewer’s attention on them. This style is designed for travel and street photography shots rather than portraits.
Also, there are 20 styles with various curve adjustments to speed up your editing.

Automate actions with scripts and macros
Finally, you can significantly speed up your editing workflow using Capture One scripts.
You might have seen my post about creating Capture One scripts using ChatGPT. Even if you’re not familiar with AppleScript, you can use AI to write scripts for you.
Yesterday OpenAI released GPT-4, and I’ve just tested it for writing Capture One scripts. The real difference is that GPT-4 can actually create a Capture One script from scratch. It isn’t perfect yet, and you’ll likely need a few iterations to make it work properly. Still, it’s pretty impressive.
I’ve recorded a short video showing how you can create a script that sets a five-star rating and applies green color tags to all selected images.
Unfortunately, Capture One scripts support macOS only. If you are on Windows, you can use macro commands to automate your Capture One workflow.
Here you can download a free chapter from my book Capture One Hidden Features.
In this chapter, I’ll show you how to create macro commands to copy everything except layers and run Edit in Photoshop in a single click.
You’ll learn how to draw two gradients on a single layer, use mask inversion in editing, and set up must-have shortcuts.
BTW, the book is also available in the French language.
Become a Capture One Expert
If you want to learn more tricks like these, you’ll enjoy my Capture One Expert course. Watch the full lesson on color grading free of charge!