Recently Rocky Nook published a new book “Capture One Pro 9: Mastering Raw Development, Image Processing, and Asset Management” written by Sascha Erni.
In 15 chapters “Capture One Pro 9: Mastering Raw Development…” discovers each Capture One’s tool tab and places it in a general workflow pipeline. During the reading, you will also get a mass of helpful tips, hardware recommendations and important, well explained basic concepts.
With Rocky Nook’s permission, we will publish four parts of the book during the next few weeks.
The first article – An Overview of the Rendering Pipeline
Today we’re publishing the second article – “Color Editor: The Basic Tab”.
3. Adjustment Layers and Masks
4. Understanding the Capture One Sharpening Tool
The Color Editor
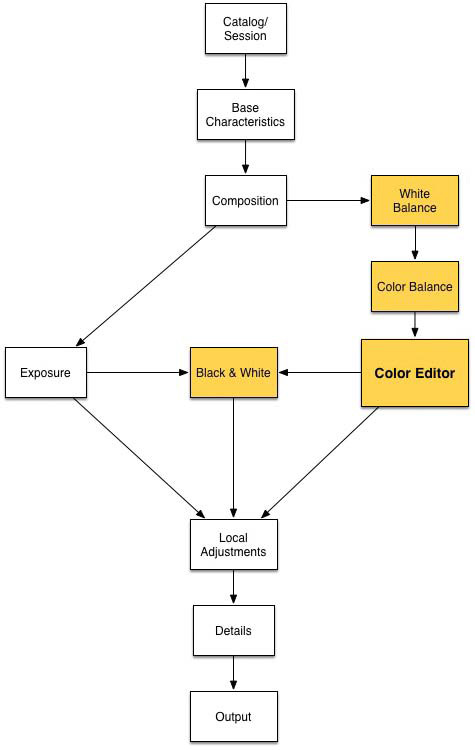
The Color Editor is one of Capture One’s most popular tools, and some users maintain that it was deactivated in the Express version of the program to get more people to upgrade to the Pro version.
Once you’ve spent a while working with the Color Editor, you’re sure to be impressed by the ease and speed with which you can perform high-quality color edits.
Among other things, you can use the Color Editor to do the following:
- Correct color casts—for example, if you have to shoot in (poor) artificial light.
- Compensate for the color errors produced by a weak in-camera infrared filter.
- Creatively recolor image details, such as the iris in a subject’s eye or a flower.
- Clean up skin blemishes and irregularities, even if your model used makeup.
- Intensify color effects—for example, to make a sunset more dramatic or give a landscape extra punch.
- Select a range of colors, and then create a new Adjustment Layer from this selection to edit these image areas with tools other than just the Color Editor (see section 10).
These are, of course, all tasks you can perform in Photoshop or by using specialized plug-ins like Color Efex. However, as described in section 5.5, performing these types of adjustments at the raw development stage produces higher-quality results and enables you to alter your color settings later without having to trash all your other settings.
QUICK TIPS
Settings you make using the Color Editor can be saved as ICC color profiles using the action menu (the three dots at top right in the tool panel). This makes the Color Editor a useful tool for making ad hoc adjustments to camera profiles (see section 5.1) and offers a much easier way to desaturate, brighten, darken, and modulate colors than creating a new ICC camera profile from scratch.Also in the action menu, you will find the option to Create Masked Layer from Selection. When you choose this option, the selected color range is used to create a new Adjustment Layer in the Local Adjustments tool.
This makes it easy for you to not only fine-tune the tone of blue in the sky (i.e., do color edits), for example, but also to use tools such as Sharpening, Noise Reduction, Clarity, or Exposure correction on the selected range only. Sticking with the sky example, you usually don’t want high levels of sharpness in a uniform sky because it would only accentuate sensor noise or dirt spots. Use a masked layer of the sky, switch to the Local Adjustments tool tab, and turn off Sharpening—done.
The Basic Tab
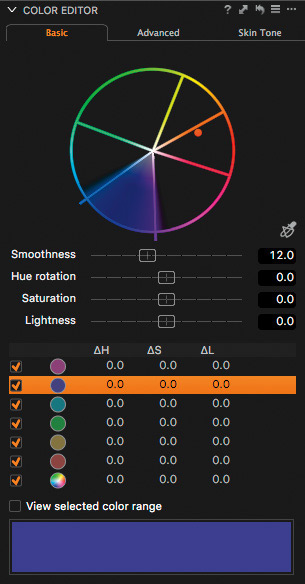
The Color Editor offers Basic, Advanced and Skin Tone tabs. The Basic tab is the simplest to use: pick a color using the Color Picker (eyedropper) or one of the color ranges (or “slices”) displayed in the lower part of the tool’s panel and use the Smoothness, Hue Rotation, Saturation, and Lightness sliders to tweak it as you wish.
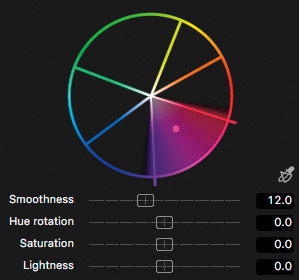
The Color Editor makes it quick to adjust and retouch colors.
The Saturation and Lightness sliders are self-explanatory. The Hue Rotation slider rotates the selected color slice within the color wheel.

Imagine you have shot a session under a tree and your subject’s face has turned out looking too green. All you have to do is click on the face using the Color Picker and use the Hue Rotation slider to shift the color wheel toward red.
If a photo of a sunset doesn’t turn out as dramatic as your memory of it, select the sky and rotate the blue slice toward violet.
The Basic tab isn’t designed with high-precision adjustments in mind, but the Smoothness slider and the “View selected color range” option make it effective for quick adjustments.
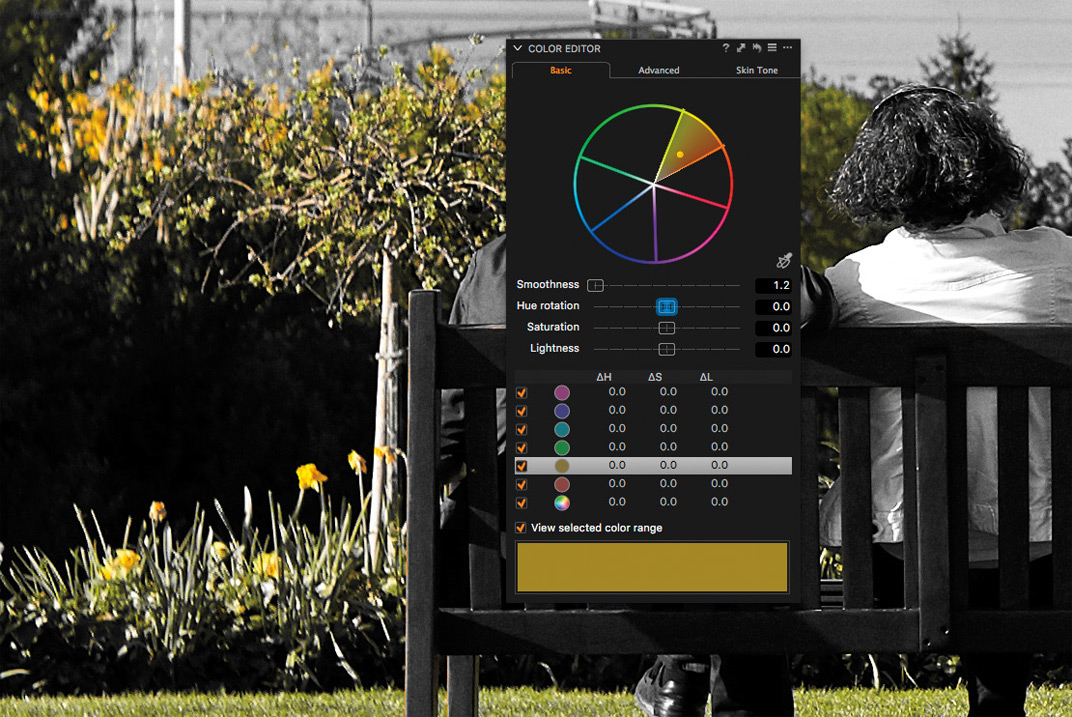
The Smoothness setting determines the degree of similarity between the colors that are included in the selected range. The default value 12 includes tones that vary only slightly, whereas a value of 1 affects only the tone you’ve selected, and a value of 29 affects a wide range of tones on both sides of the selected one.
You can use different settings for each color range and the settings you select are shown in the ΔH, ΔS, and ΔL columns in the tool panel.
Δ stands for the Greek letter delta and denotes the difference between the displayed and original values. The check boxes next to each color range show which of your adjustments are currently active.
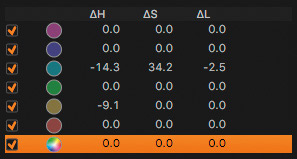
The last entry in the range list applies to all the tones in the image instead of just a selected range. If you select this entry, the Smoothness slider will be grayed out.
This option is useful for performing quick repairs on color casts—for example, if you forgot to use a yellow filter for a black-and-white shot or if the blue spotlights in a theater shot turn out too pink.
You can purchase the whole book “Capture One Pro 9: Mastering Raw Development, Image Processing, and Asset Management” at Rocky Nook on-line store.

