


Capture One 21 has just been released, and it’s designed to make your editing faster and easier.
First of all, Capture One 21 brings a new Dehaze tool that allows you to quickly enhance color and improve contrast on hazy and foggy images.
Secondly, Capture One 21 introduces a new Speed Edit workflow based solely on shortcuts. You can now adjust all the essential tools just by moving your cursor over the image.
Thirdly, the import process has been entirely reworked in Capture One 21.
You can now import images from multiple folders, and the redesigned interface makes it way easier to pick files for import.
On top of that, in Capture One 21, you’ll find the new ProStandard camera profiles, under-the-hood performance improvements, and a bunch of other enhancements.
Download Capture One 21 and let’s see how all these new features work in practice.
Capture One 21 All the New Features Video Overview
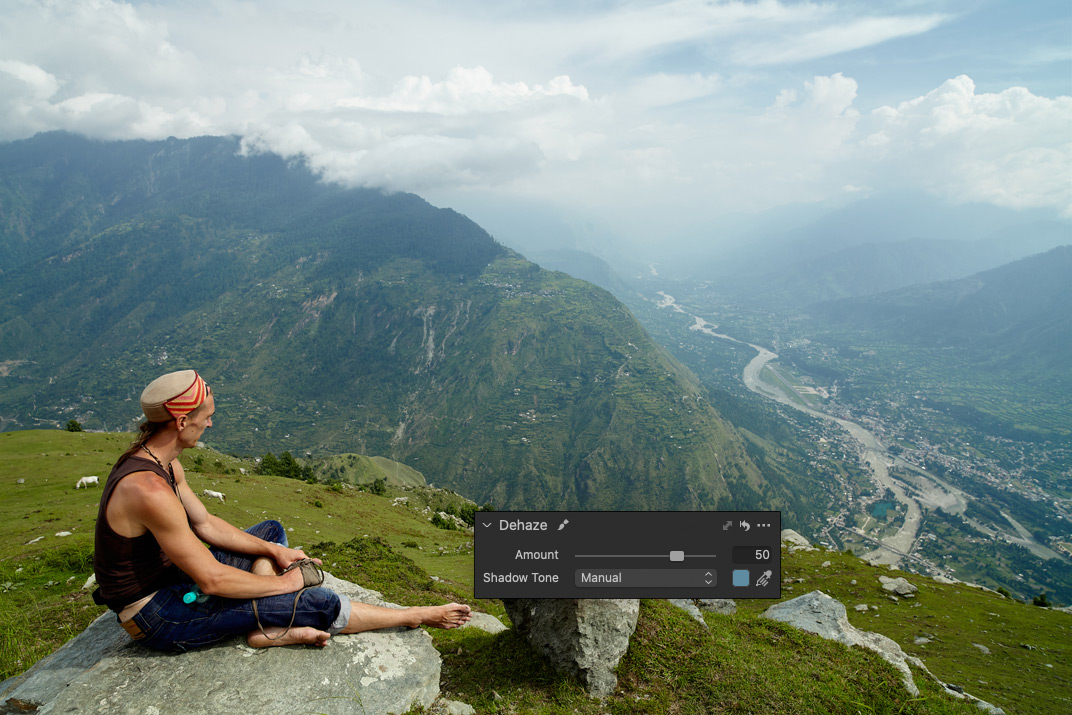
The new Dehaze tool
First, the new Dehaze tool!
Using smart algorithms, Dehaze removes a haze on your image and improves contrast and color in related areas.

It’s pretty challenging to replicate such an effect manually. Basically, Dehaze saves you a bunch of time working with Layers, Levels, and Color Editor to get a similar result.
Dehaze tool automatically analyzes your image, but you can pick Shadow Tone manually if you’re not satisfied with the default outcome.
Setting a custom Shadow Tone allows you to get more details and enhance color in shadows on your image.

You can easily adjust the Dehaze impact on an image. I don’t want to eliminate aerial perspective here, so I’ll just reduce it a bit.
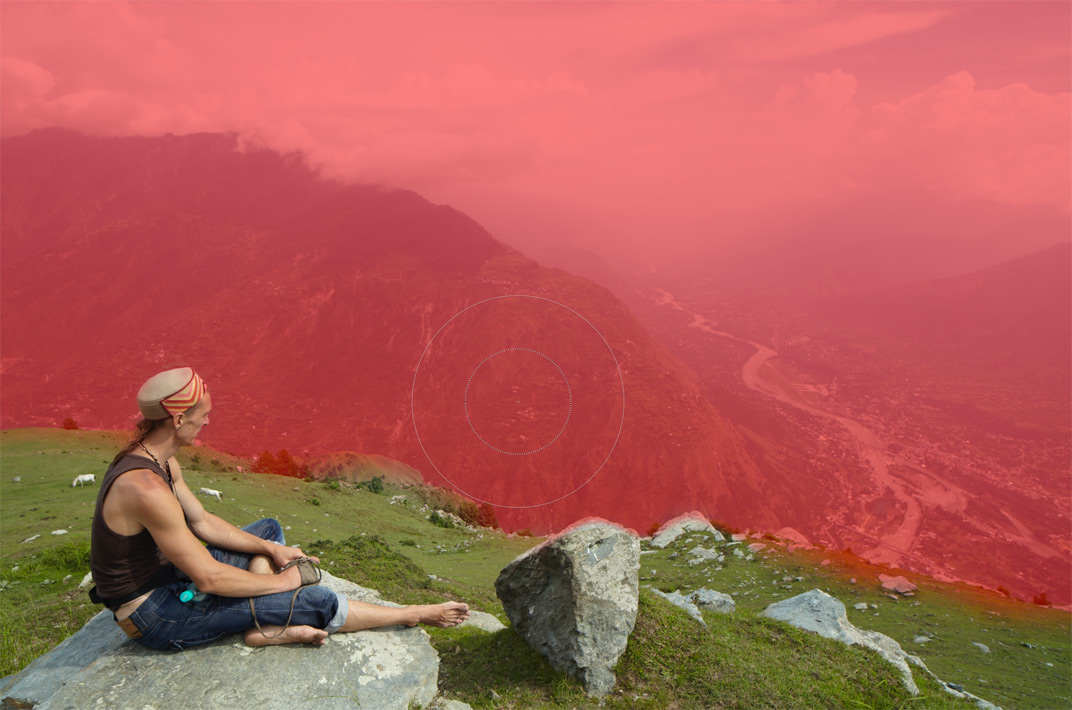
Also, the Dehaze tool supports Layers, so if there are some areas that you don’t want to dehaze, simply mask them out!
Here are some hints that will help you to enhance your images with Dehaze.
First of all, selecting the Shadow Tone can dramatically affect the result.
Sometimes I pick a manual Shadow Tone just to see what Dehaze can get out of my image.
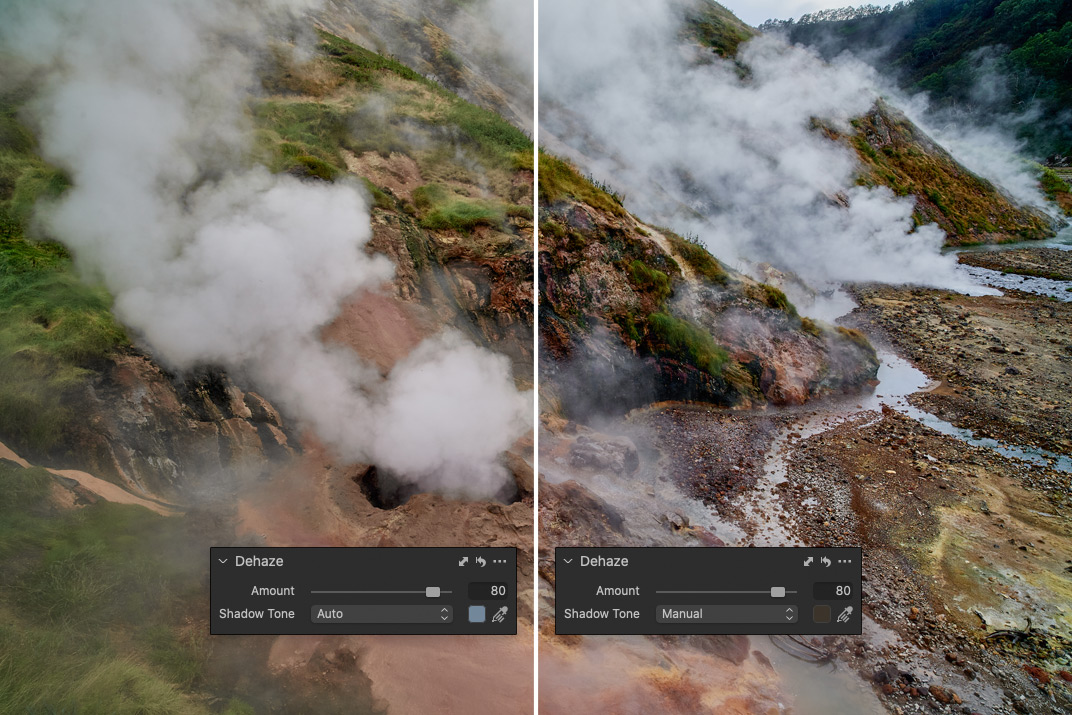
Custom Shadow Tone can also improve colors if the default correction doesn’t fit your preferences.

Keep in mind that the new Dehaze tool is not a replacement for Levels or Clarity. It’s a new feature that works great together with old tools.
Here I’ll adjust Dehaze and accompany it with Color Channel Levels correction and minor Clarity and HDR tweaks.
Well, I love the result!
Note that Dehaze can seriously affect your image histogram, so it makes sense to apply it before Levels correction.

Also, Dehaze tends to make images darker, so I prefer to recover dark areas with HDR after.
Let’s compare the new Dehaze tool with Clarity. I’ve added Clarity to the left image variant here and Dehaze to the right variant.

As you can see, Dehaze has a way more complex impact on an image, and Clarity can perfectly supplement this new tool.

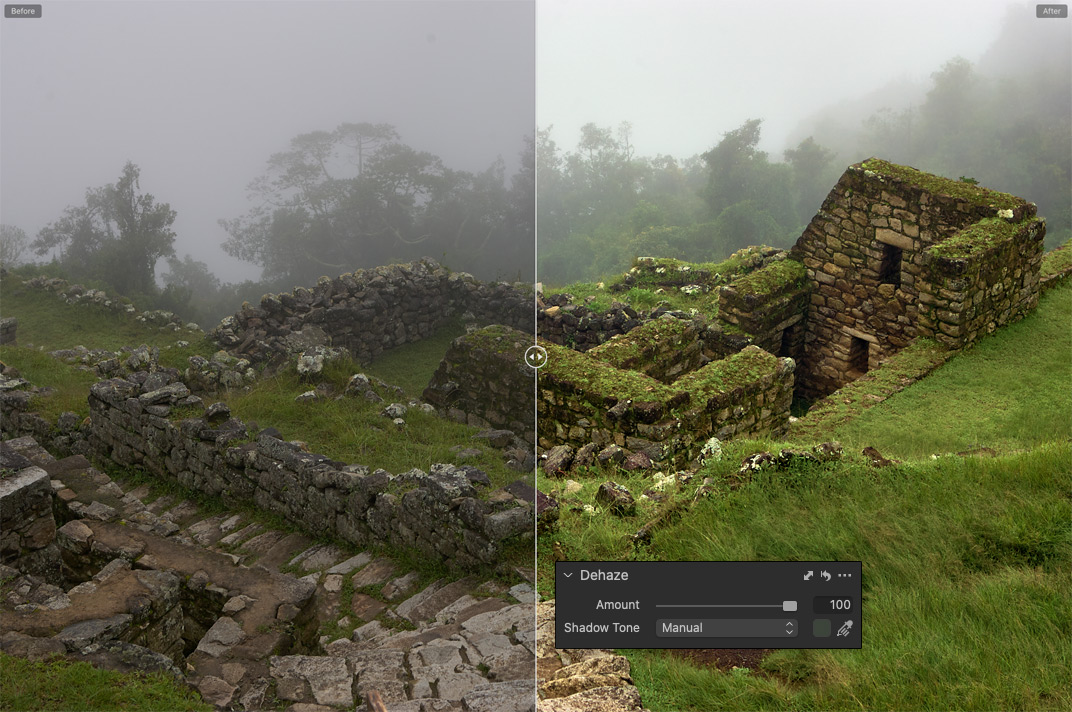
Besides removing the haze, the new tool can also add haze to your image.
That’s a pretty useful feature when you’re editing some fog-friendly pictures.

These features make Dehaze a perfect tool for flat and foggy images.
You can even enhance some regular images with Dehaze. But be careful; you can easily get artifacts and broken colors on your image.

Finally, I had compared Capture One Dehaze tool with Lightroom Dehaze tool, and I have got some curious results.
At first glance, Lightroom Dehaze works similarly to the Capture One tool.

However, Capture One adjusts your images more accurately, especially on the high values.
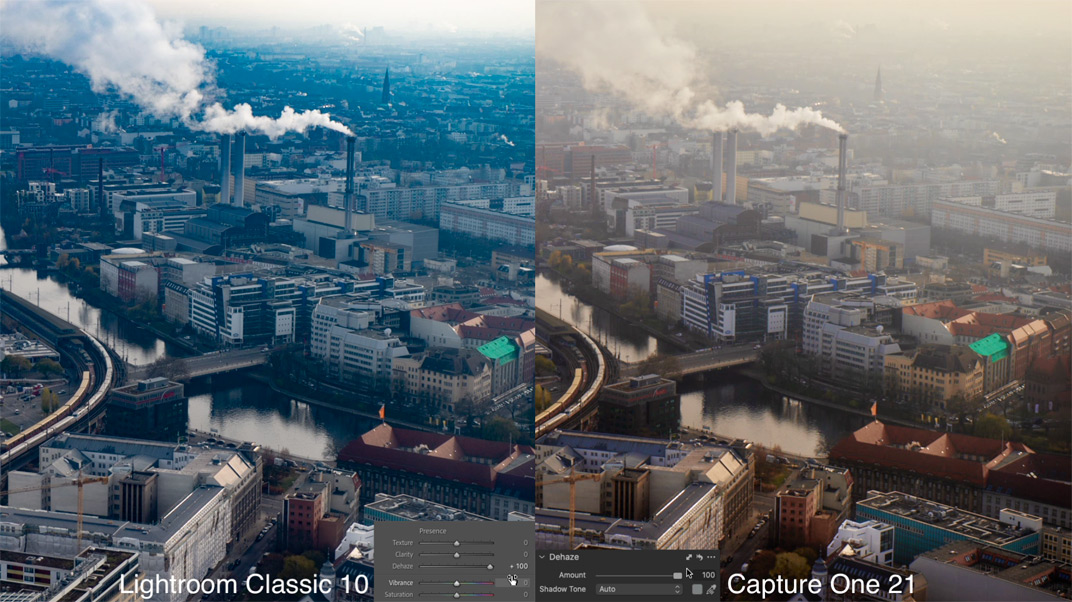
I love how Capture One Dehaze treats colors; they look way more natural here.

Also, in Capture One, you can manually set Shadow Tone to get a color correction that fits your image best. With Lightroom, you’re limited to a default outcome.

Speed Edit
So, the new Dehaze tool looks great. Now, let’s figure out what the deal is with this new Speed Edit workflow?
There is a whole bunch of devices available designed to increase your editing speed in Capture One. From top-notch retouch panels by Tangent and modular controllers by Palette Gear to custom setups of MIDI controllers.

Capture One 21 introduced the new Speed Edit workflow to achieve the same editing speed by using regular shortcuts with no additional hardware.
All the essential tools have Speed Edit shortcuts now; you can set them in the Shortcut Editor window’s new tab.

To make an adjustment, simply hold down an assigned key and scroll the mouse wheel or trackpad.
Also, you can left-click and drag your cursor in any direction. To increase adjustment, move your cursor up or right; to decrease – down or left.
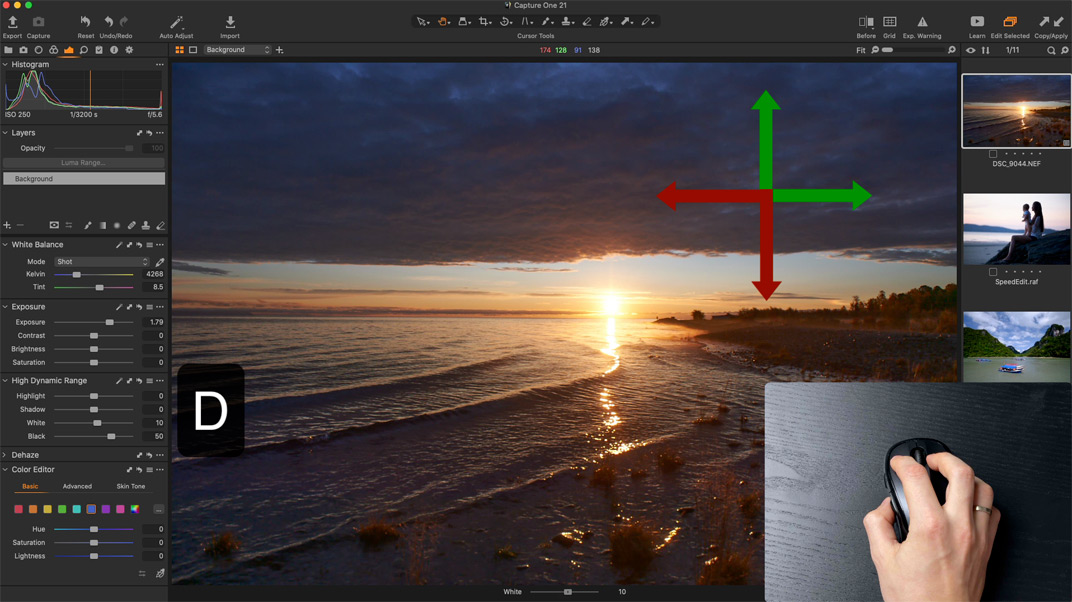
In the same way, arrow keys can also be used for speed editing.
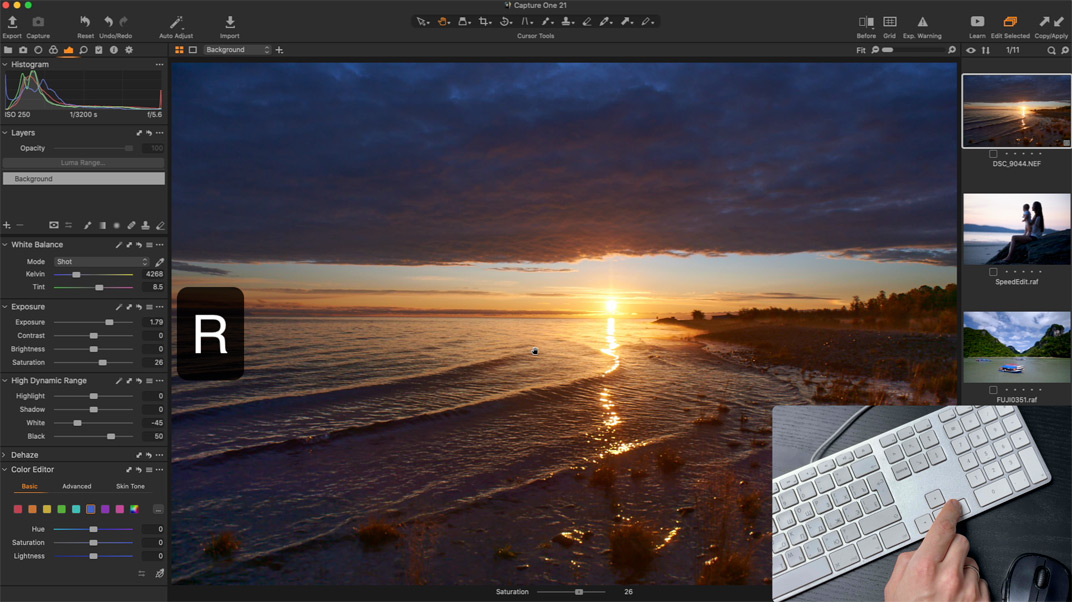
As you hold down a tool’s key, a temporary slider that indicates your adjustments appears below the image.

Speed Edit perfectly develops an idea of Direct Color Editor, presented in Capture One 20. Now, you have control over all the essential tools, and your eyes are always on an image. You don’t need to look at sliders and reach them with your cursor. You’re 100% focused on editing.

BTW, the RAW file of this image is available in my 100 RAWs for Image Editing Practice set.
Seriously, I think that’s just a fantastic tool for professional photographers.
You can now edit images quickly, even on a laptop; no additional hardware is required.
Moreover, with Speed Edit, you can now edit multiple images at the same time. That makes group editing way faster and easier.

Keep in mind that all the adjustments on multiple images are made to the Background layer.
For better experience, I recommend you to set Speed Edit sensitivity that fits you best.
In addition to the new Speed Edit workflow, you can now similarly change the size, hardness, opacity, and flow of any brush in Capture One 21.

For instance, to adjust brush size, simply hold down Ctrl, Opt, and left-click-n-drag mouse or trackpad.
Here is the full list of the new control keys:
Mac
Size: Ctrl + Opt + left-click and horizontal drag (right/left)
Hardness: Ctrl + Opt + left-click and vertical drag (up/down)
Opacity: Shift + Ctrl + Opt + left-click and horizontal drag (right/left)
Flow: Shift + Ctrl + Opt + left-click and vertical drag (up/down)
Windows
Size: Alt + right-click and horizontal drag (right/left)
Hardness: Alt + right-click and vertical drag (up/down)
Opacity: Shift + right-click and horizontal drag (right/left)
Flow: Shift + right-click and vertical drag (up/down)
The next big upgrade in Capture One 21 is the improved importer.
Improved import
The import process has been entirely reworked in Capture One 21.
First of all, you can now import images from multiple folders or select the files directly.

As you set sources, all the available images appear in a redesigned import window. Here you can choose files for import, and only picked images are going to be imported.
You can manually pick images with the spacebar or quickly pick and unpick all the files.

Also, developers have changed import descriptions to make it more evident what will happen with your files after the import.
The next new feature of Capture One 21 is ProStandard camera profiles.
ProStandard camera profiles
ProStandard is a new type of camera profiles designed to render more natural colors in challenging conditions.

BTW, the RAW file of this image is available in my 100 RAWs for Image Editing Practice set.
The new profiles offer better preservation of color across contrast gradients, enhanced retention of colors during image editing, and improved transition between colors of different hues.
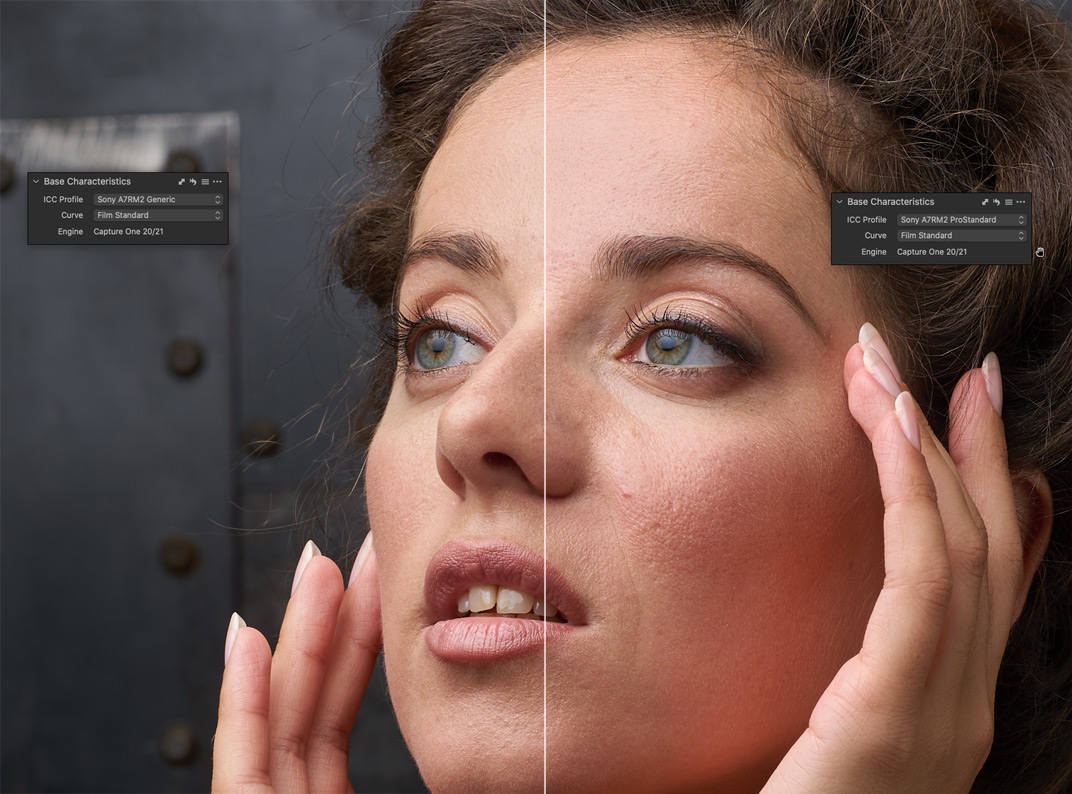
According to developers, ProStandard profiles are more suitable for portrait and product photography. I’ve tested the new profiles with some images, and sometimes they provide better color for sure.
BTW, you can easily set the new profile as the default profile for your camera.
Simply click “…” menu and select “Save as Default for /your camera model/”
At this moment, the new profiles are available for these cameras:
Sony: a7 III, a7R II, a7R III, a7R IV, a7C, a6000, a6300.
Nikon: D810, D850, Z6, Z7.
Canon: 5D II, 5D III, 5D IV, 5DS R, R5, R6.
Phase One: IQ3 100MP, IQ4 150MP.
Leica: S3, SL2.
Apart from these new features, Capture One 21 contains some other minor improvements.
Other improvements
Leica tethering support

First, Leica S3 and Sl2 have gained tethering support. This is a big thing for Leica camera owners.
HEIF support

HEIF image format that is widely used on Apple devices is now fully supported by Capture One. You can edit 8-bit HEIF files and export them to other formats. Export to HEIF is not supported yet, though.
Redesigned White Balance
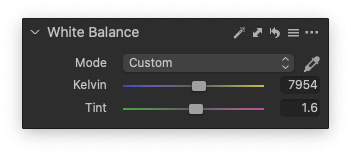
White Balance sliders are now colored in temperature gradients.
Improved performance
Capture One 21 has gained a number of under-the-hood performance improvements.
They provide faster browsing, searching, and importing of images. Catalogs and Sessions now open faster as well.
Mac
• Faster opening of Catalogs and Sessions
• Faster importing of images
• Locating offline images in Catalogs up to 4x faster
• Faster general browsing in Catalogs and Sessions
Win
• Faster general browsing in Catalogs and Sessions
• Searching in collections now supports multi-core
• Up to 7x faster search on an 8-core CPU
• Trashing images and emptying trash up to 10x faster
New Camera Support
• Fujifilm X-S10
• Leica SL2 (added tether support)
• Leica S3
• Sony A7C
• Sony A7S III (added tether + live-view support)
Plus, there are two useful improvements for new to Capture One users:
Enhanced tooltips

All tools now have new, enhanced tooltips. Hover a cursor over a tool name, and you’ll see a short description with a link to a tutorial about this tool.
If you’re already familiar with Capture One tools, you can easily turn tooltips off in General Preferences.
Easy access to Tutorials
Developers have added a special “Learn” button for quick access to Capture One tutorials.
New Release Cycle
It seems that Capture One has switched to a new release cycle with two main releases per year.
Capture One 20.1 (13.1) brought reworked Heal and Clone tools, the new Before/After tool, Nikon’s collaboration, and even a new logo! Such major upgrades were always a prerogative of the Main Release of the Year, such as Capture One 20 or 21.
I think this new release cycle will continue with Capture One 21, and the next major upgrade will bring some completely new features.
Basically, what we see now is Capture One 21 Part 1.
Capture One Hidden Features eBook

Capture One Hidden Features is a collection of more than 200 pro hints to improve your Capture One workflow, structured into an easy-to-read book.
You can download four chapters from the Capture One Hidden Features ebook free of charge:
- 3. Must-Have Shortcuts
- 14. Hidden Features of Layers
- 27. The Power of Mask Inversion
- 38. Automation with Macros
Simply subscribe to the AlexOnRAW newsletter by entering your email in the form below. After subscribing to the newsletter, you’ll immediately receive the four chapters from the book. Also, you’ll regularly get a friendly newsletter with free Capture One tutorials, image editing tips and tricks, and news from Capture One community.