Recently Rocky Nook published a new book “Capture One Pro 9: Mastering Raw Development, Image Processing, and Asset Management” written by Sascha Erni.
It’s a well structured, well illustrated and well explained guide to learn how Capture One works.
With Rocky Nook’s permission, we will publish four parts of the book.
1. An Overview of the Rendering Pipeline
2. Color Editor: The Basic Tab
3. Adjustment Layers and Masks
Today we’re publishing the fourth article – “Understanding the Capture One Sharpening Tool. Finding the Right Sharpening Settings”.
Understanding the Capture One Sharpening Tool
The Sharpening tool has Amount, Radius, and Threshold sliders. The Amount setting determines how strongly the tool sharpens. The Radius setting determines the number of pixels. The Amount range of 0–1000 ensures finely differentiated settings.
The Threshold value is a little trickier to come to grips with. Put simply, it defines how little contrast there has to be between image areas before the sharpening effect kicks in. Low values equate to low contrast (that is, more image areas), whereas higher values equate to more contrast (that is, fewer, more precisely defined areas such as edges or backlit mesh patterns). The defaults are “fine weather” settings designed to counteract only a little of the unsharpness caused by demosaicing.
The Threshold setting determines which areas of an image are affected.
In a shake-free image captured at the camera’s lowest standard ISO setting, Capture One will only sharpen gently where ultra-fine contrast exists—that is, where fine details have been lost due to demosaicing. The default settings leave everything else as it is.
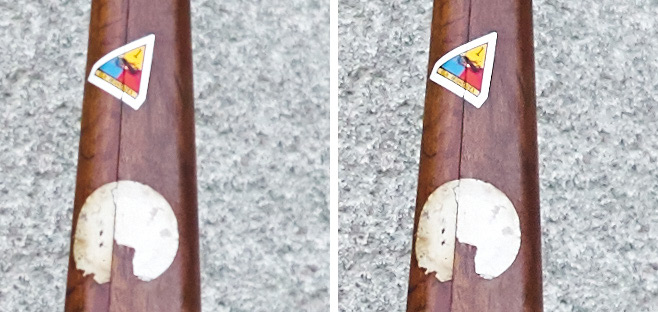
As an example, let’s take a look at the Soft Image Sharpening 3 preset, which is designed to rescue details that have turned out too soft.
The preset has an Amount setting of 300 (about 30%) for everything above the Threshold value of 0.5—in other words, nearly every pixel. The Radius setting of 2.0 ensures that the effect is generously applied.

The aim of input sharpening is to make softer image areas crisper without creating too many additional artifacts in high-contrast areas.
The overarching aim at this stage is to counterbalance the technical shortcomings of the image capture process and to prepare the image for further processing, not to apply sharpening fit for online or print output.
You can, of course, use the Sharpening tool to perform general sharpening. However, because optimum sharpness depends on the size of the final image, you’ll still have to experiment to find the best settings.
Additionally, because appropriate sharpening settings vary from image to image, output sharpening in Capture One can quickly become quite complex and you can easily find yourself adjusting and outputting even small numbers of images multiple times until they all look sharp enough but not oversharpened.
I recommend that you perform only input sharpening in Capture One and leave output sharpening for small images destined for online publication to an image-processing program like PhotoLine or a dedicated sharpening program like Nik Dfine.
Finding the Right Sharpening Settings
Learning to find the right compromise between “sharp enough” and “oversharpened” takes practice.
If you’re preparing small images for online publication, you can simply ignore the Sharpening tool or leave the default settings in place.
The presets provided cover most situations, although they are quite general and are designed specifically for use with Phase One cameras.
The following steps explain how to find and save the right settings for your particular camera:
1. Open a shake-free image with a low or medium ISO setting, neutral exposure, a well-defined focal plane, and no creative light and shade effects.
2. Switch to the 100% view and set all three Sharpening sliders to 0. Use the Navigator to find where the image is sharpest.
3. Drag the Amount slider all the way to the right.
4. Increase the Radius setting until the fine details lost during demosaicing are once again well defined.
To increase the Radius setting by increments of 0.1, click in the value box and use the up / down arrow keys.
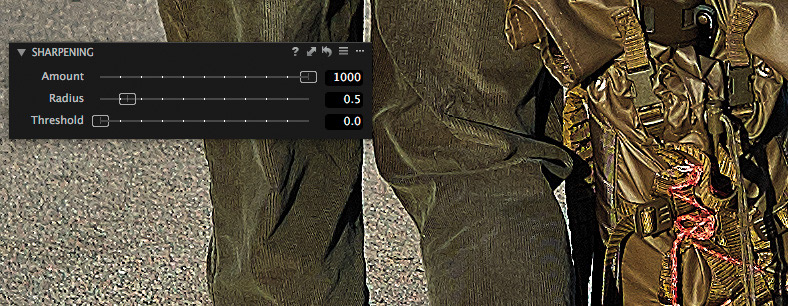
5. Once you’ve found the right Radius setting, switch to a dark area.
This doesn’t have to be on the focal plane, since the next step is about noise rather than sharpness.
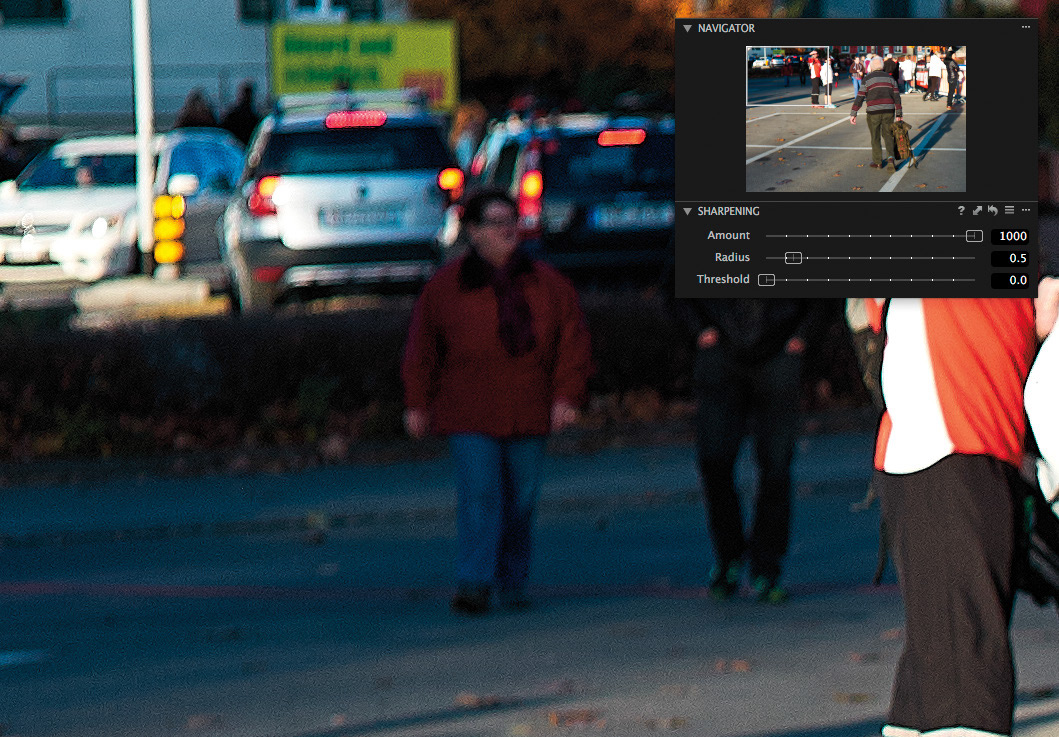
6. In step 4 you increased the level of visible sensor noise. Let’s now reduce this effect using the Threshold setting.

7. Click in the Threshold value box, and once again, use the arrow keys to find the optimum value.
8. Switch to the Amount setting, starting with a value of 100.
9. Use the Navigator to shift the zoomed detail back to the focal plane and start to increase the Amount value. To adjust it in increments of 10, click in the value box and use the up / down arrow keys with the Shift key pressed.
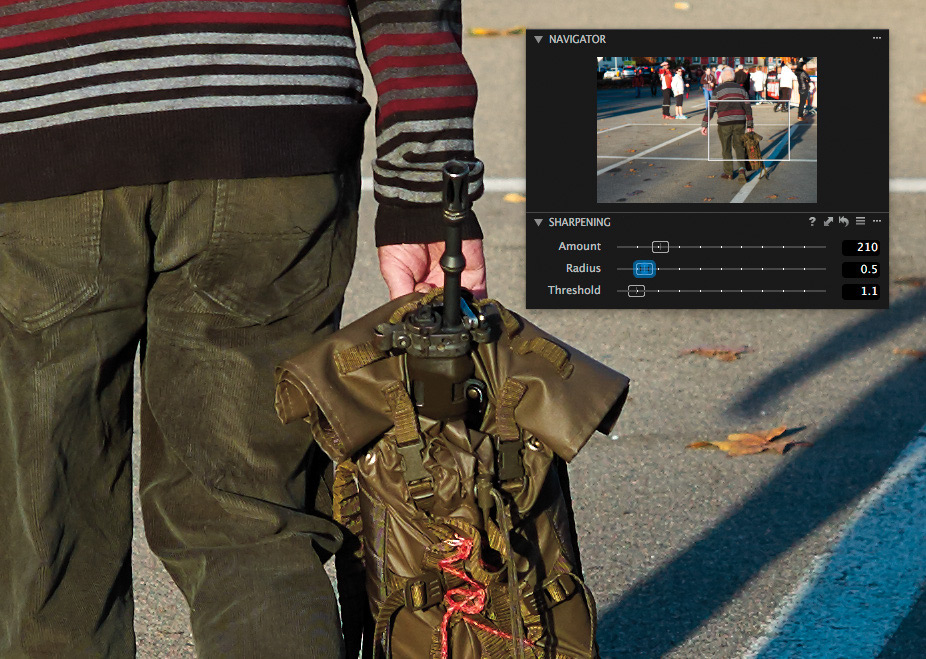
You’ve now found the optimum settings for a “normal” image.
To save these settings for the camera that captured it, open the action menu (the button with three dots in the Sharpening panel) and select “Save as Defaults for….”
To make these settings available generally, open the Manage and Apply menu (the button with three horizontal lines) and select Save User Preset.

IMPORTANT
Noise reduction also influences the amount of input sharpening you need to apply.
To find the appropriate values for your camera, set Noise Reduction to its default values (for Capture One 9, this means Luminance 50, Details 50, Color 50, Single Pixel 10).
This ensures that any sharpening presets you create can be more universally applied—when no noise reduction is required, you won’t need to apply as much input sharpening, but you can still use the settings for a variety of source images captured at widely differing ISO levels.
You can purchase the whole book “Capture One Pro 9: Mastering Raw Development, Image Processing, and Asset Management” at Rocky Nook on-line store.
Capture One Hidden Features eBook
Capture One Hidden Features is a collection of more than 200 pro hints to improve your Capture One workflow, structured into an easy-to-read book.
You can download four chapters from the Capture One Hidden Features ebook free of charge:
- 3. Must-Have Shortcuts
- 14. Hidden Features of Layers
- 27. The Power of Mask Inversion
- 38. Automation with Macros
Simply subscribe to the AlexOnRAW newsletter by entering your email in the form below. After subscribing to the newsletter, you’ll immediately receive the four chapters from the book. Also, you’ll regularly get a friendly newsletter with free Capture One tutorials, image editing tips and tricks, and news from Capture One community.


