


Two years ago I published an article with my ten reasons to switch to Capture One 9. It had dozens of thousands of views and hundreds of shares and comments.
Thank you all for your feedback. Time has passed, and Capture One 10-12 releases brought us new robust features to be added to the list.
That’s why I have updated the post and divided it into two parts. The first part is dedicated to amazing features that Capture One delivers besides the processing itself.
The second part is all about the RAW editing; if you’re looking for new tools – feel free to jump straight to Part II. Layers with opacities, RGB channels Levels correction, Luma and RGB Curves, Color Editor and many more features are waiting for you there.
But to see the whole story and to get deeper into it – I recommend you to start here from the beginning.
There is no question that Lightroom is the most popular RAW-converter on the market: it’s quite comfortable, cheap and easy to learn.
The problem is that many photographers are not aware of the number of opportunities, which they are missing with Lightroom and other basic RAW-converters.
RAW-converter is just a photography gear like a camera or a lens. It would be weird to hold on to a cheap 18-200mm lens and never look for anything better.
Meanwhile, this is what’s happening with some RAW software users: they’re stuck on the first step of the great RAW-processing discovery.
In this article, I’ll show you the reasons for my choosing Capture One, after almost a 10-year experience with different RAW-converters.
If you’re totally fine with Lightroom, well, good for you.
But if you feel, that there is something missing, that there should be a better way to deal with RAW format; if you’re looking for something more – this article will help you to find a new gear which will work for you.
10. Color
Actually, that should be the reason number one since for many professionals realistic and clear color “rendering” in Capture One is the primary cause for switching.
On the other hand, color is always quite a subjective matter, and that is why it’s meaningless to argue about that.
But there are a few objective reasons, why Capture One deals with color better, than any other software. First of all:
10.1. Capture One uses unique color profiles designed for each particular camera model.
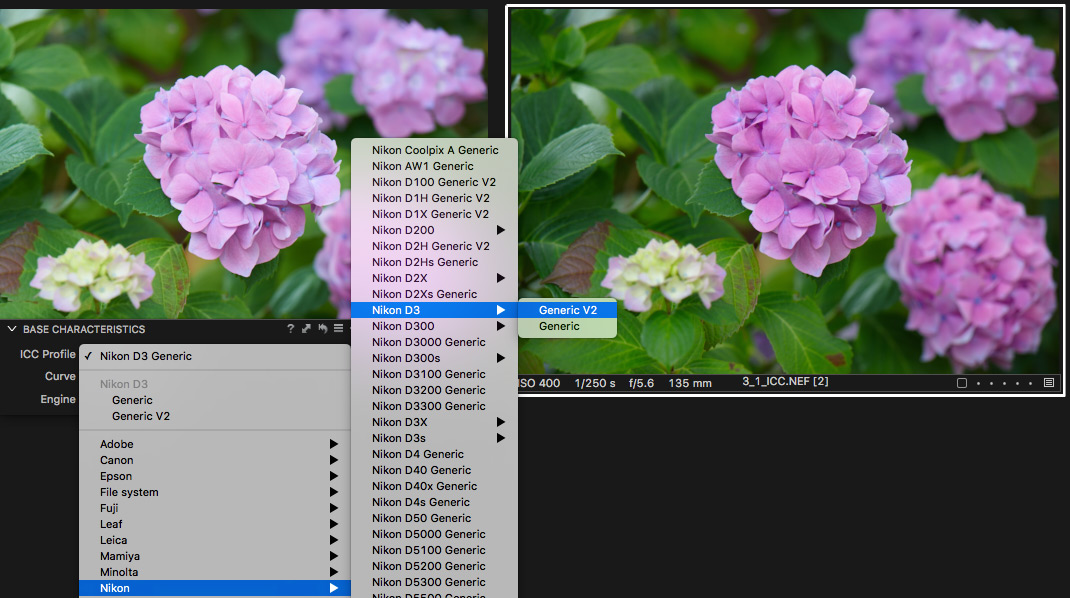
These particular profiles develop that accurate, precise and realistic color in Capture One. If you wish, you could also edit them and save them as your custom color profiles.
You may find more information about basic rendering principles in our article “Capture One: An Overview of the Rendering Pipeline”.
The second reason is not quite evident, but crucial.
10.2. Phase One, Capture One developer, is not just a software company.
Their main business is to produce hi-end digital backs and medium format cameras; they are also developing professional solutions for aerial and cultural heritage photography.
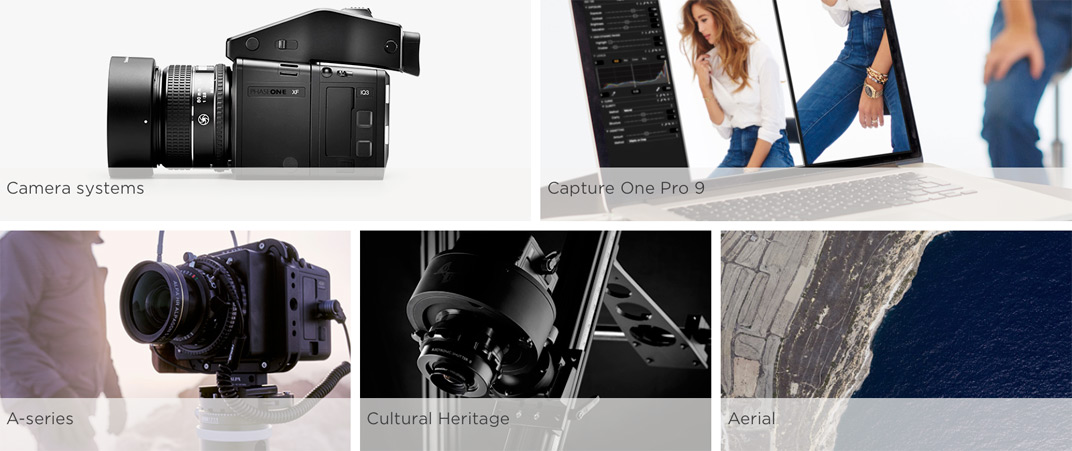
High-quality image processing algorithms in Capture One are a logical result of their many years of experience in that field.
10.3. Advanced primary image rendering.
In Capture One, at the very first stage of image rendering, you can choose the type of Base Curve, which will affect the image and it may give you a mass of editing possibilities.
For example, with Linear Base Curve you will get the “real” RAW image, almost without any initial corrections, which all the popular RAW converters do without your permission.

At first glance, the image with Linear Curve may look quite ugly, but behind that, you’ll find some amazing RAW editing capabilities.

If you’re looking for something more than a simple contrast and exposure sliders – it’s a great place to start.
Plus, Fuji photographers will find here all the classical Film Simulations:

Fujifilm Film Simulations are available in all the versions of Capture One, including Fujifilm Express, Fujifilm Pro and a regular Pro.
If you’re not familiar with Capture One Fujifilm, I’ve prepared for you a detailed guide, where you will find all the information on this special offer for Fujifilm photographers.
Last but not least, with the great color handling Capture One delivers:
10.4. Professional color measurement tools.
Starting from Capture One Pro 11 you can calibrate color not only in RGB and CMYK, but in LAB as well.
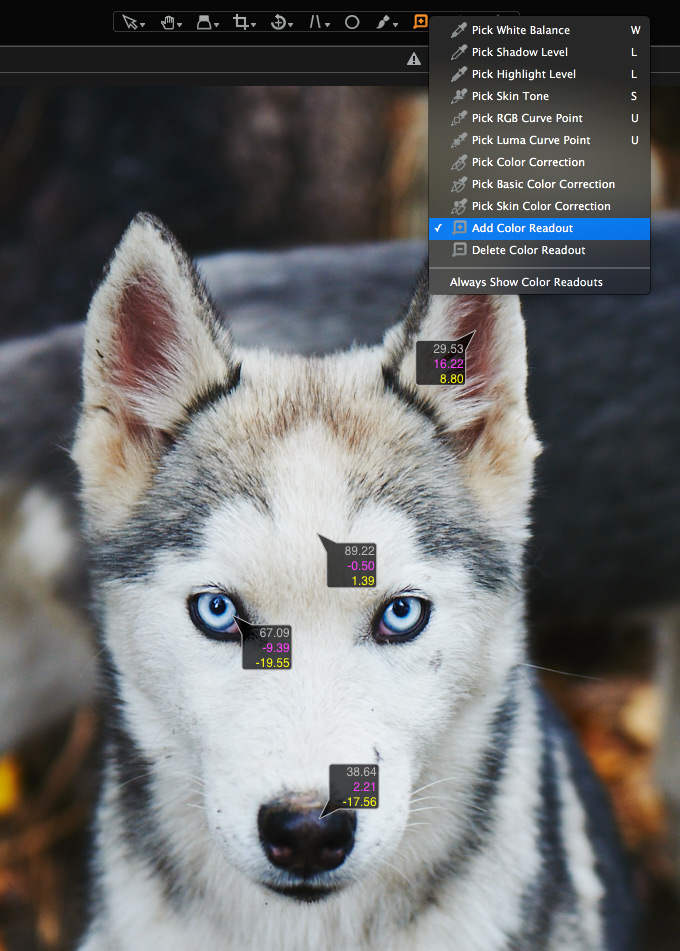
Unlike RGB and CMYK, the LAB color model is based on how we perceive color. That’s why there are a lot of benefits for using it, and it is widespread in photography and many other industries.
9. Customizable Everything
One of the main advantages of Capture One workflow is that you can customize almost anything:
9.1. Reorganize and resize each workspace element.

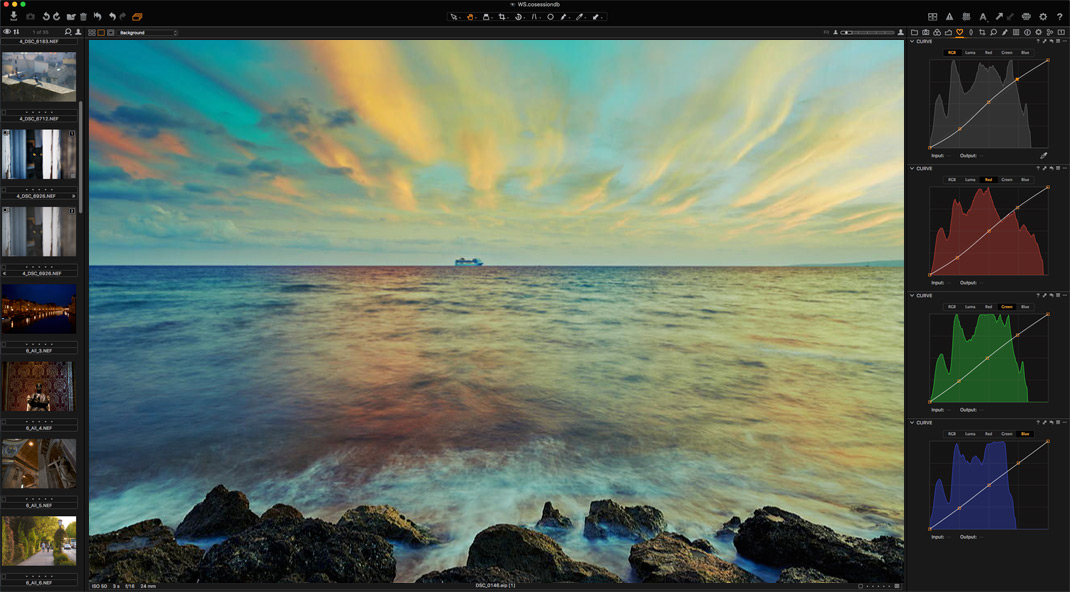
9.2. Put any tool in any place on the screen or duplicate tools and create custom tool tabs.
By the way, it’s a really useful feature to deal with Red, Green and Blue channel Curves.
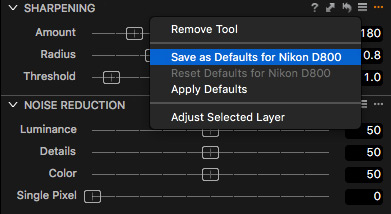
9.3. Set a custom default settings for all the main tools for one particular camera model.
For example, if you have a few different cameras you can set default Sharpening and Noise Reduction settings for each camera.
9.4. Edit keyboard shortcuts.
Here is my short video about main features of custom workspaces in Capture One:
8. Image Management
What I truly love in Capture One’s image management approach is that it gives you a choice.

There are three alternative ways to work with your files:
8.1. Open files directly on your hard drive, without import or any additional action.
Simply open a folder, and you’re ready to work.
8.2. Create a new session for every new shooting.
Best suited for commercial photographers with project-based workflow. That way, you will have all the images that are related to a particular shooting in one place.
8.3. Organize images in Catalogs.
Capture One Catalog has all the popular DAM (Digital Asset Management) features: an ordered structure with folders and projects, albums & smart albums, searching filters, keywords. You may also decide where to store RAW files – inside Catalog or in any other place.
If you have tried Capture One 7 and weren’t satisfied with its catalog features – it’s definitely worth to give Capture One 11 a second chance. Since the first release of Catalog in Capture One 7, a bunch of features have been changed and improved. Now we have great Keyword Libraries, Folder Synchronization, Dynamic Locations and much more.
But it is still the same Capture One Catalog with an approach to image organizing that is different from Lightroom’s. In the same way, as Mac is different from Windows. Take your time to get used to it and let it work for you.
7. Advanced Processing
During the last few years, Capture One got a bunch of fantastic new features to deliver image processing to completely new level.
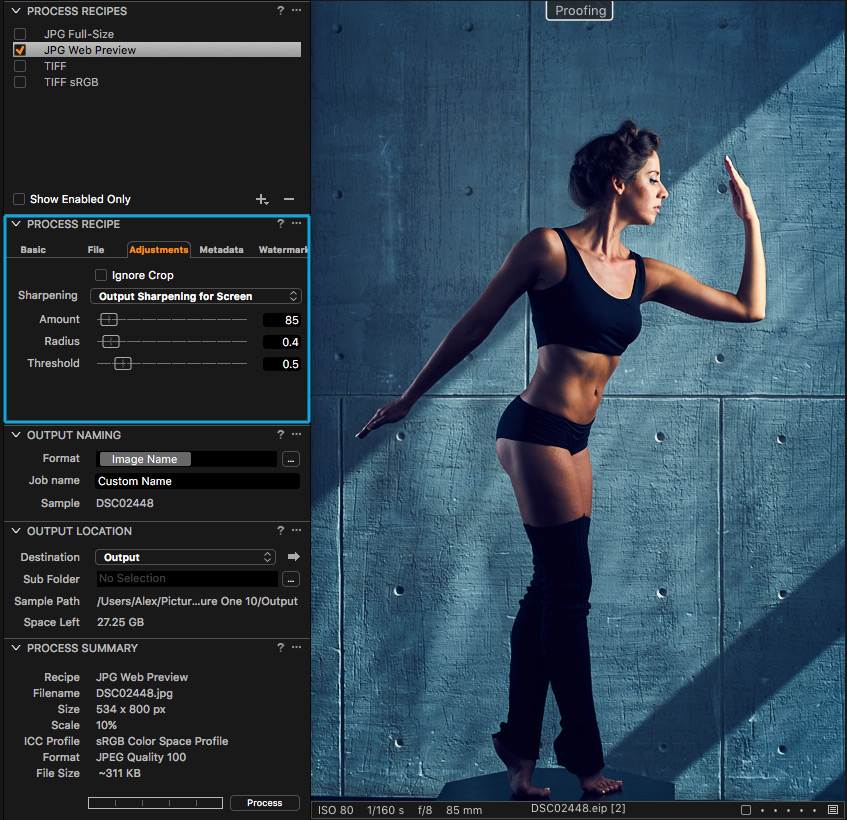
7.1. Different processing recipes
In Capture One, you can easily create custom processing recipes and convert images into different formats with one click.
Let’s take the most common case: processing images into Full-size JPG, Tiff, and small-size JPG for the web.
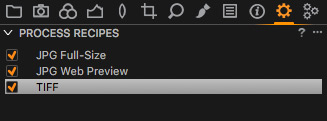
We’ve created three recipes with different formats, sizes, quality and embedded metadata settings. Now you can convert all the files to different formats and locations with just one click.
By the way, here is another example of how you can automate processing using tokens:
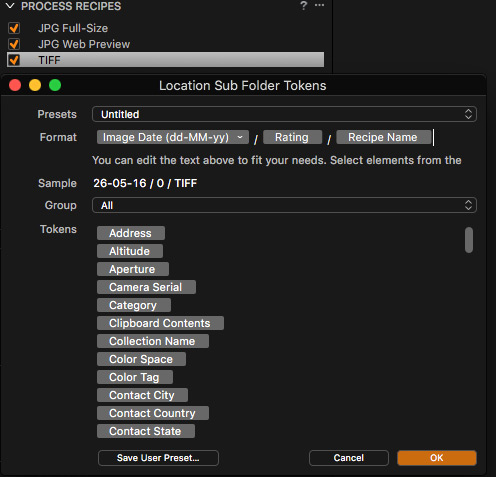
With that set of tokens, Capture One will create new folders with dates when images were taken. Inside each folder, it will create folders by image ratings and inside them – by format names.
In my case it looks like this:

Again – all that folder structure will be generated automatically for any new process with only one click. And you have dozens of tokens to choose from and to create unique processing paths.
7.2. Output Proofing
Output Proofing is dedicated to showing you how exactly the RAW file would look after the processing.

When you are working with RAW, there are many options to convert it to the final JPG or TIFF. For different purposes, you may need a particular color profile, size or sharpening settings, and sometimes it’s quite difficult to predict the look of the final image.
Output Proofing would immediately show you the prepared image with applied preferences from the selected recipe. It’s especially useful when you’re processing images for the web.
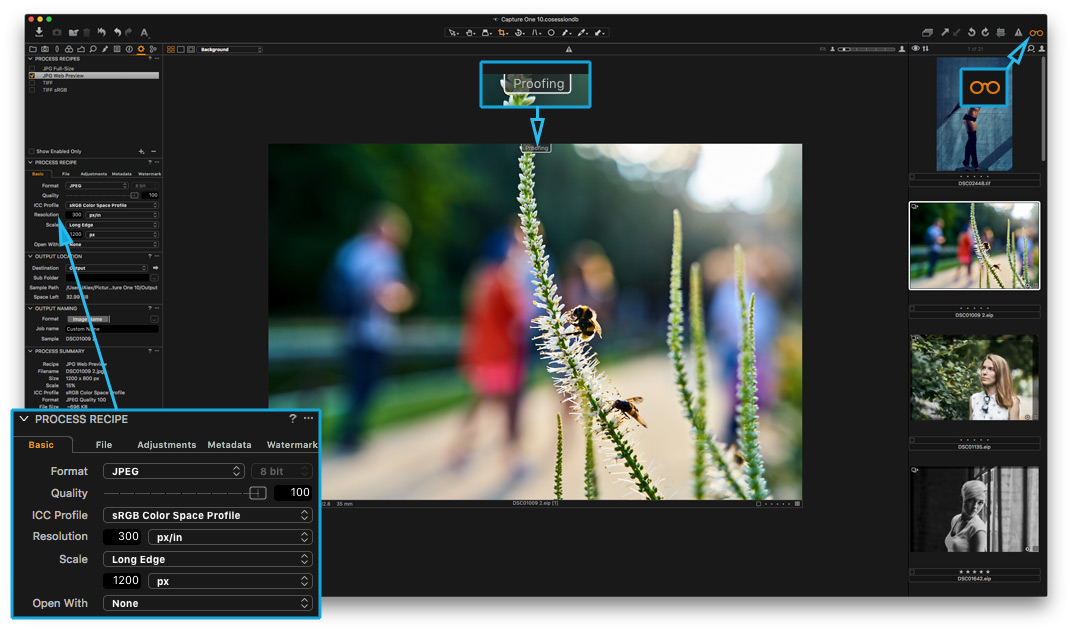
With Output Proofing, you can set the best sharpening for your image depending on image size. Proofing allows you to check if your picture looks good with selected color profile. Even JPEG compression artifacts can also be simulated.
Also, in Capture One you can adjust sharpening right in recipe’s settings for different purposes. For example, it allows you to set specific sharpness for web and print recipes.
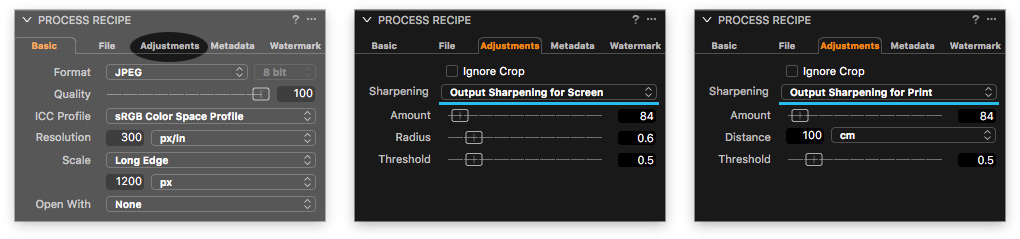
Output Proofing will show you how it looks on the final image. For prints you can also specify the distance the image should be viewed from.
Together, Output Sharpening and Output Proofing allow you to prepare the image for web or print in all the details.
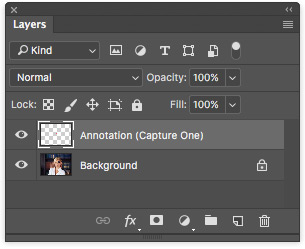
7.3. Annotations for retouchers
In case you regularly work with retouchers, I’m pretty sure you wished for communication tools in your RAW software. With Capture One Pro 11 you can draw annotations right from Capture One with this tool:

Annotations are stored as standard Capture One image settings and can be processed as a layer in PSD file with the image.
6. Tethered shooting with Capture One
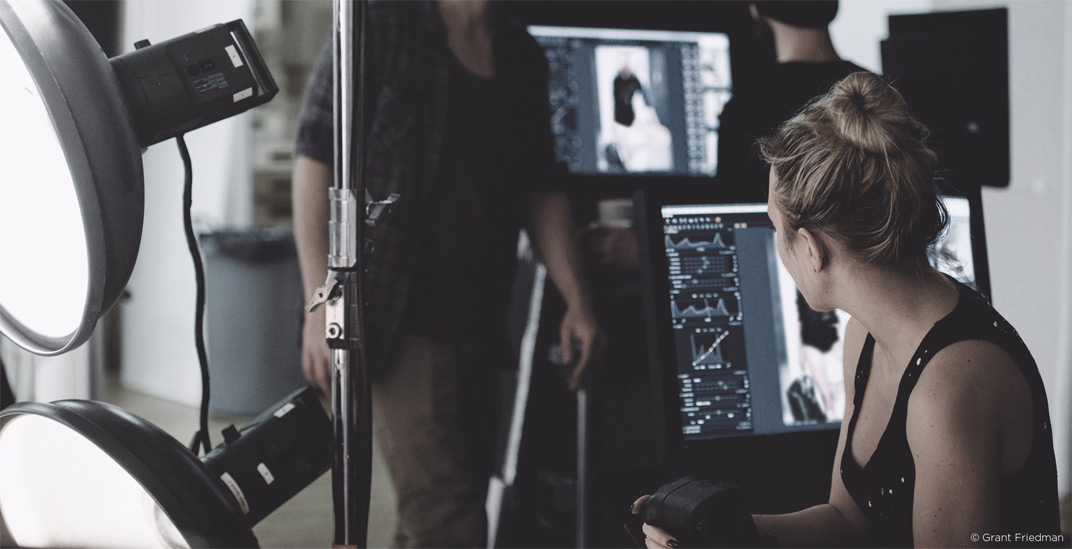
If you work a lot in a studio on a portrait, commercial or product photography – tethered shooting software is one of your main tools.
In modern photography tethered shooting isn’t a new fancy feature anymore, it’s a professional work standard.
And in this area, there are no competitors to Capture One. The reason is that Capture One provides all the features, which you may need for tethered shooting and even more.
6.1. Full control over the camera settings and image adjustments
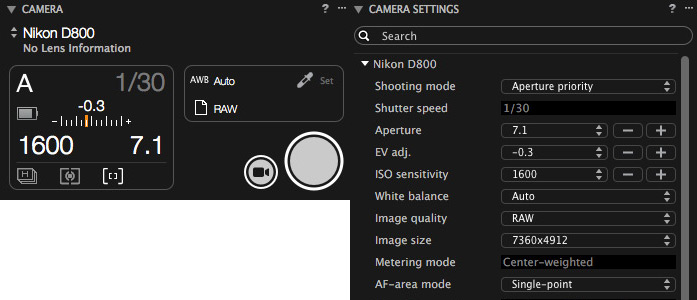
You can change almost all the camera settings directly in Capture One: starting from an aperture, shutter speed and ISO to focusing, synchronization, bracketing and dozens of other camera settings.
It allows you, literally, to not touch the camera during the shooting. Unfortunately, Capture One can’t move your camera and product in the frame, yet. But perhaps in the bright future, special photography robots will surely help us with that; today, however, we still have to use human assistants.
You can also decide which adjustments will be applied to the next captured image. They could be adjustments from any previous image or from saved presets.
Actually, this is one of my favorite features, because my clients will never see “raw” image during the shooting. Each new image shows up immediately with the right color, Curves, and exposure corrections.
6.2. Great composition features
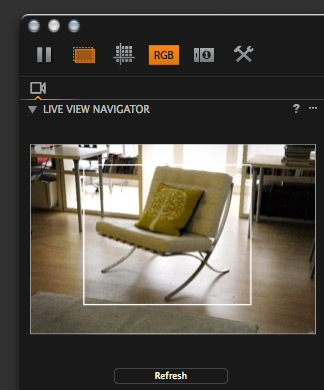
Live view – allows you to see “live” picture from your camera, to set composition and focus.
Composition mode – while this option is on, only the last captured image will be saved on your drive. Excellent feature for the pre-shooting tests.
Overlay – adds any picture over the main image. It’s really convenient when your image should fit a specific design layout.
6.3. Remote camera control
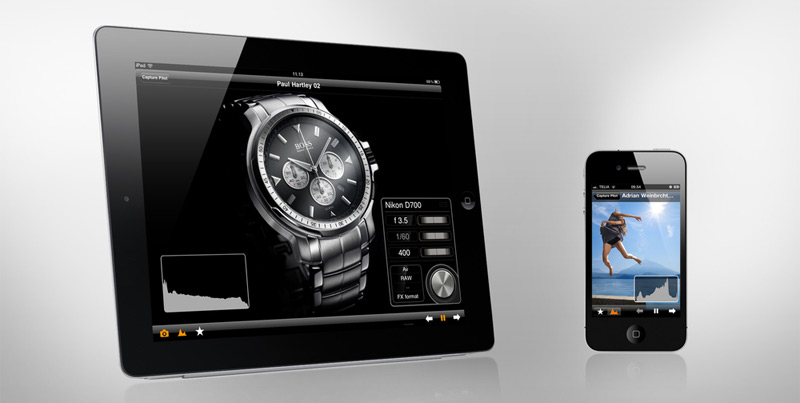
With Capture One Pilot app you can control your camera from any iOS device. For example, you may connect your iPad over Wi-Fi to your laptop with Capture One and fully control your camera. Take images, change exposure and quality settings – everything, right from your iOS device.
You can also select images, rate them and set color tags during the shooting. This feature works not only with iOS but with any internet browser on any device.
Here are some videos of how it works:
Using Capture Pilot for iOS and Web
Camera Control
My favorite trick in a commercial session is to connect client’s laptop to my Capture One server and watch the reaction when images start to display on client’s machine.
It really impresses people! And it’s also quite convenient that client may rate best images while you shoot.
Of course, you may find separate applications for each of those tasks, but you’ll never find all of them in one solid and easy-to-use solution on the market.
Now let’s talk about editing possibilities, ‘cause, well, RAW-converter is actually about editing!
Continue reading with “10 Reasons to Switch to Capture One Pro 11. Part II”

Author – Alexander Svet
Alexander Svet – professional photographer and specialist in image processing.
Phase One Certified Professional and Capture One trainer.
AlexOnRAW.com