

We’ve rebranded from CaptureOneBlog.com to AlexOnRAW.com.
It’s only the name that is going to change; our content will always stay the same: the most interesting news about Capture One, reviews of all the latest updates and the best deals from Capture One community.
This year Phase One has released two major updates for Capture One 8 and for the whole autumn we were waiting to see next Capture One 8.4 with some new features. Instead of that we’ve got completely new Capture One 9, and it’s amazing.
New engine, masks from Color Editor selections, updated Curve tool with layers support, new Keywords and a dozen of other interesting improvements.
Now let’s take a closer look at all the new features of Capture One 9.
New User Interface
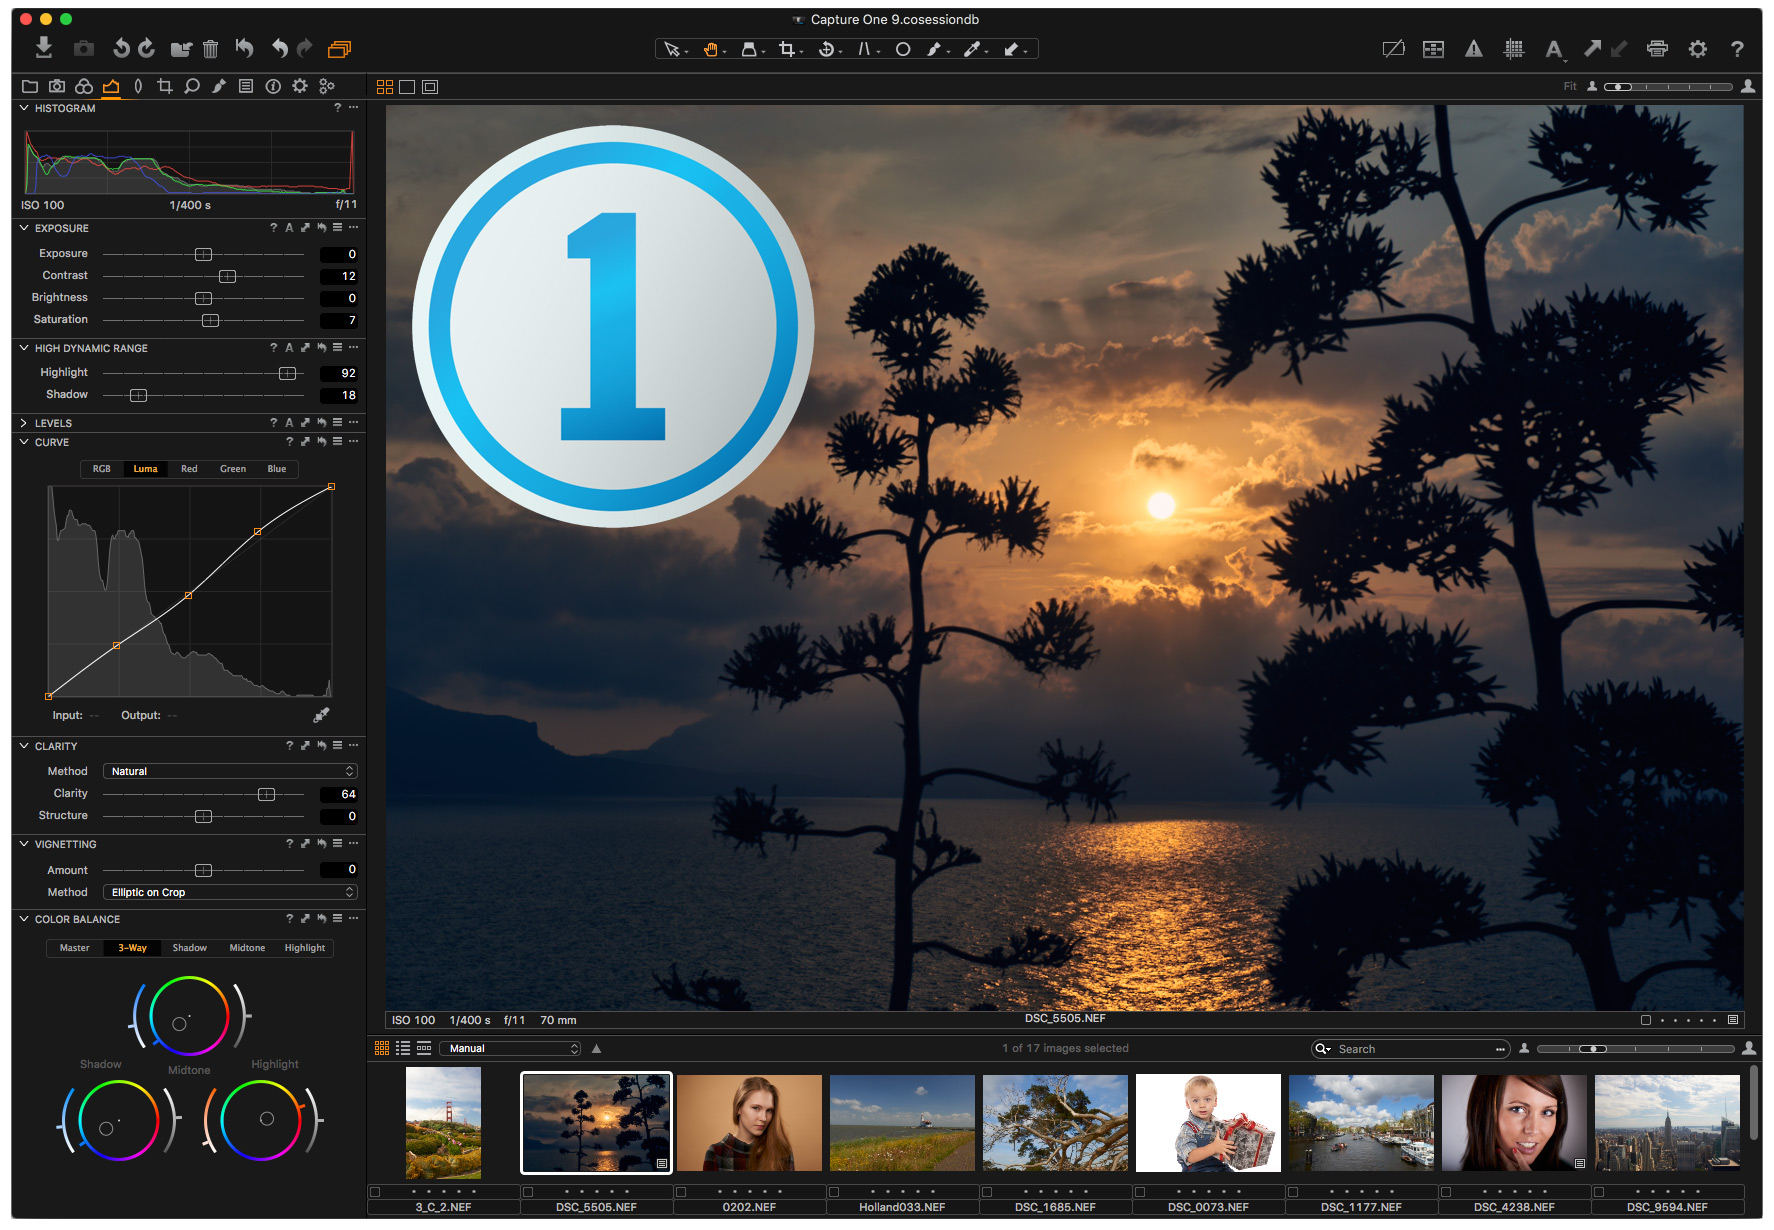
The first things that you will notice with Capture One 9 are new application’s logo and renewed User Interface.
Adjustment sliders look different; everything is more “flat”, and Color Editor got a completely new design.
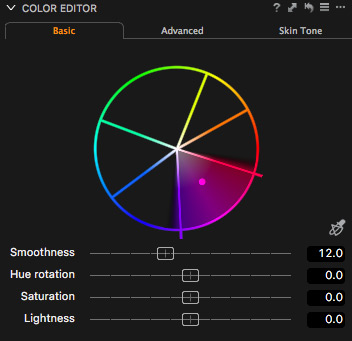
The good thing about a new Color Editor is that you always know, which color sector is selected now. It’s quite useful and looks nice.
Like any re-design it looks unfamiliar for the first time, but give it a month or two, and the previous Color Editor will look pretty old-fashioned.
For us, it’s much more interesting to see what runs Capture One 9.
New Engine
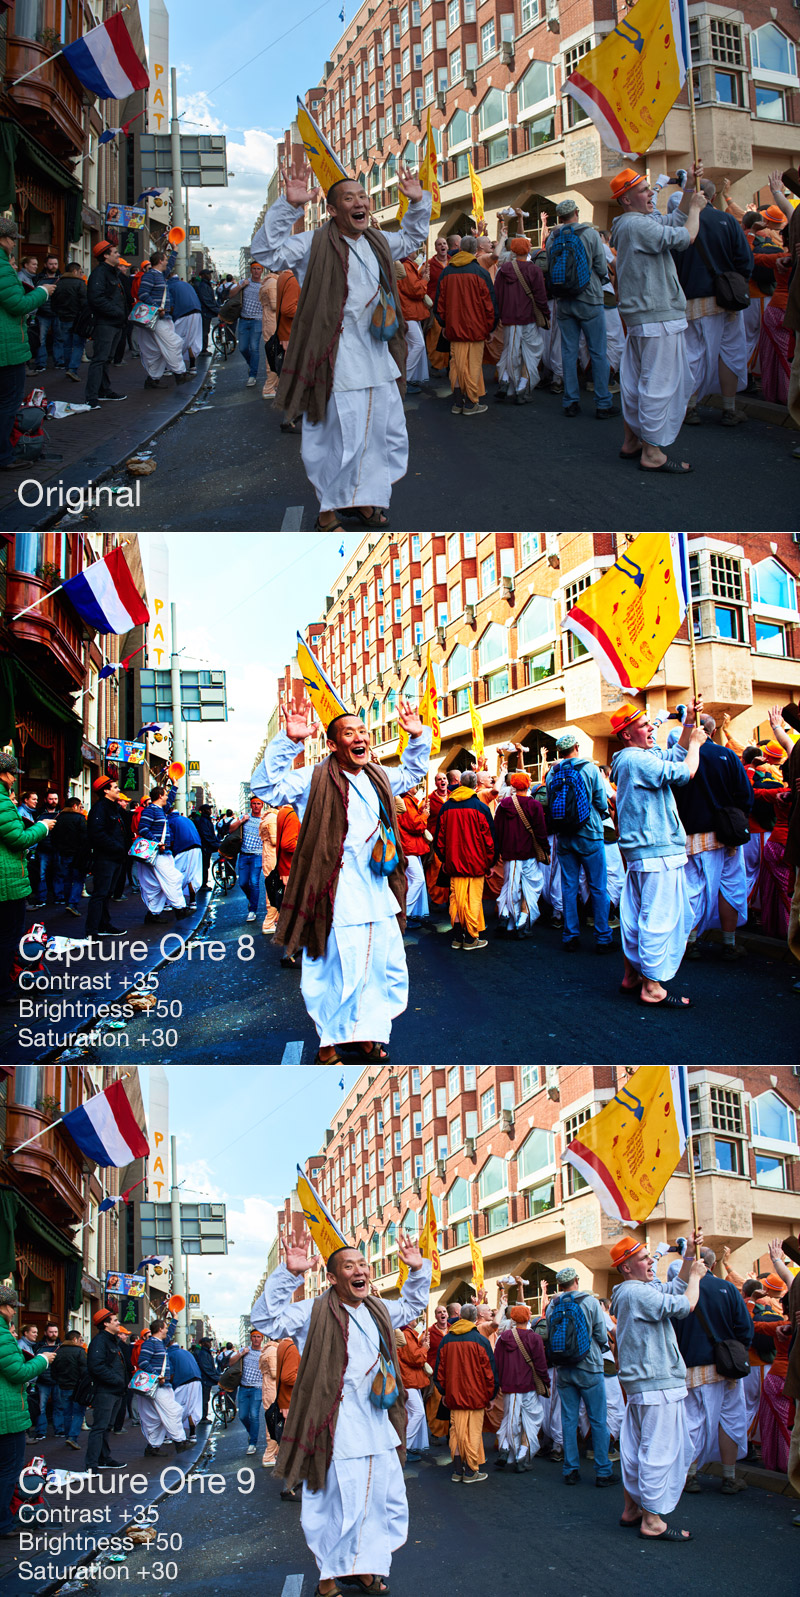
Under the hood, Capture One 9 has a new engine with totally reworked contrast, brightness and saturation algorithms.
New Contrast Engine
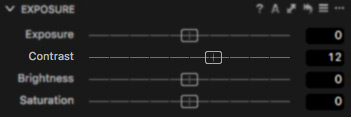
In previous versions of Capture One, Contrast slider was a fast and handy tool, but unfortunately with some limitations – at a high value it becomes seriously destructive for the image color.
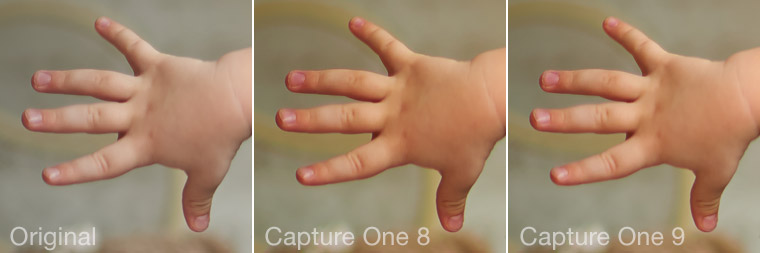
New Contrast tool works much more accurately with color, and it’s really noticeable with portraits:
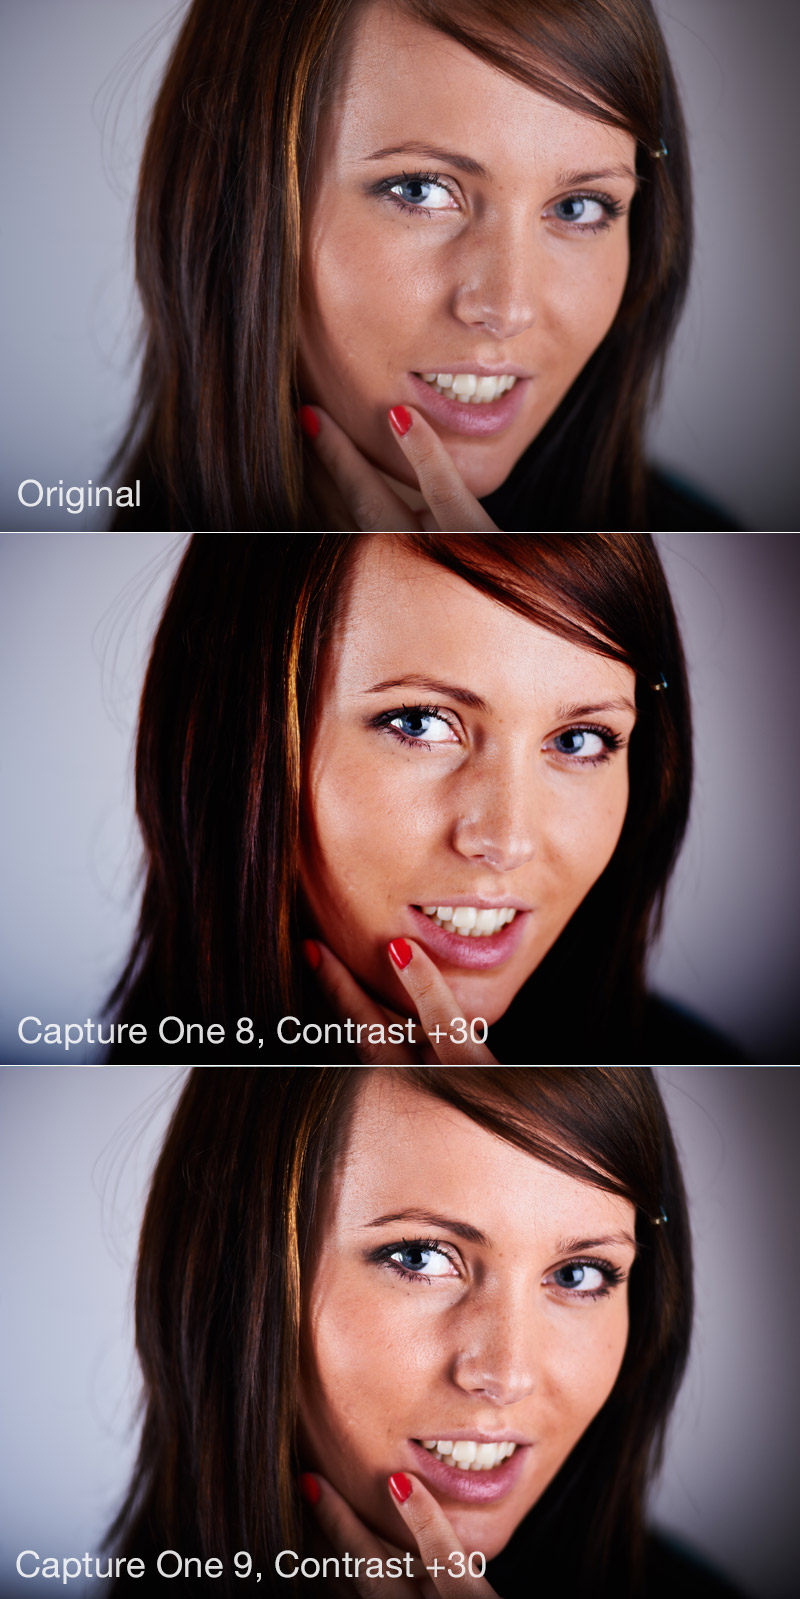
It also works significantly better with details in the shadows and dark parts of the image.
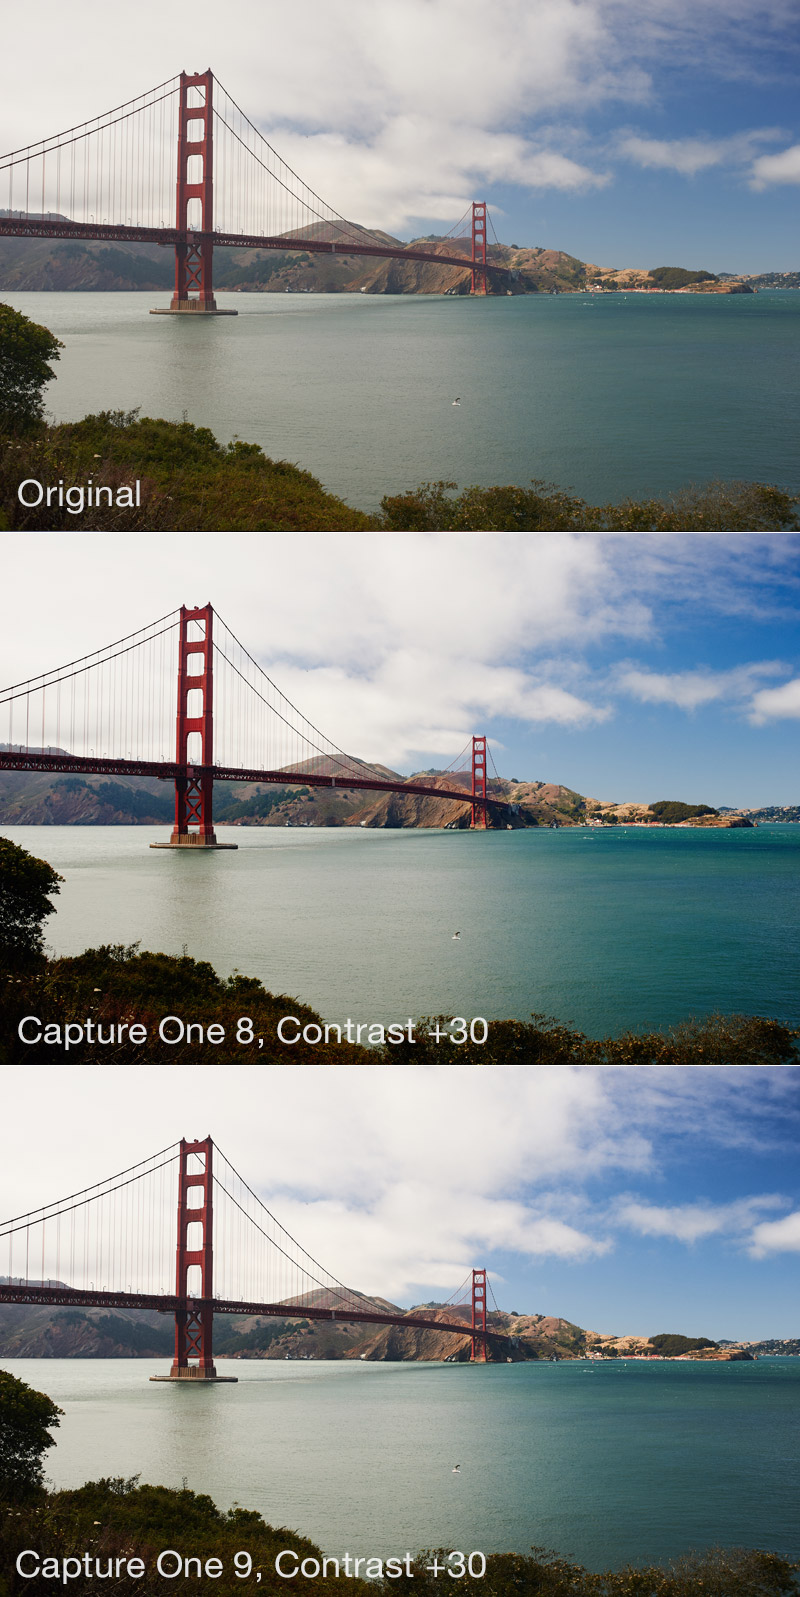
Now we can add more contrast without worrying about color sensitivity.
New Brightness Engine
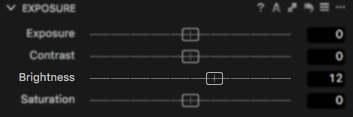
Last few years Brightness was pretty much out of the main toolset. Powerful Exposure and HDR did almost all the work, but that may change with Capture One 9.
Updated Brightness engine is something really new; it works smoother and smarter, like a specific mix of HDR, Exposure, and mid-tones Curve correction.

Sometimes it’s very useful, and it could give Brightness a second chance at your workflow.
New Saturation Engine
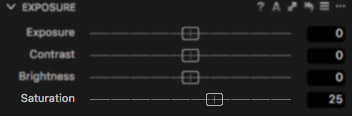
Starting from Capture One 7, Saturation always was a smart tool. It’s algorithm provides an intellectual way of saturating each color in the image.
New Saturation Engine is not so significantly different from Capture One 8’s version; it’s just better and smarter.
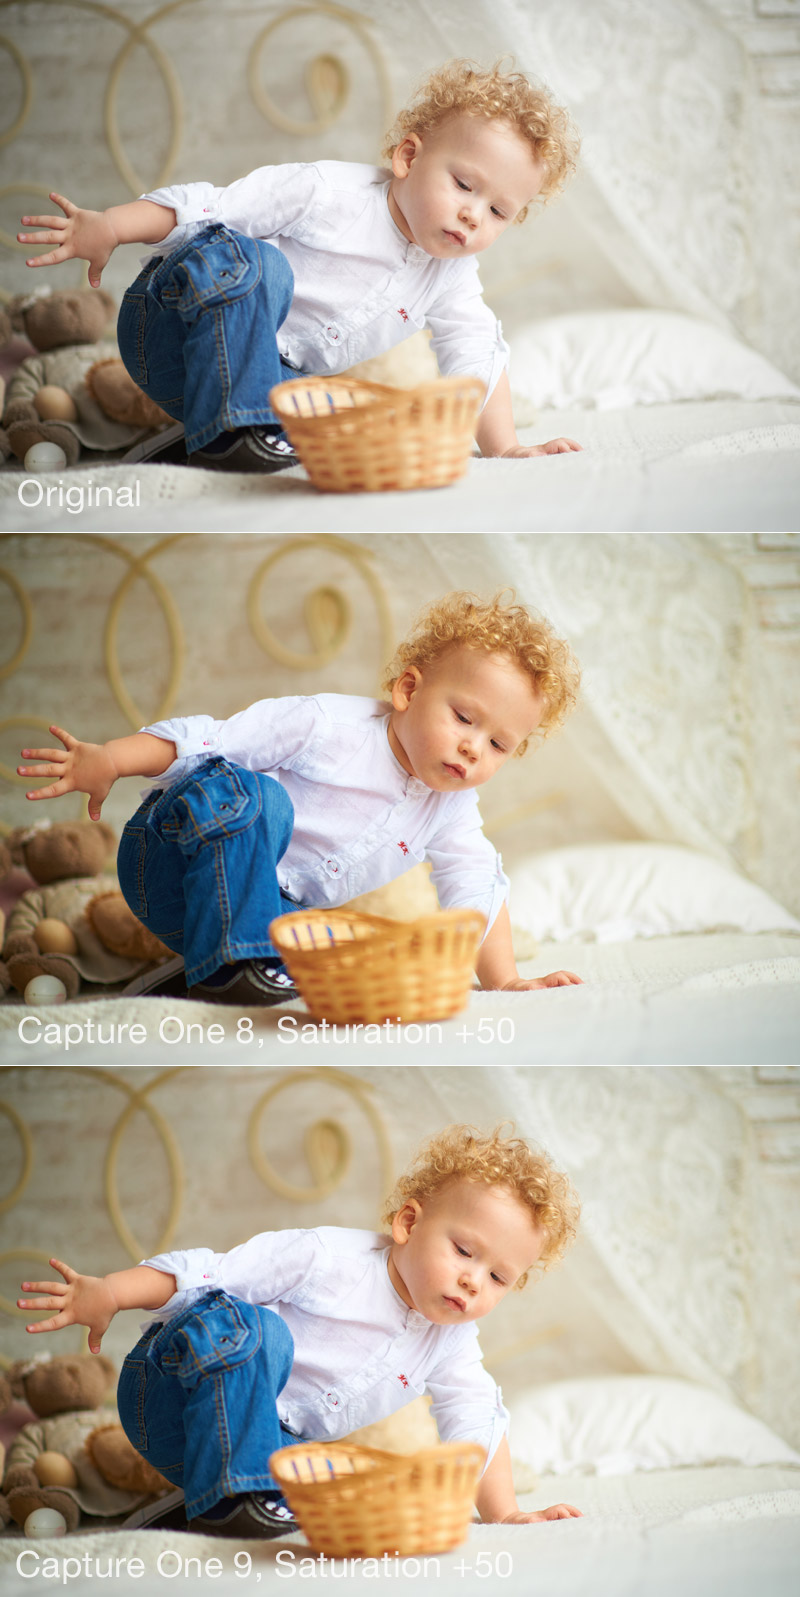
It’s noticeable especially with the luminance preservation algorithms:
What is also quite interesting – all the new tools work better together. New Saturation combines nicely with new Contrast; and new Brightness works well with both of them.
Each Capture One engine’s update feels unfamiliar and strange at first.
It’ll take some time and practice to get used to the new engine. After I’ve beta-tested Capture One 9 for a few weeks, I can say that it’s definitely worth it.
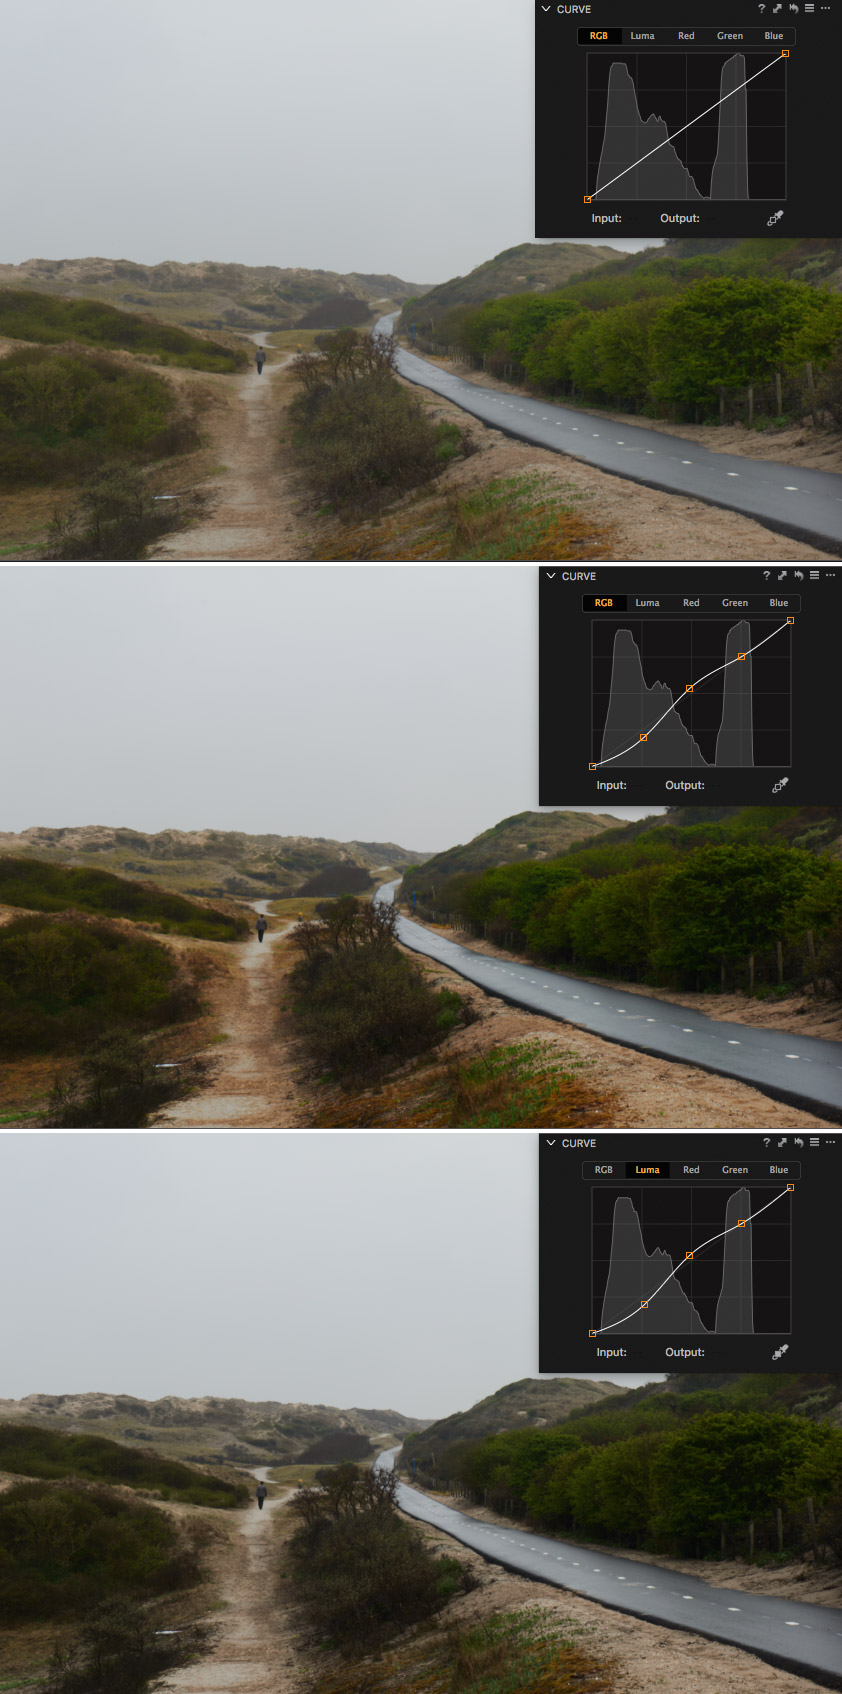
New Curve tool
Here are two main things about the Curve tool in Capture One 9:
1. Curves can now work with layer masks.
2. We’ve got a new Luma Curve.
Everything is clear with the first point – finally Curves work in layers, great news.
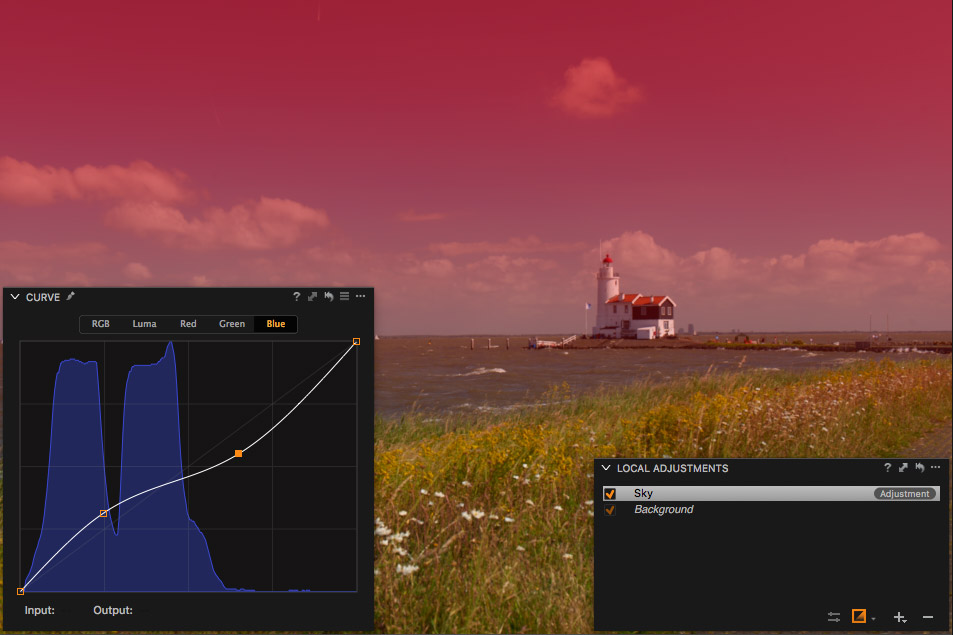
New Luma Curve is a much more interesting thing.
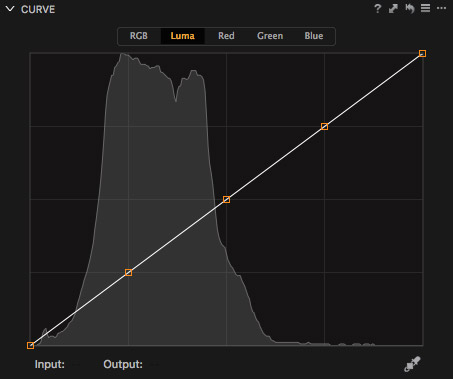
It affects only luminance of the image (I think that’s why they call it Luma), and it works quite similar to L-channel curve in LAB.
If you are familiar with LAB processing, you could already guess how many possibilities that new curve may unlock.
Of course, it’s not a real Photoshop’s LAB, but even with that one curve you can do a great number of amazing things.
Most common and really useful case – add contrast without increasing saturation.
Masks From Color Editor
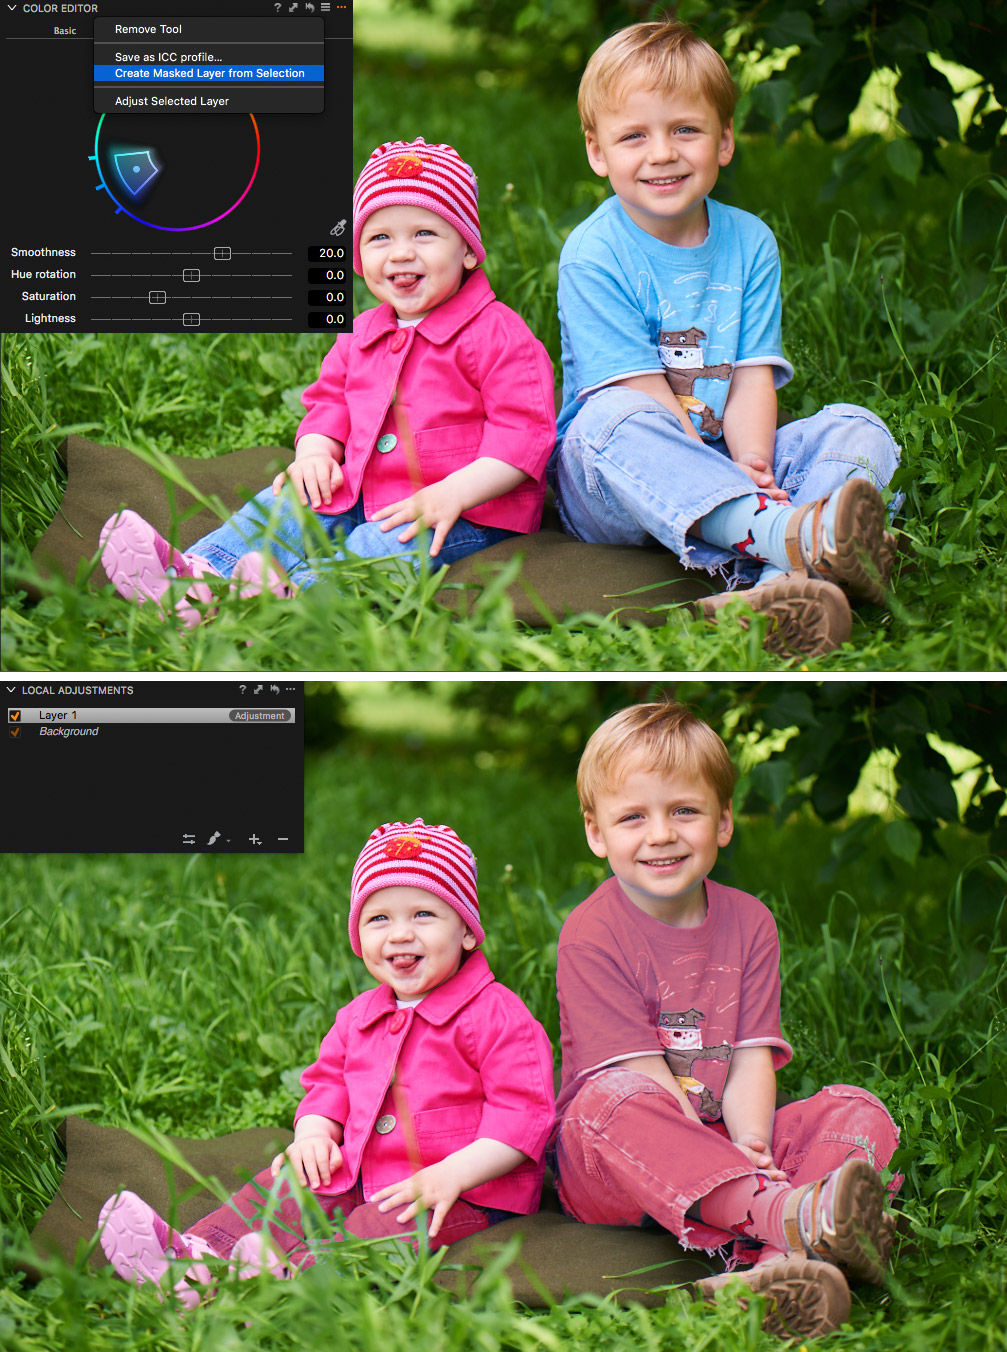
Behind new fancy Color Editor design, hides an amazing new feature – Create Masked Layer from Selection.
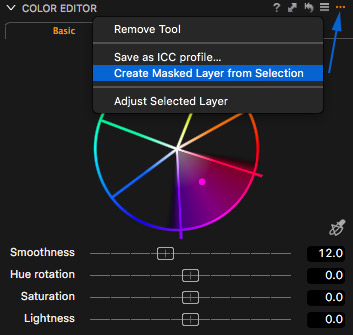
Yes. It’s exactly what you are thinking about: select a color and create regular layer mask from it.
It’s absolutely a killer feature, which will completely change your whole workflow and save you a mass of processing time.
Masked Layer could be created in any Color Editor’s mode: Basic, Advanced and Skin Tone.
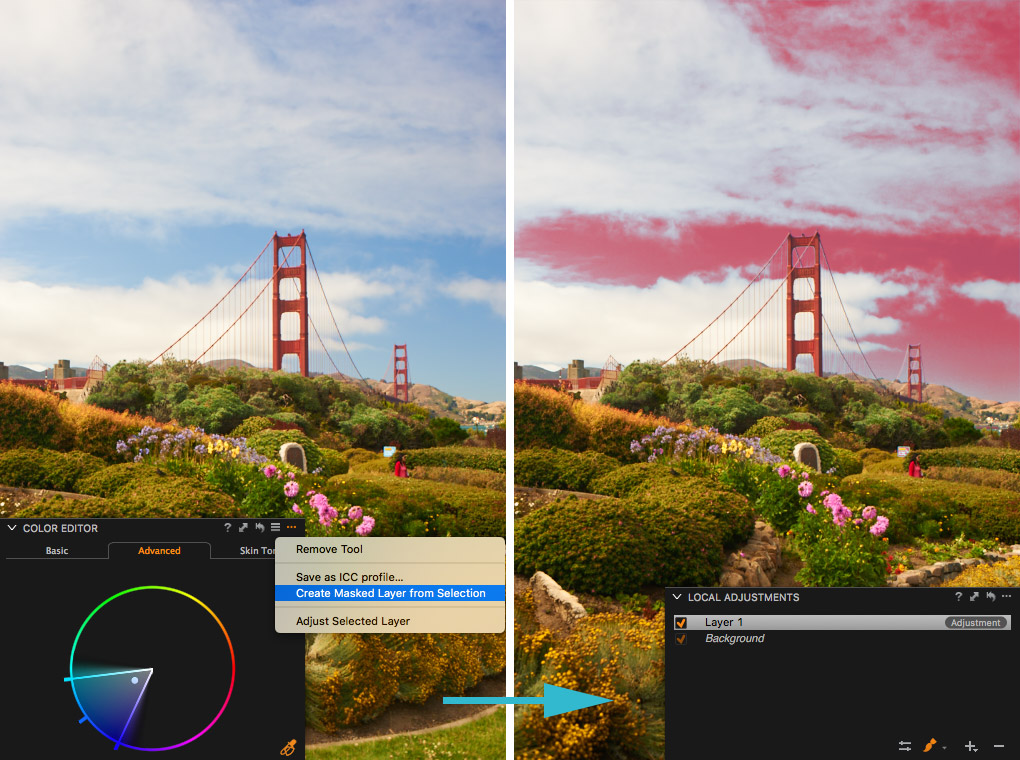
Imagine – now we can create complicated layer masks just with a few clicks:
Need to create a mask over the model? No problem:

Want to work with only the model’s clothes? Click, click:
And don’t forget – it’s a simple, regular mask. It means you can erase it or draw on it, copy it and invert the mask.
If Color Editor will select some excess objects in the frame – just remove it or add a new mask.
Now everything comes together. With all the previous versions of Capture One, we were delivered step by step up to this moment.
- Capture One 6 – first Local Adjustments tool released
- Capture One 7 – more abilities to create layers
- Capture One 8 – new tools for layers + Repair Layers
- Capture One 9 – almost all the tools work with layers + Masks From Color Editor
With Capture One 9 you can create astonishing complicated masks with just a few clicks and edit them with all the tools including Red, Green, Blue, and Luma Curve channels.
It’s such a huge topic, that I will surely prepare a special article about it.
New Layer Features
Besides Masks from Color Editor in Capture One 9, there are few other quite interesting updates to Local Adjustments tool.
First of all Brush tool was upgraded with two new masking features: Flow and Airbrush.
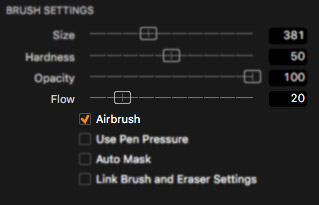
Flow allows you to draw a mask passing over the same area with the brush, as long as the mouse button is held down. With each new pass the mask’s opacity increases.
For example if you will set Opacity to 100% and Flow to 20%, the first pass will have 20% opacity, the second pass over the same area – 40%, third – 60% and so on, until 100% opacity is reached.
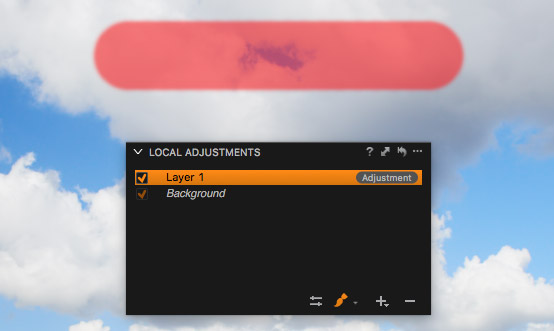
In Airbrush mode, Brush will build a mask in the Hardness zone while the left mouse button is depressed or the border of Hardness zone is reached.
Try and you will see, that it’s just like a real airbrush.
Second update – Straight Line Brushing.
Now you can hold Shift while drawing to get a straight line. Or mark a point, hold Shift and click the second point to draw a straight line between them.
Third update – Link brushes.
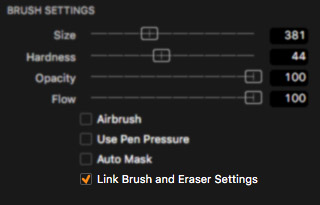
You could turn this mode on to link all the settings of Brush and Eraser.
New Keywords
Keywords was always the weakest point of Capture One DAM (Digital Asset Management).
In Capture One 9 it’s completely rebuilt, now there are two separate tools: Keywords and Keyword Library.
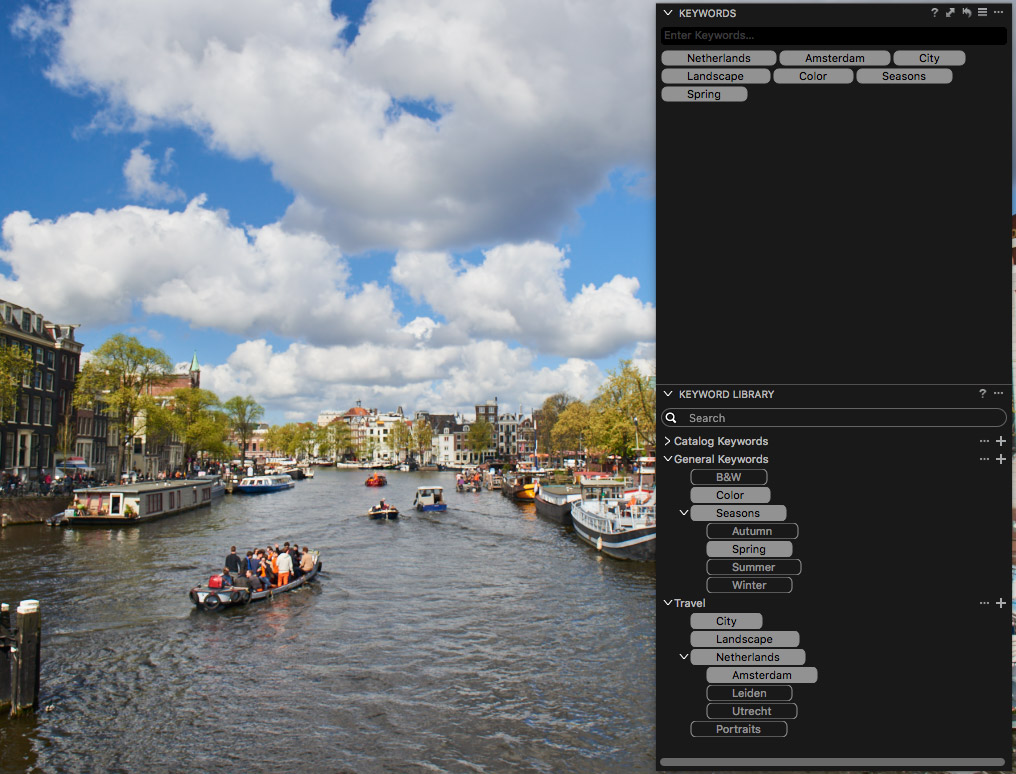
Keywords tool is designed for local management of keywords. In general, it’s the same tool from Capture One 8 with some nice improvements.
Keyword Library is the new tool to manage and store different keyword databases.
With Keywords Library tool, you can add existing keyword databases to your session or catalog. You can also use shared keyword libraries for all your projects.
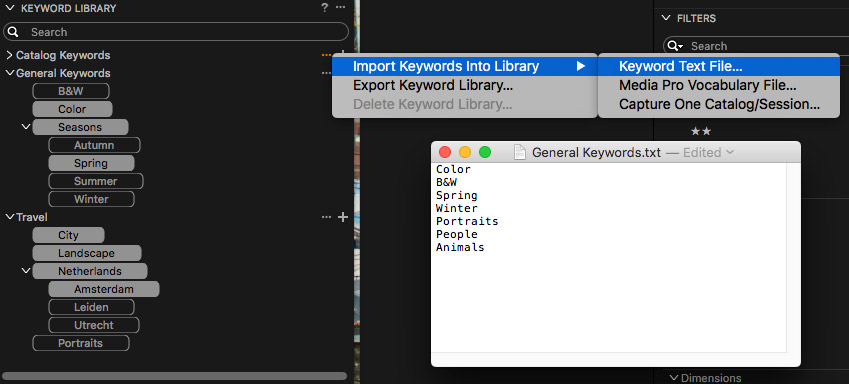
The most exciting part of a Library tool is the ability to import/export keywords from other Sessions/Catalogs, Media Pro Vocabulary, and even simple TXT Files!
If you wish to run a detailed photography archive or you have to use keywords for you work – Keywords Library provides a range of great possibilities.
Besides new Keywords Library tool, there are few other useful improvements to Keywords:
- Keywords may be added and removed to/from all selected images
- Keywords for single images may be manually sorted
- The logic of combining different keyword pre-sets has been noticeably improved and it also works for some IPTC fields
There are lots of interesting details about new Keywords tools, but let’s keep it for one special article.
Capture One Colors for DNG
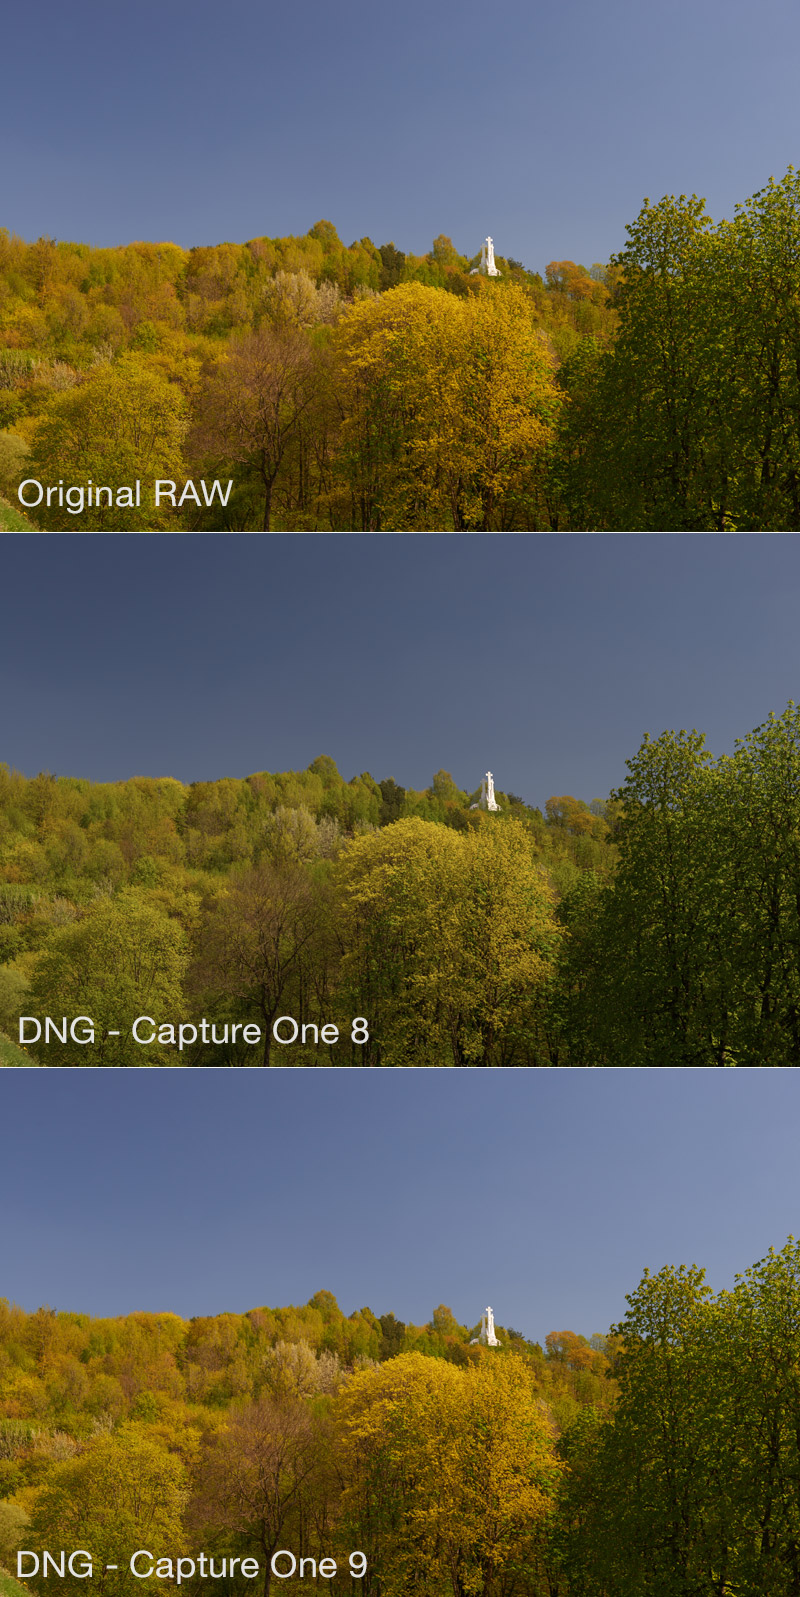
All previous versions of Capture One have an issue with converted DNG files. For Lightroom/CameraRAW photographers, who have converted their photo archive into DNG, there were no options to get the true colors with Capture One without extracting the original RAW file.
Capture One 9 works much better with DNG; the color is clear and realistic. There are still slight inequalities with image luminance, but, in general, DNG picture is quite close to the original RAW and with some images you will even find no difference.

To avoid any misunderstandings – that feature is not for saving Lightroom/CameraRAW processing adjustments (that would be impossible), it’s only about preserving the original RAW picture. There are also few limitations:
- RAW file should be embedded in the DNG package
- It does not work with unsupported formats converted to DNG
- Capture One 9 does not support Adobe Lens or Color Profiles
Anyway, there surely will be some photographers who will find that feature really useful.
Other Improvements
Export as EIP from Catalog
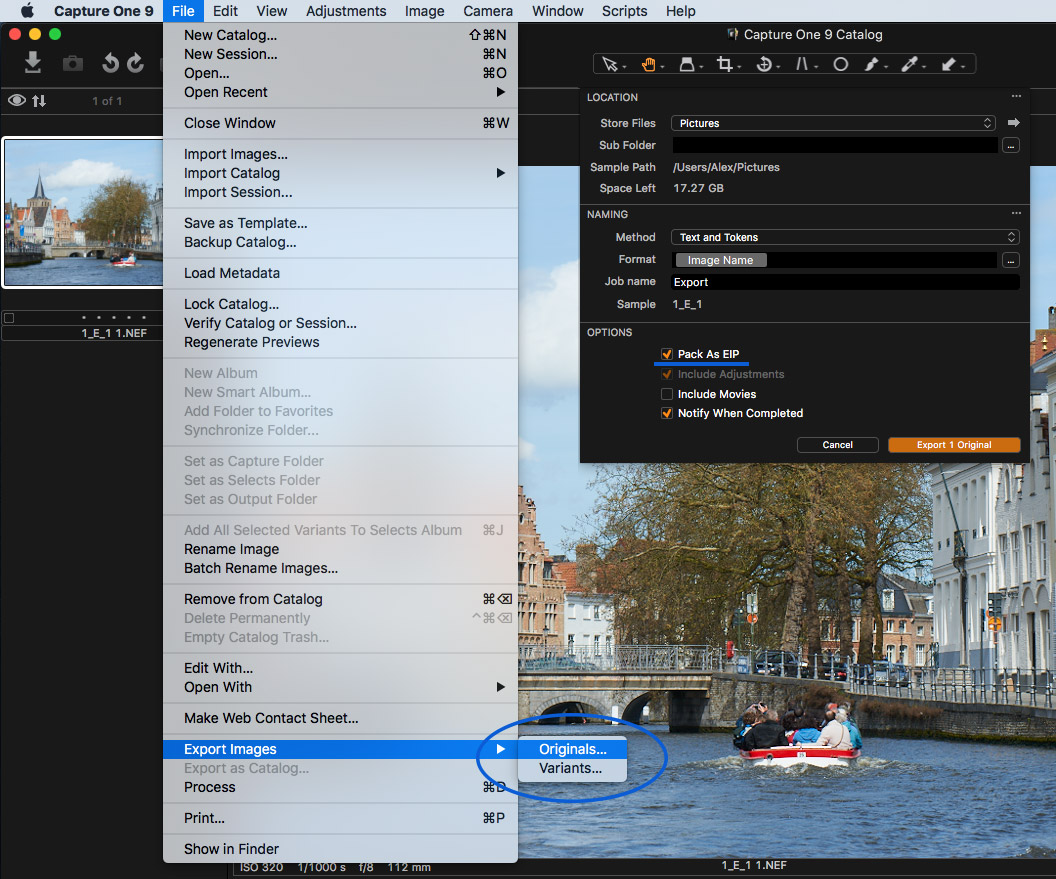
EIP is an archive, which contains original RAW and all the settings in one file.
A quite helpful feature to transfer RAW with adjustments to another Capture One machine.
Before Capture One 9 it was available only in Sessions mode, now you can use it with Catalogs too.
New Re-Scaling Engine
In Capture One 9 rescaling algorithms were reworked, and it’s especially noticeable with small-size files. Very nice improvement for web preview processing.
Tool Bar Battery Status
Now you can add a special Toolbar icon to indicate connected camera battery status.

Nice improvement, but it would be great to finally see features like “History tool” or “On/Off Button” for all the image adjustments.
I was writing about that a year ago in my Capture One 8 review, and I’m writing about it now, again. Phase One, you are doing a great job. I’m sure that you have prepared a lot of new features for Capture One 9.x updates. Stop for a moment. Add those really necessary features. Make thousands of users happy. And continue to do awesome things. Thank you.
Performance
Capture One 9 is noticeably faster than 8 version, around 20-30% processing speed increase in my case. Of course it depends on your hardware, I have tested Capture One 9 on different Mac OS and Windows machines and in all cases it works faster than Capture One 8.
Pricing
Capture One 9 Pro license (single user – 3 seats) price is 279 EUR / 299 USD
If you wish to upgrade your Capture One Pro 8 license to Capture One 9 it will cost 99 EUR
Summary
What I truly like is that each Capture One update is about real improvements that make your work better, easier and faster.
There is a real evolution of processing capabilities: New Engine, Luma Curve, New Keywords and Local Adjustments features.
Capture One 9 is not about darkroom style fancy-pants updates. It’s about real work.
Sure, we will see some comments from angry users, who don’t want to pay for a license upgrade. It’s fine. Every professional knows how much his work time costs. Now imagine all the time, that only Mask from Color Editor feature can save you. For a few weeks, I was editing my commercial shootings with Capture One 9 and I can say that upgrade is totally worth its money.

Author – Alexander Svet
Alexander Svet – professional photographer and specialist in image processing.
Phase One Certified Professional and Capture One trainer.
AlexOnRAW.com