

Hey!
Recently, one of my readers, Ian MacMichael, faced a weird issue with exporting in Capture One.
Ian has exported photographs, but for some reason, images appeared in a folder different from the selected path. The same happened with the next export and the one after that. The destination path had been set correctly; images just somehow refused to export to this folder.
Do you have any idea of what could have gone wrong here?
If not, it’s time to discuss some hidden features of exporting in Capture One.
Root Folder
Let’s start with solving Ian’s problem.
Capture One has two places where you can select the destination folder for export:
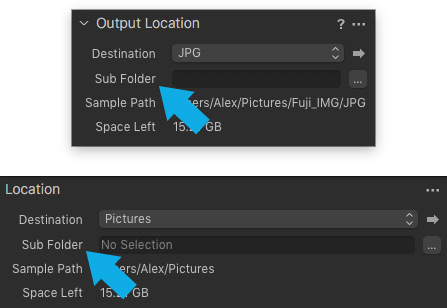
1. Output Location (Location in the Export window)

That’s a standard option for choosing a destination and, usually, Output Location works right as expected. Unless you have overridden it with…
2. Root folder
Root Folder is located in the File tab of exporting settings:

That’s a standard option for choosing a destination and, usually, Output Location works right as expected. Unless you have overridden it with…
- Output Location is a default choice. It exports images to a folder chosen in Output Location (Location in Export window). No conflicts, everything is fine.
- Image Folder. Select this option and Capture One will export files to the same folder, where your RAWs are located. No matter what you have chosen in Output Location.
- Select Folder allows you to choose any custom folder for export, ignoring Output Location settings as well.
Thus, if you would select different destination folders in Root Folder and Output Location (like Ian did), Root Folder will always override the latter.
At the same time, Root Folder is extremely helpful when you need to export images to the RAW files folder or to set an individual destination for some recipe.
Dynamic Locations
As you might have noticed, there is a Sub Folder field near Root Folder.
Output/Export Locations have this option as well. Moreover, the Import window has the same field!
Sub Folder is a fantastic tool for automation of your imports and exports.
The concept is pretty simple: you can generate subfolders automatically using special tokens.
Say, you love the idea of exporting JPG in the folder with your RAW files. But you don’t want to mix them! Sub Folder allows you to easily and automatically sort JPGs in separate folders.
Simply open token menu and drag-n-drop the Recipe Format token in the field:

Now, Capture One will automatically create a subfolder inside a folder with your RAW and will name it according to your export format (JPG, TIFF, etc.).
You can use multiple tokens as well! Place “/” between tokens and Capture One will create auto-subfolders inside subfolders.
To learn more about tokens and Dynamic Locations, I recommend this article “Automation in Capture One – a lesson in rocket surgery”.
Sub Name
This is another curious and hidden feature of exporting!
Sub Name allows you to set a specific text, individual for each process recipe.
Say, you have full-size and small JPG recipes. For small JPG files recipe, you can set Sub Name as “For 500px.com” and the full-size recipe remains without Sub Name. Now, set an output location and place the Sub Name token in the Sub Folder field.

Capture One will export full-size JPGs in a general folder and will create a separate folder “For 500px.com” for your small JPGs.
Output Sharpening
Output Sharpening has been presented in Capture One 10, so if you’re new to Capture One, you might be not aware of it.
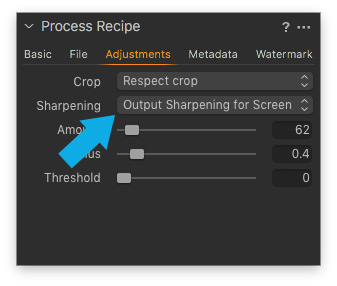
Output Sharpening allows you to set specific sharpening for particular process recipes. For instance, you can set different sharpening for web-previews and full-size images.
Fantastically useful feature! If you still don’t use it, check out this article to learn how it works.
Keyword libraries
In Capture One, you can set particular keyword libraries to be included in the final exported file.

That’s extremely useful when you have keywords for inner archive and for public use (uploading to photo stocks). Using this feature, you can include keywords from “public” keyword libraries only to the exported file.