This week we practice working with color schemes in Capture One! If you’ve missed the first part of this tutorial, check out my blog post to learn about applying analogous colors in Capture One.
Today, we’ll see how to work with complementary colors!

Complementary Color Schemes in Capture One
I think photographers shouldn’t overcomplicate complementary color schemes. Like with analogous colors, you might find multiple variations of complementary color harmonies, including Split Complementary and Double Split Complementary schemes. I believe that such a precise approach doesn’t work in real-life photography.
Think simpler: complementary colors are the colors that are opposite to each other. With complementary colors, a viewer can recognize objects faster and feel the image atmosphere better, which makes your image easier to perceive in general.
Why do we see the same color palette in most blockbuster movies?
Amongst other reasons, I prefer this one the most:
Many blockbusters are filmed in an urban-style environment full of gray areas: asphalt underfoot, сoncrete jungle around, and 50-shades-of-gray walls on every background. Fortunately, the gray color fits perfectly for color grading.
But what color to choose for color grading? Apart from an urban background, all movies contain people!
Now, what color is the opposite of a skin tone color in a broad sense?

Yep. That’s why we see very similar look here and there in the cinema.
Let’s try to replicate it in Capture One. There are two main tools for this: Curves and Color Balance.
Applying complementary colors with Curves
So, here I have a shot that looks very similar to some villain from a superhero movie.

This is actually a very nice musician from the Mordor band. Not a villain at all!
First, we’re making some general HDR adjustments.

Then, we’re masking skin tone and adjusting Contrast and Clarity to amplify the emotions on the face.

Next, we need to create a mask of everything except for the skin tone:

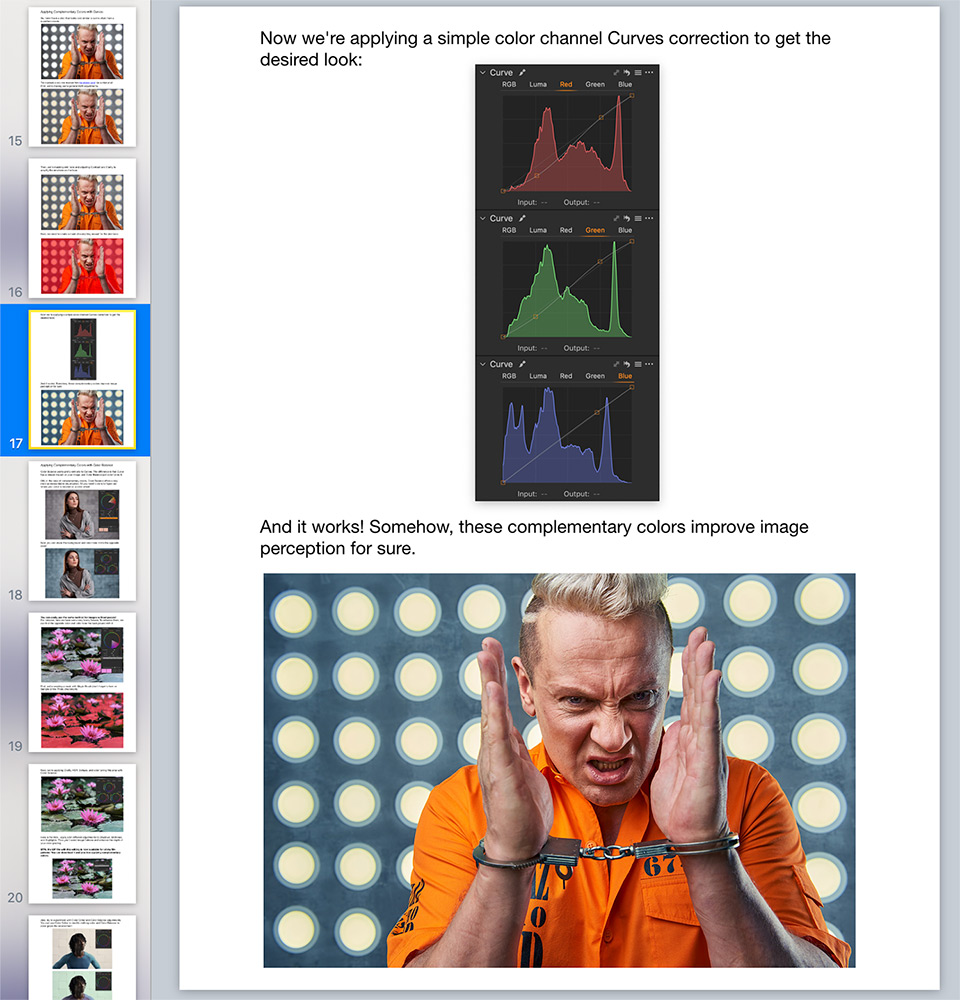
Now we’re applying a simple color channel Curves correction to get the desired look:

And it works! Somehow, these complementary colors improve image perception for sure.

Applying complementary colors with Color Balance
Color Balance works pretty similarly to Curves. The difference is that Curve has a deeper impact on your image, and Color Balance just color tones it.
Still, in the case of complementary colors, Color Balance offers a way more understandable visualization. All you need to do is to figure out where your color is located on a color wheel:
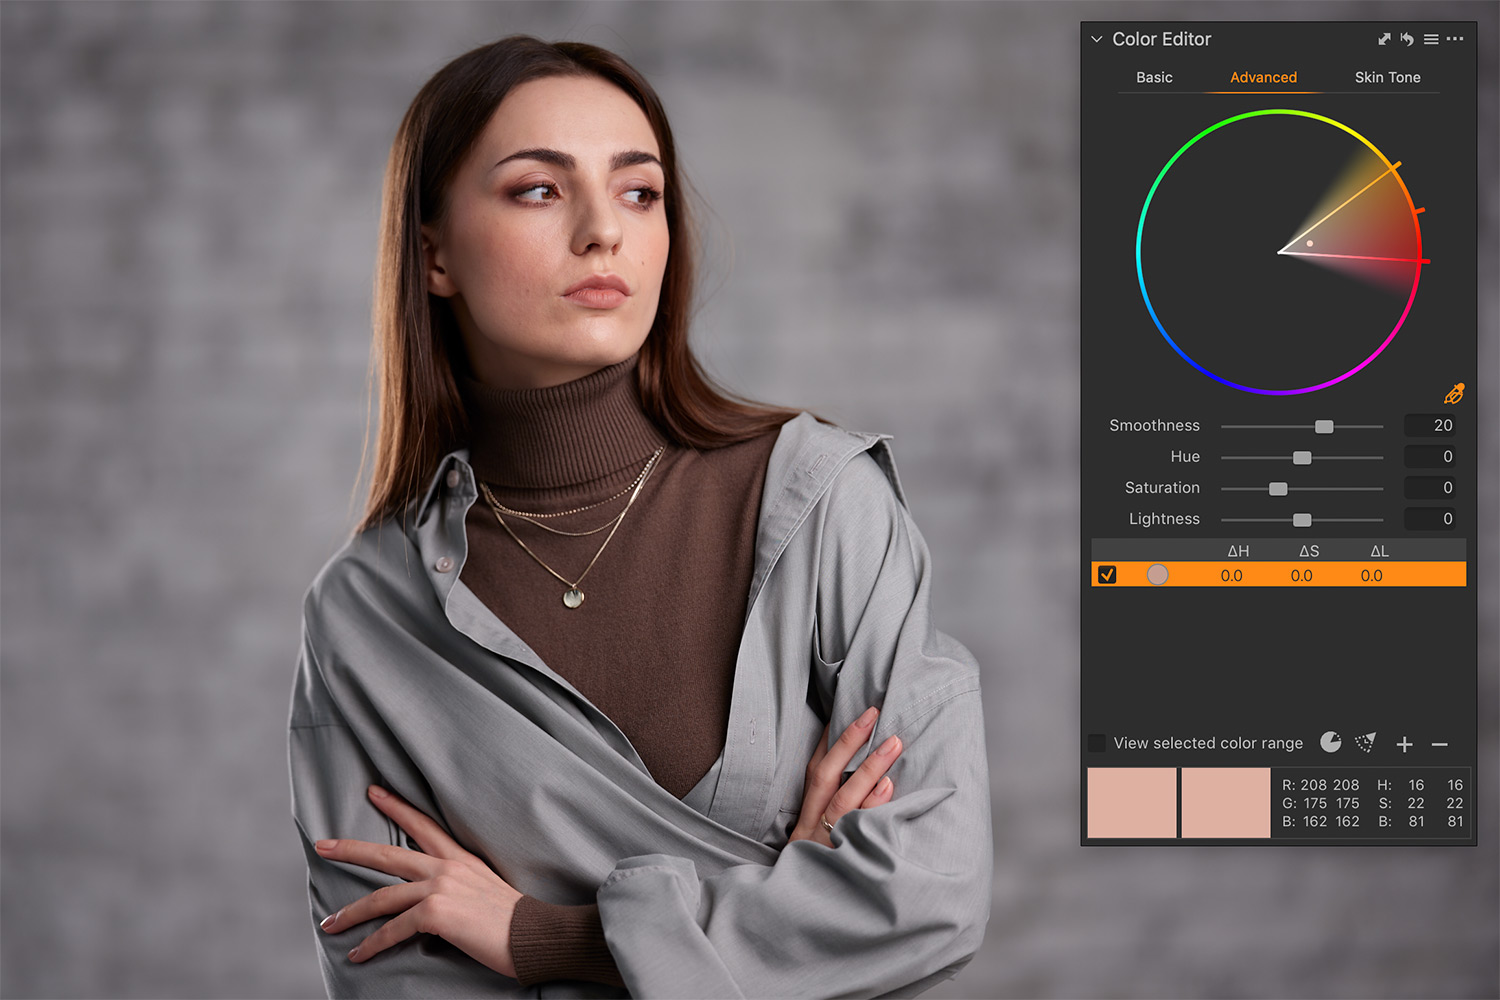
BTW, the RAW file of this image is available in my 100 RAWs for Image Editing Practice set.
Now, you can mask the background and color tone it into the opposite color:

You can easily use the same method for images without people!
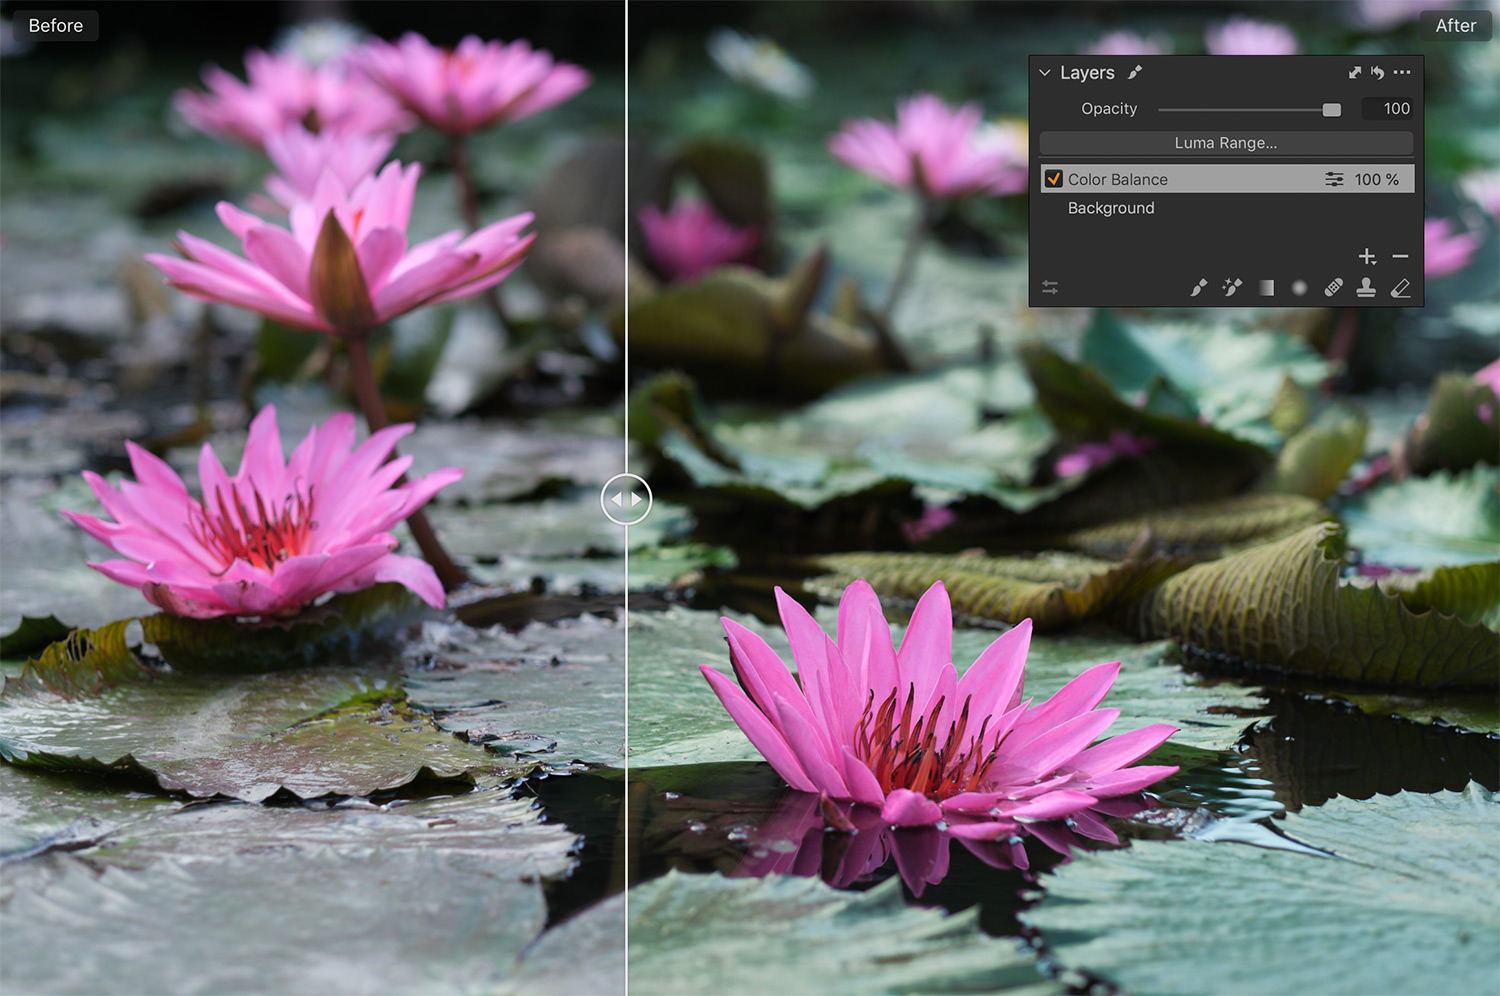
For instance, here we have some very lovely flowers. To enhance them, we can find the opposite color and color tone the background with it:

This RAW file is also available in my 100 RAWs for Image Editing Practice set.
First, we’re creating a mask with Magic Brush (don’t forget to turn on Sample Entire Photo checkmark):
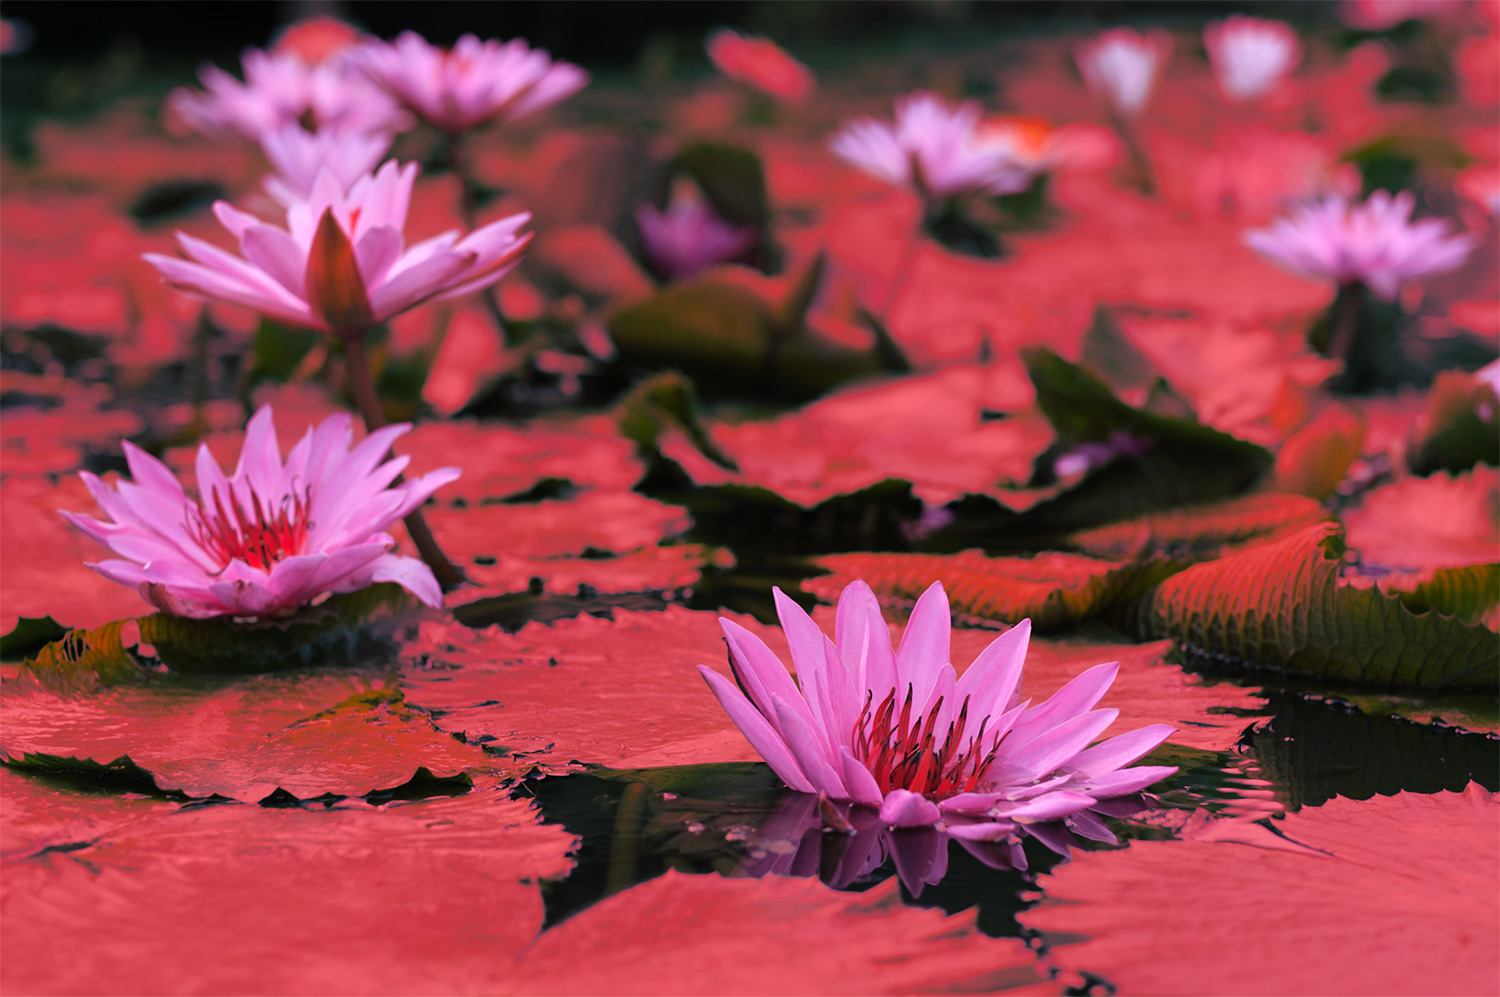
Next, we’re applying Clarity, HDR, Dehaze, and color toning this area with Color Balance.
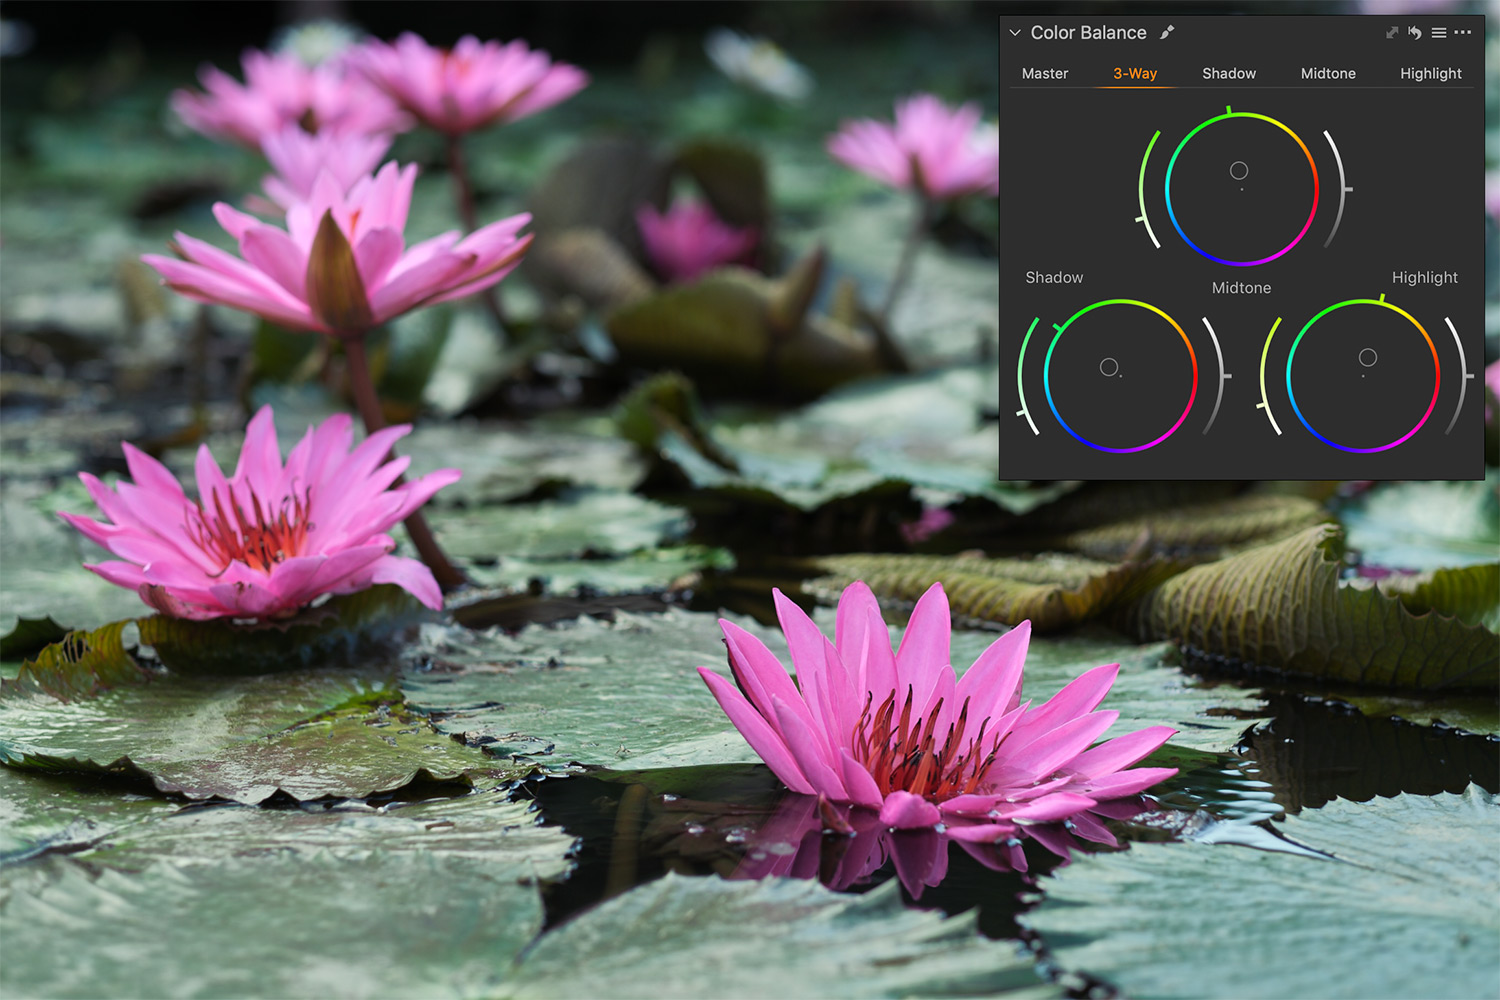
Here is the trick – apply a bit different adjustments to Shadows, Midtones, and Highlights. Thus you’ll avoid image flatness and enhance the depth of your color grading.
BTW, the EIP file with this editing is now available for all my $9+ patrons! You can download it and practice applying complementary colors.
Also, try to experiment with Color Editor and Color Balance adjustments.
You can use Color Editor to modify clothing color and Color Balance to color grade the environment:


Finally, Warm-Cool Contrast is also a variation of complementary color scheme. Here you’ll find my article on how to apply Warm-Cool Contrast in Capture One using Gradients, Luma Range, and Style Brushes.
I’ve combined this and the previous part of the tutorial into a PDF file for my $9+ patrons!
Become my $9+ patron, and you’ll immediately gain access to all patron-exclusive styles and RAW files for image practice:
- 27 unique Capture One styles
- 9 RAW files for image editing practice
- PDF of tutorials
Read Part III. Working with Additional Color Schemes in Capture One
Capture One Hidden Features eBook
Capture One Hidden Features is a collection of more than 200 pro hints to improve your Capture One workflow, structured into an easy-to-read book.
You can download four chapters from the Capture One Hidden Features ebook free of charge:
- 3. Must-Have Shortcuts
- 14. Hidden Features of Layers
- 27. The Power of Mask Inversion
- 38. Automation with Macros
Simply subscribe to the AlexOnRAW newsletter by entering your email in the form below. After subscribing to the newsletter, you’ll immediately receive the four chapters from the book. Also, you’ll regularly get a friendly newsletter with free Capture One tutorials, image editing tips and tricks, and news from Capture One community.


